Sat 18 Feb 2006
Making a planning model of the model railroad
Posted by Daniel Swearingen under Layout Design , Layout Progress , Scenery1 comment / Leave a comment
This stage of layout design borrows heavily from architecture and theater. Indeed, examining the definitions of these words you get:
Architecture: The art and science of designing and erecting buildings.
Theater: (the most appropriate of the many definitions) A place that is the setting for dramatic events.
For me these definitions exactly span what model railroad design and construction is and combining them gives a good working definition of model railroading:
Model Railroading: The art and science of designing and erecting a place that is a miniature setting for dramatic events involving trains, terrain, and associated human activities.
When is it the right time to build a planning model? Really, whenever you get a point where you feel you need to “see” things better to proceed deeper.
As I mentioned before I used the 3rd PlanIt CAD program to design my trackplan. While 3rd PlanIt has decent terrain design and 3-D visualization capability, I found it would take me a very long time to use it to design the terrain of my layout so I used the CAD program to design just the track plan and benchwork plan. I decided to use a planning model to work out the way hills, valleys, and streams would work out on the plan.
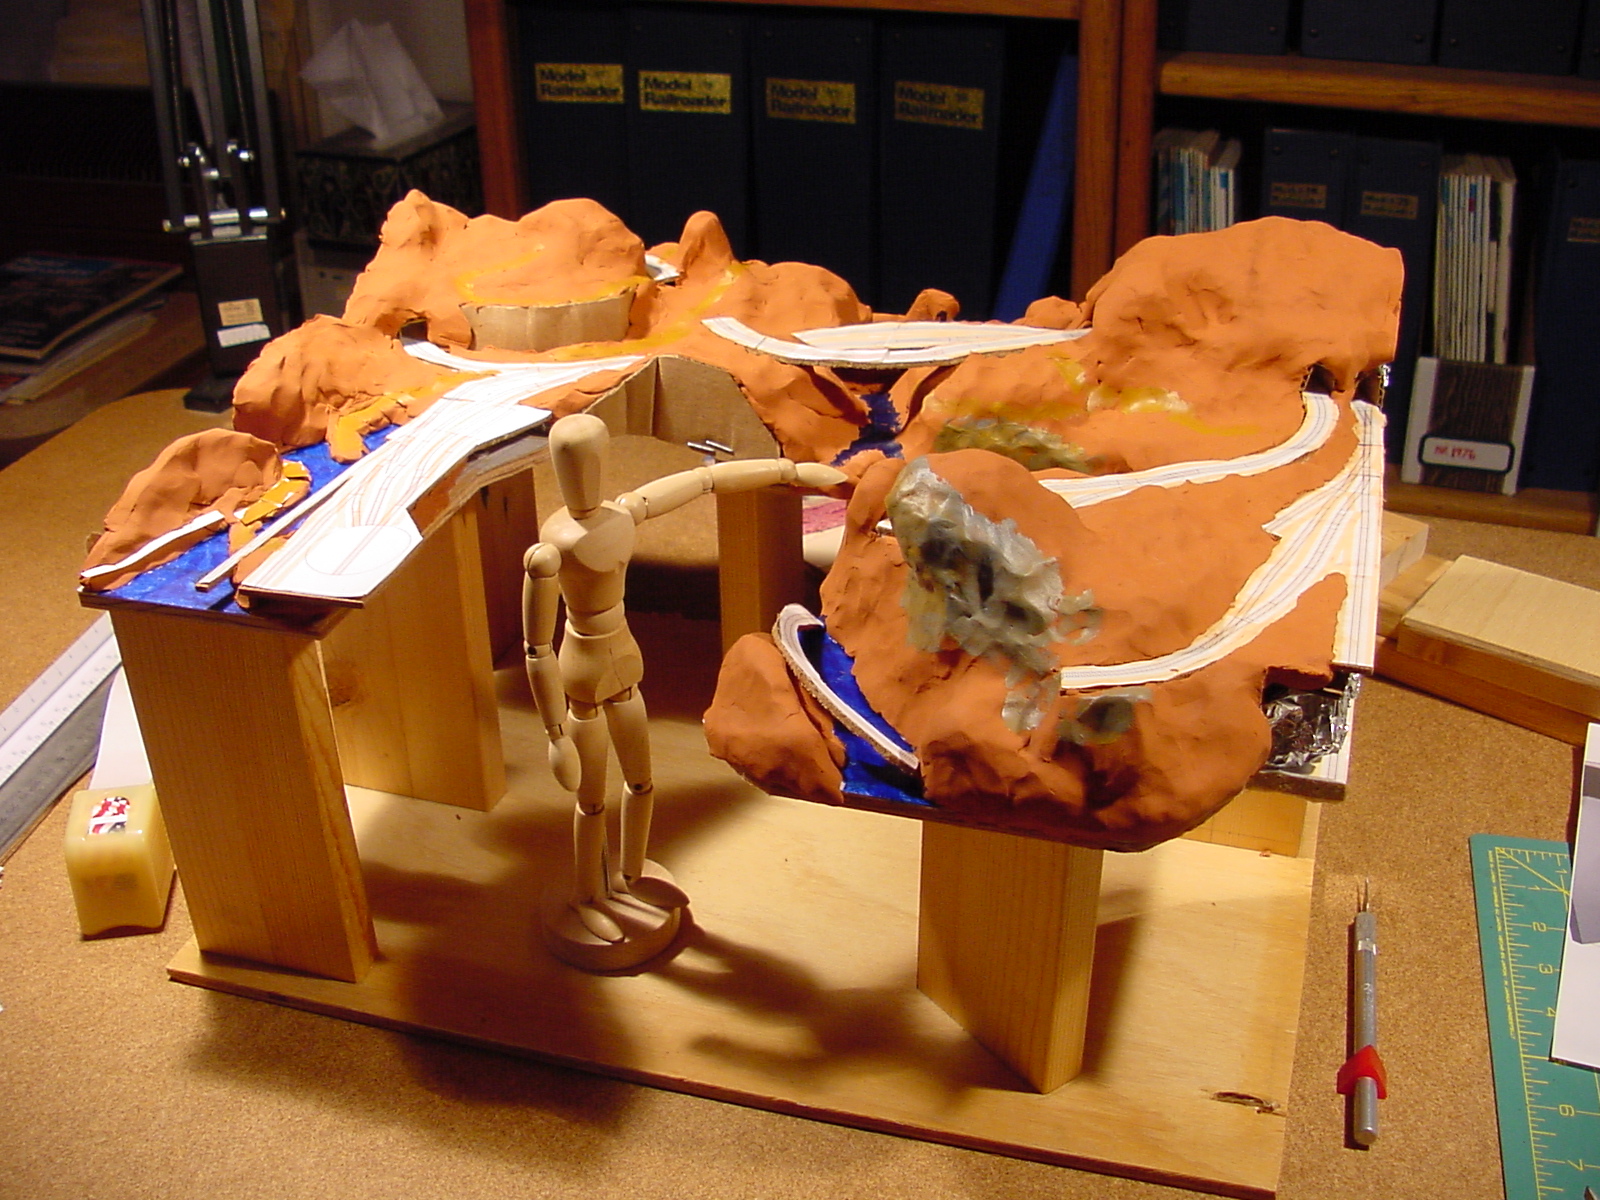
I chose a large scale: 1:8 to use for the model. This means 1/8” = 1″ (1.5 inches = 1 foot). I happen to have an artists model figure which is about 5 feet 6 inches in height in this scale.
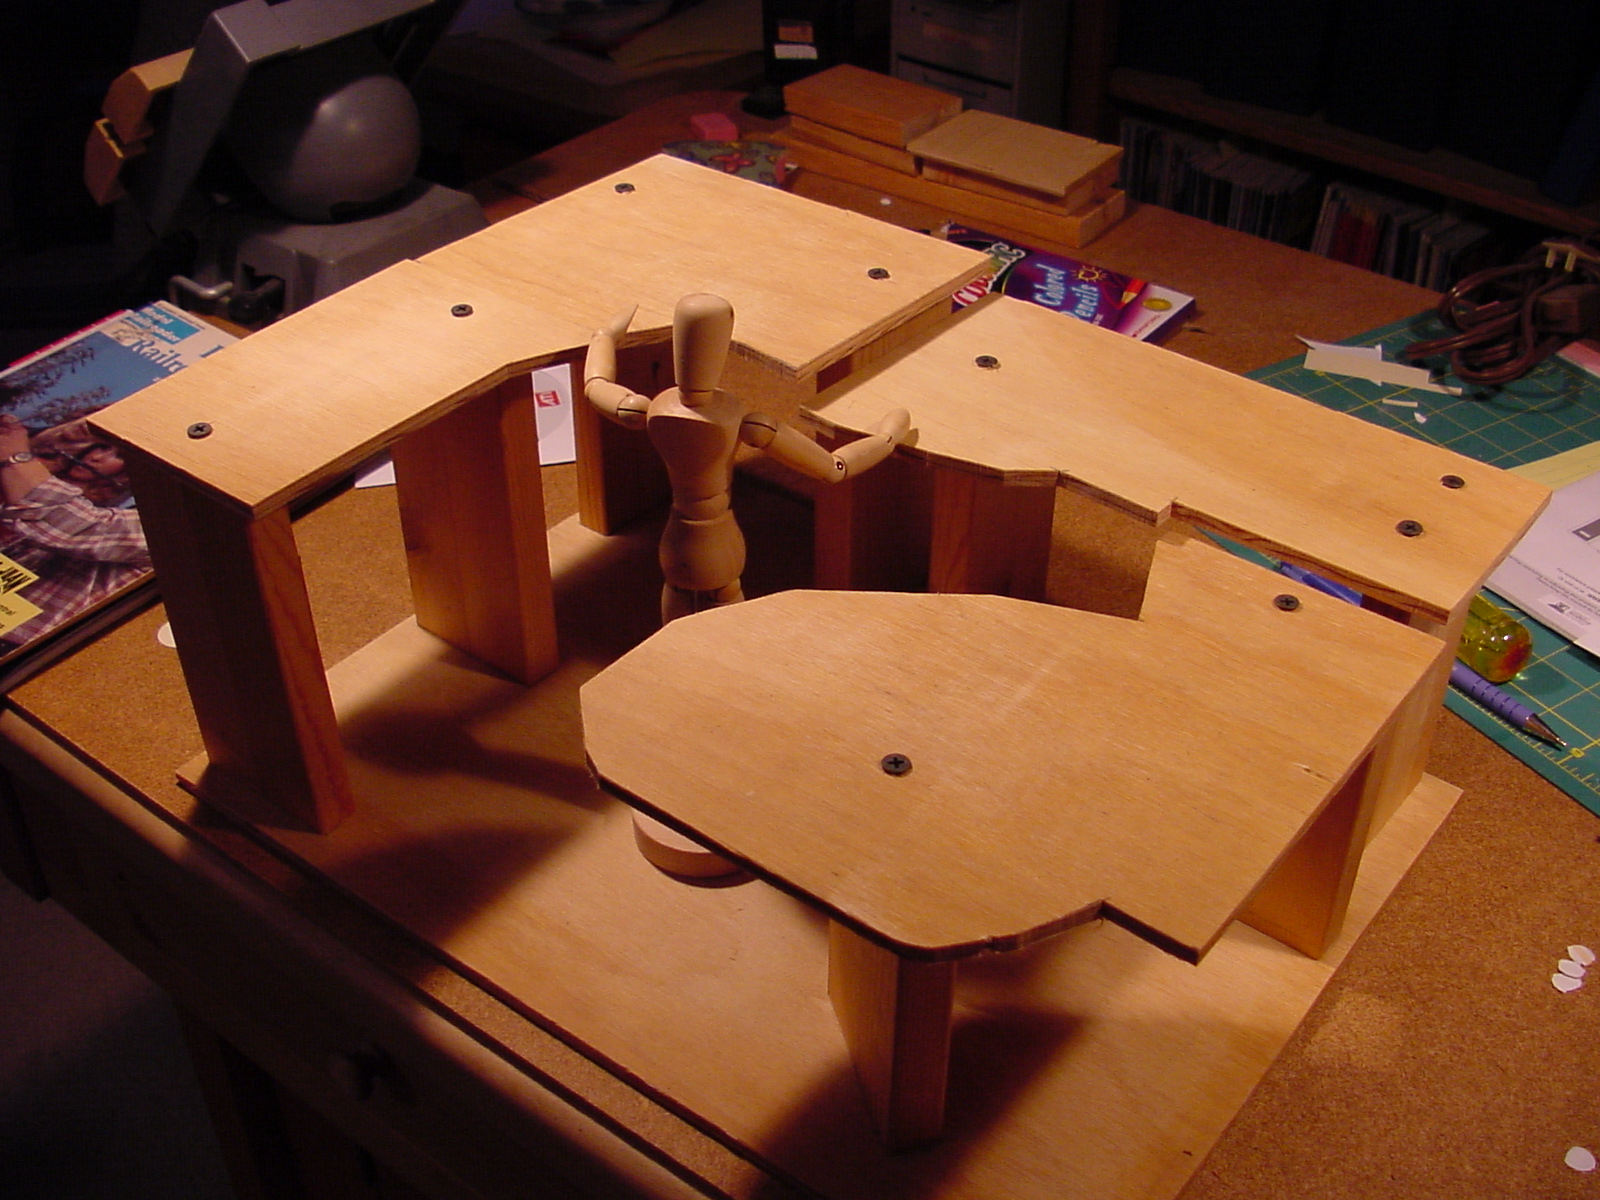
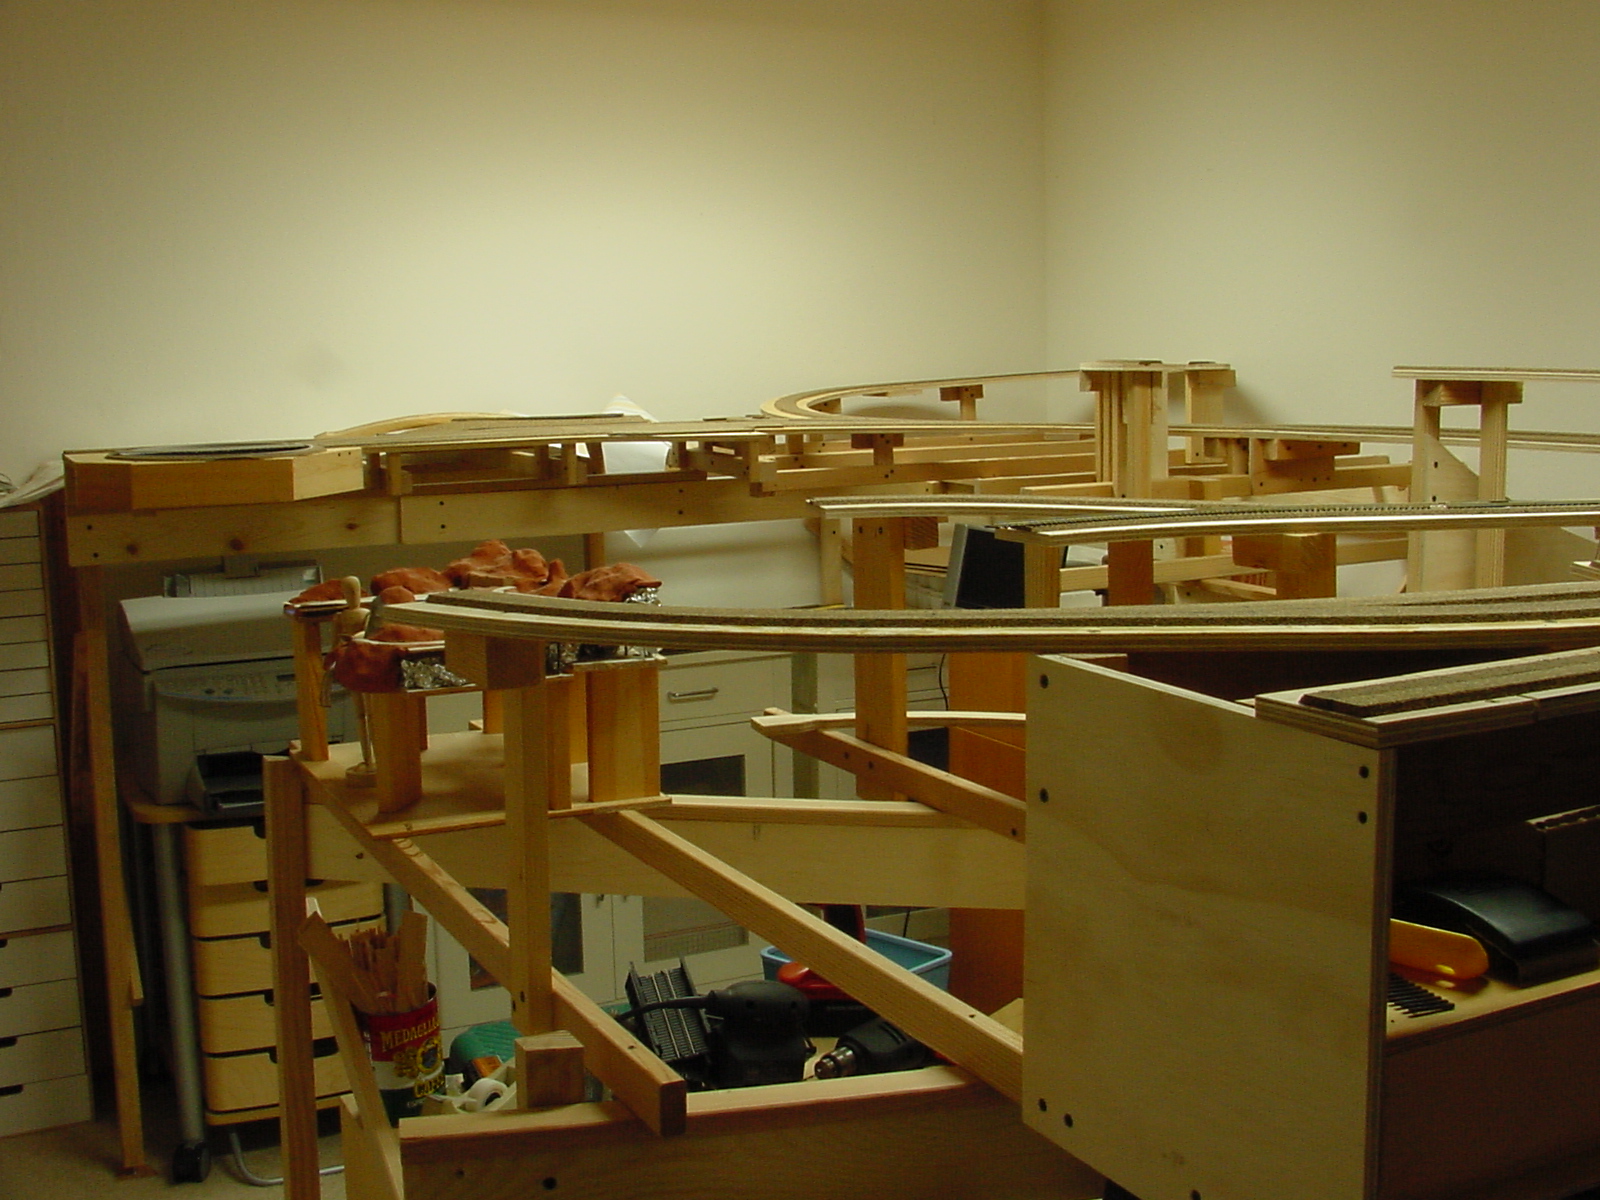
Using the CAD program and my printer I made patterns from cardstock (manila folder paper) and transferred the shaped to ¼” plywood which I cut out with a jigsaw. The ¼” thickness is not important – it’s just what I had lying around in scrap. I used some 1 x 3’s as pedestals to set the scale height of the sections.
As you can see from the photos I broke the layout up into four sections. While the layout is not portable, it needs to be moveable. The height of each section is defined by the lowest terrain planned in that area. I followed to basic height/depth plan Furlow used for his San Juan Central but offset everything higher for my track zero height of 53.5 inches from the floor.
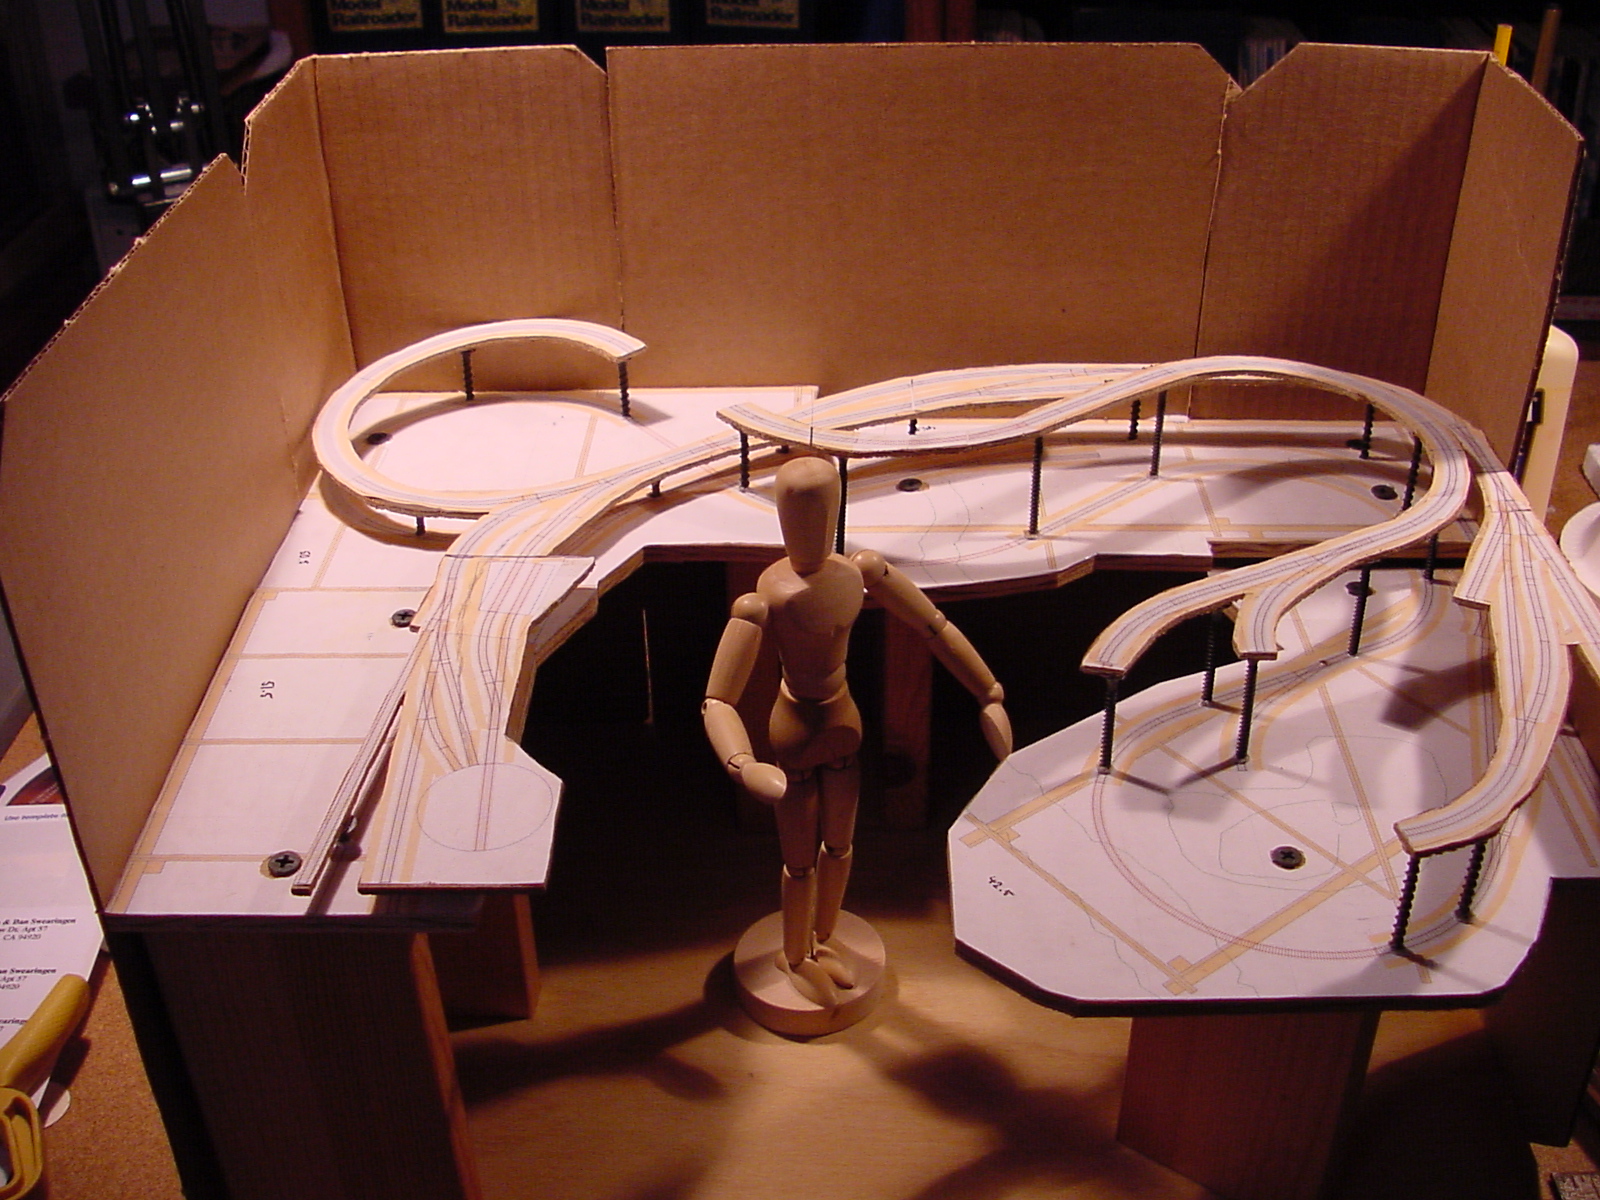
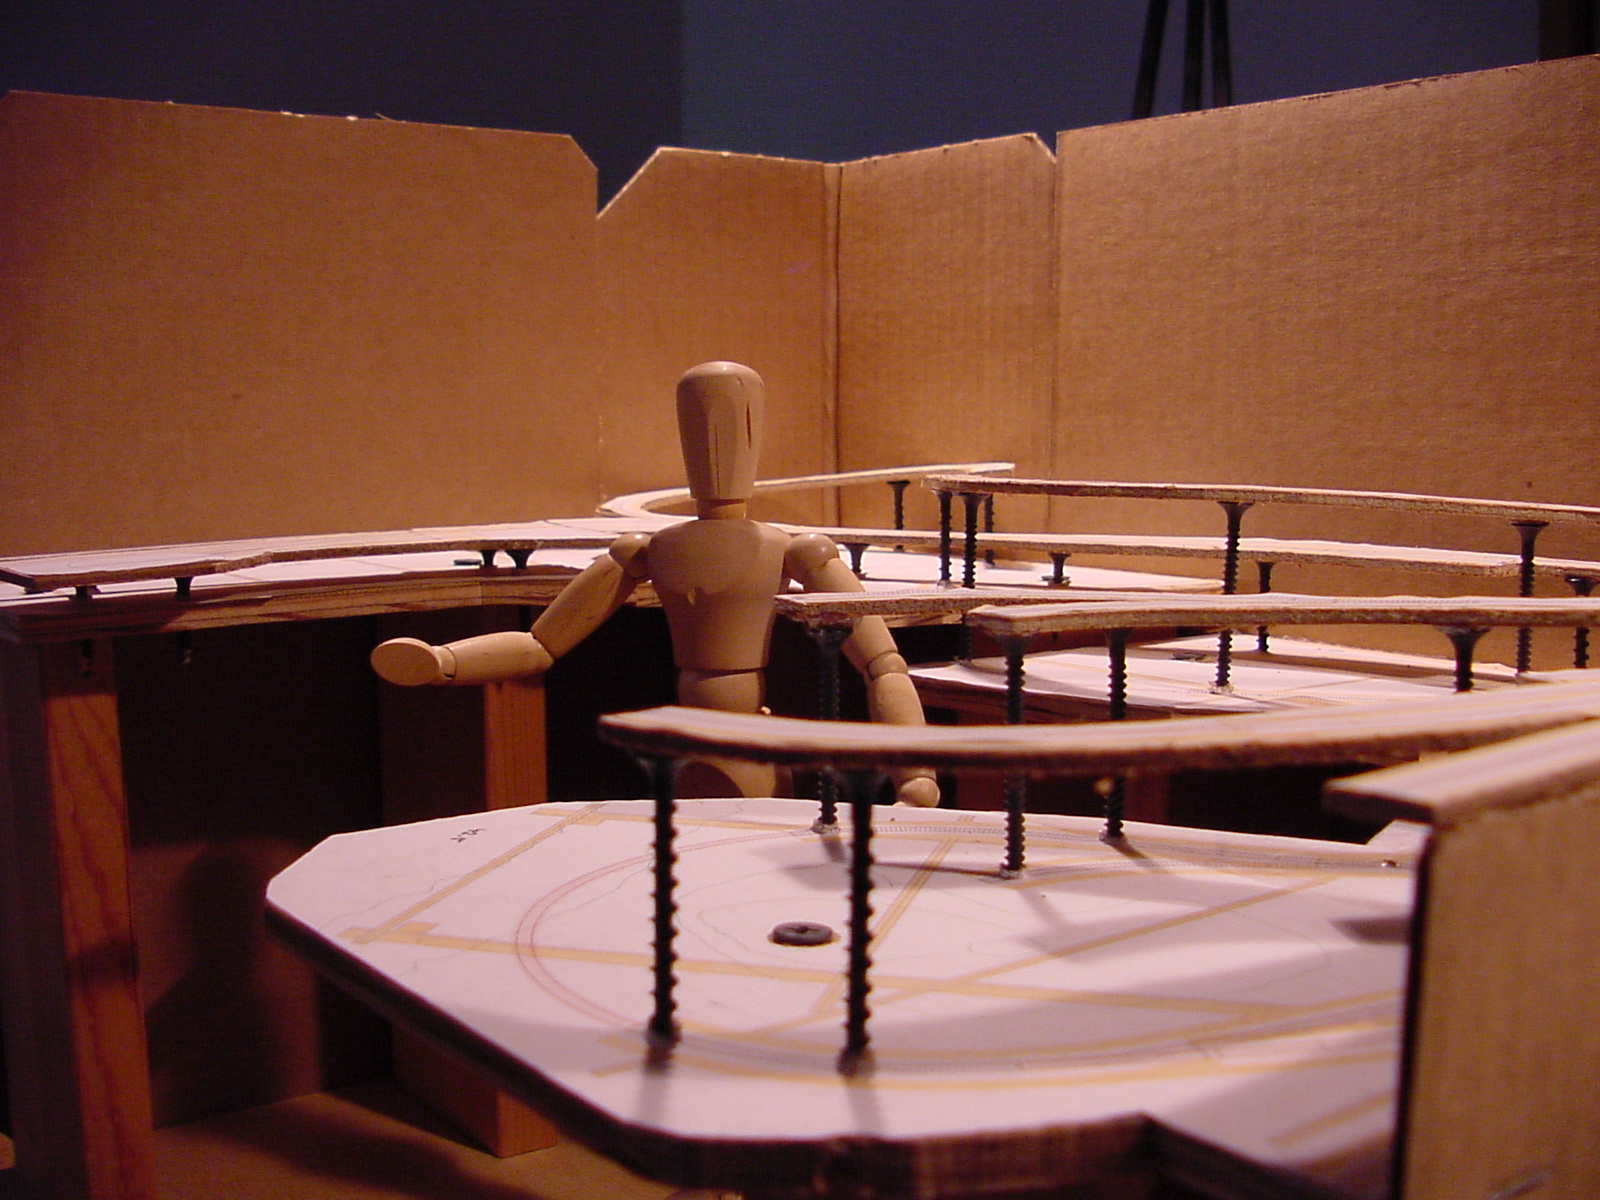
I glued a scale printout of the trackplan onto a sheet of 1/8” plywood and cut the plan out cookie-cutter style out of the thin plywood (this simulated the roadbed roadway I would eventually make for real out of ½” plywood). Then I glued a printout of the trackplan onto the layout sections and used wood screws as risers for the roadbed.
At the time I was worried I had done everything accurately enough. Comparing the model above to the current state of the layout it looks really close.
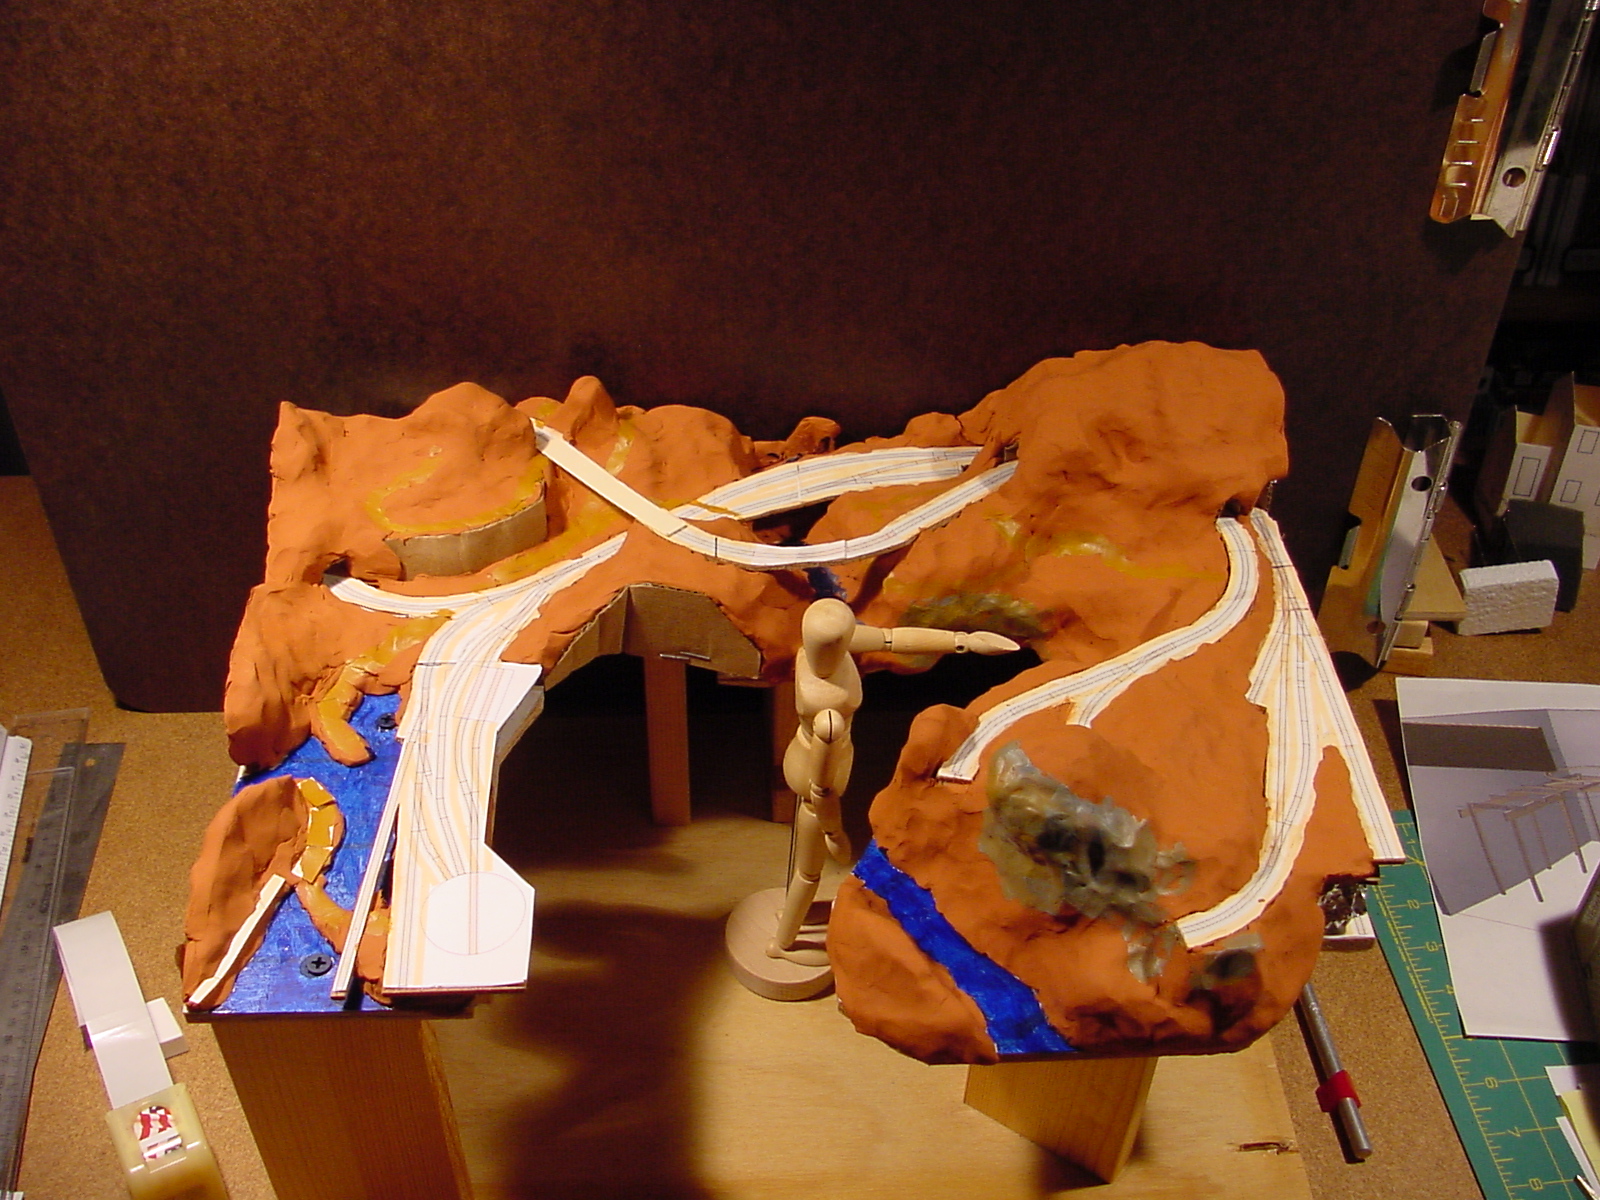
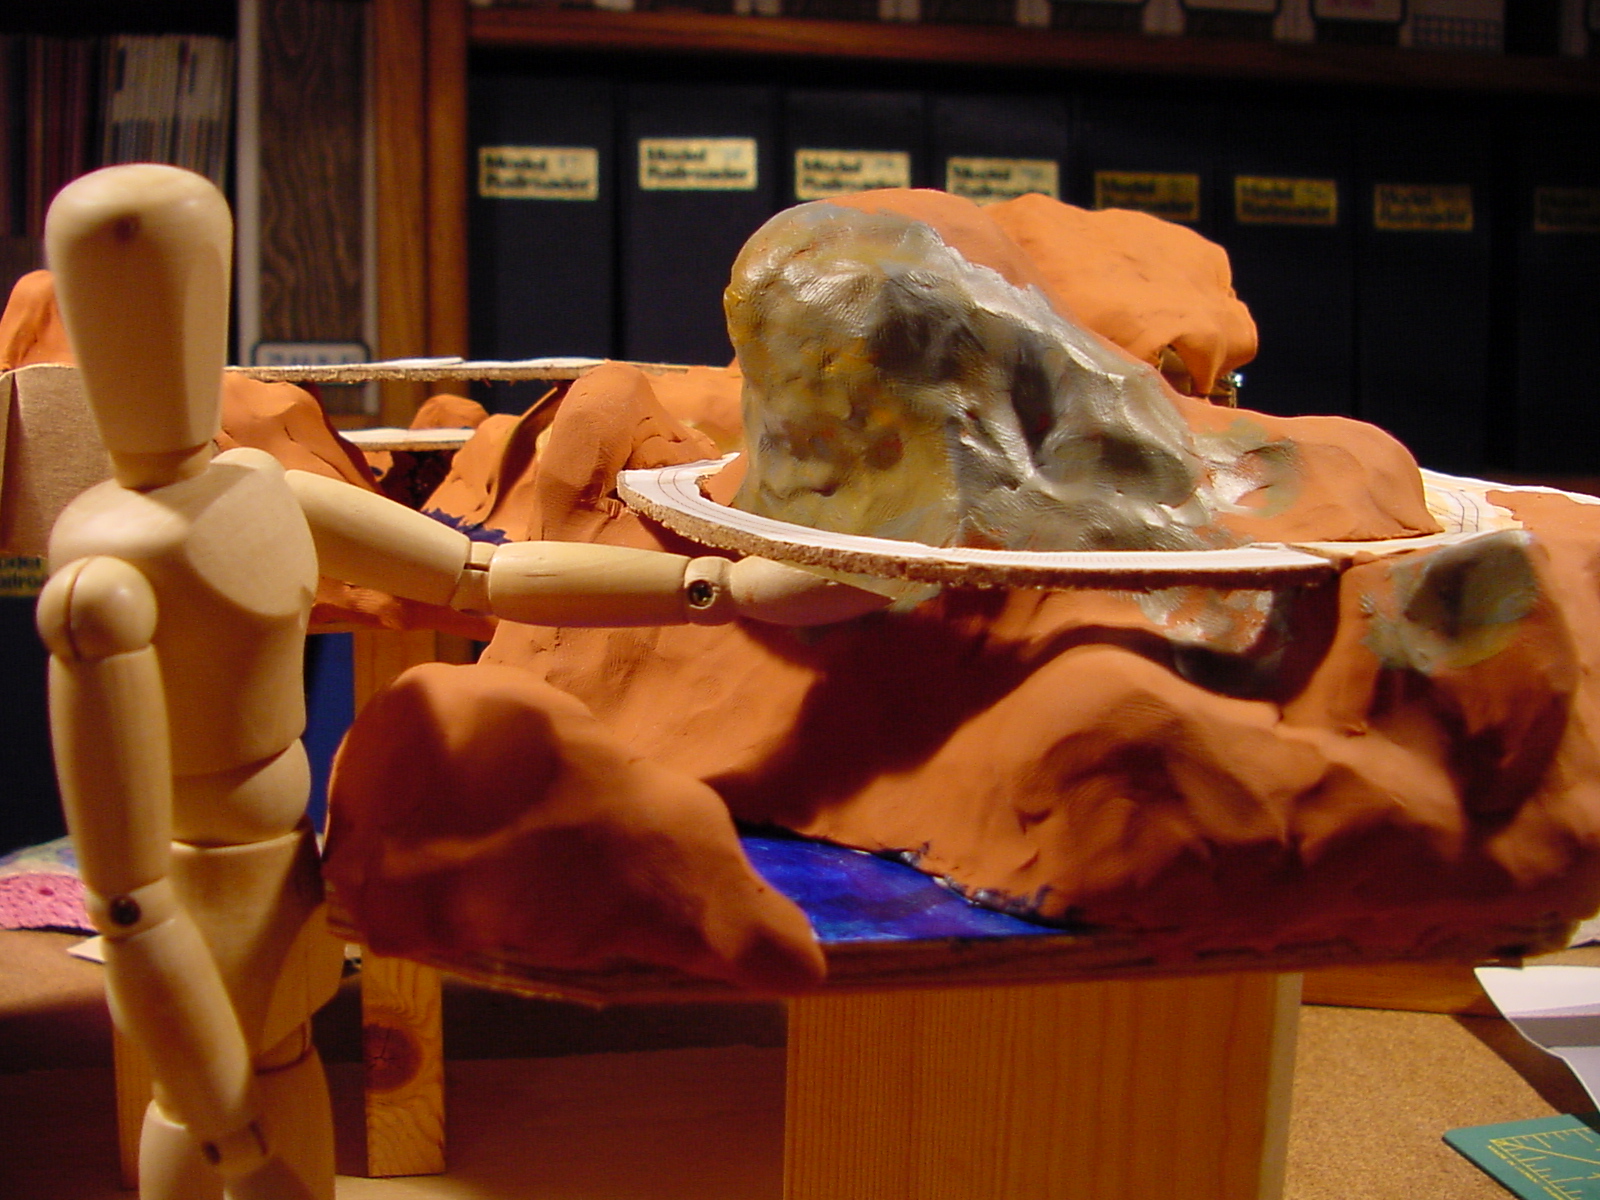
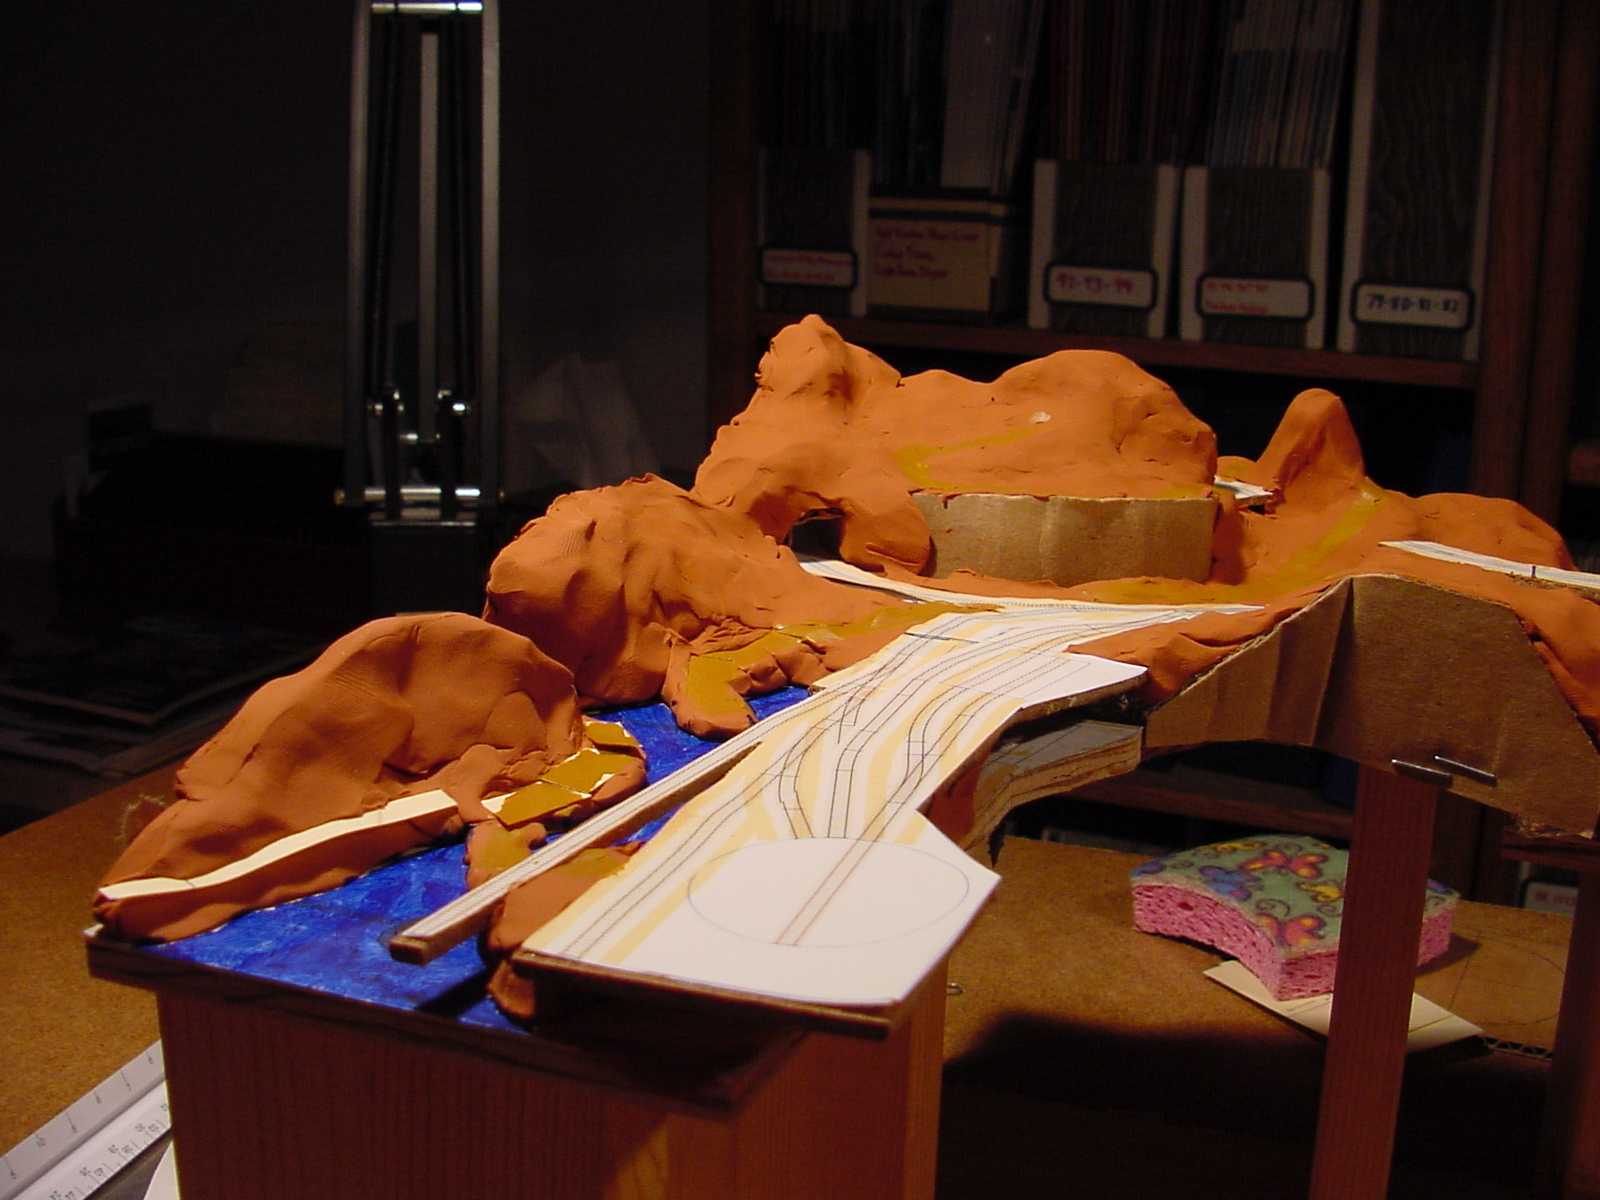
To actually model the scenery I used Sculpey (http://www.sculpey.com/) which is modeling clay that can be adjusted and shaped indefinitely and then hardened by baking in an oven (275 degrees and 15 minutes per ¼” depth). My model is big but fit nicely in our oven.
I used balls of aluminum foil to create the basic hill shapes and then covered the foil with a skin of Sculpey. Later I used acrylic paint to indicate areas that would be roads and water.
The completed model
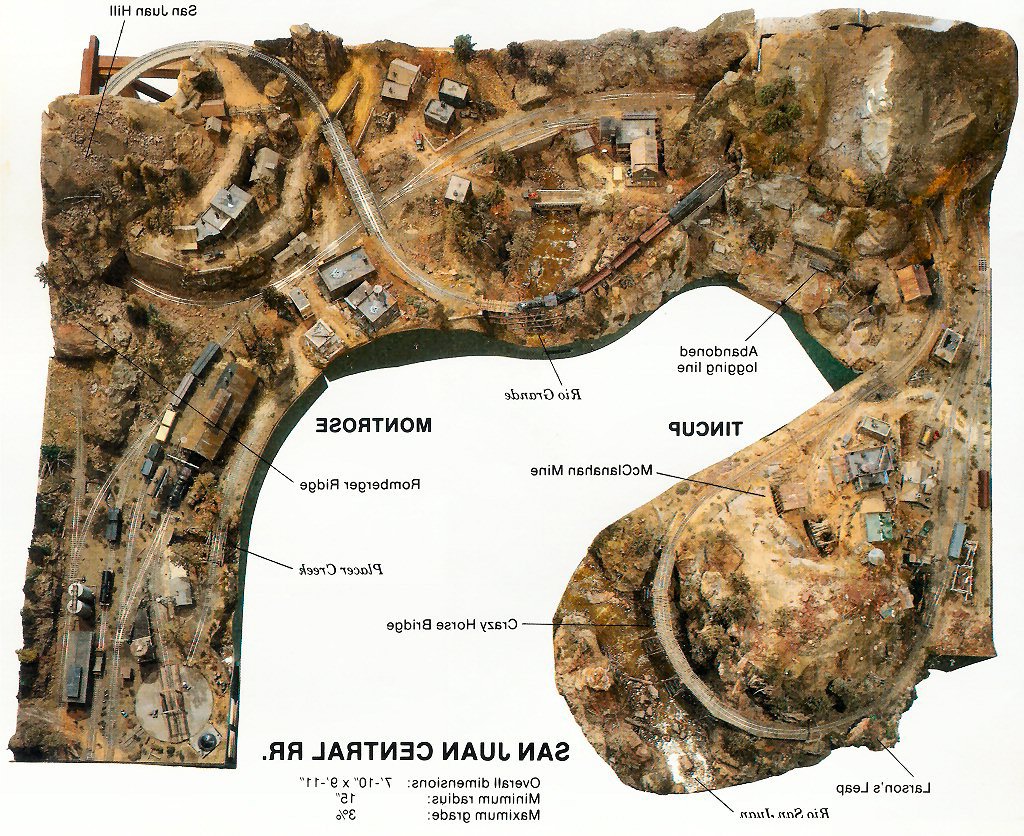
Malcolm Furlow’s San Juan Central (SJC) flipped right-left so it matches the basic configuration.
In general I followed the terrain of the SJC since I really liked the SJC looked.
Here I have the figure pointing to the Crazy Horse Bridge.
Tiburbon (a play on the name of the real town of Tiburon, California).
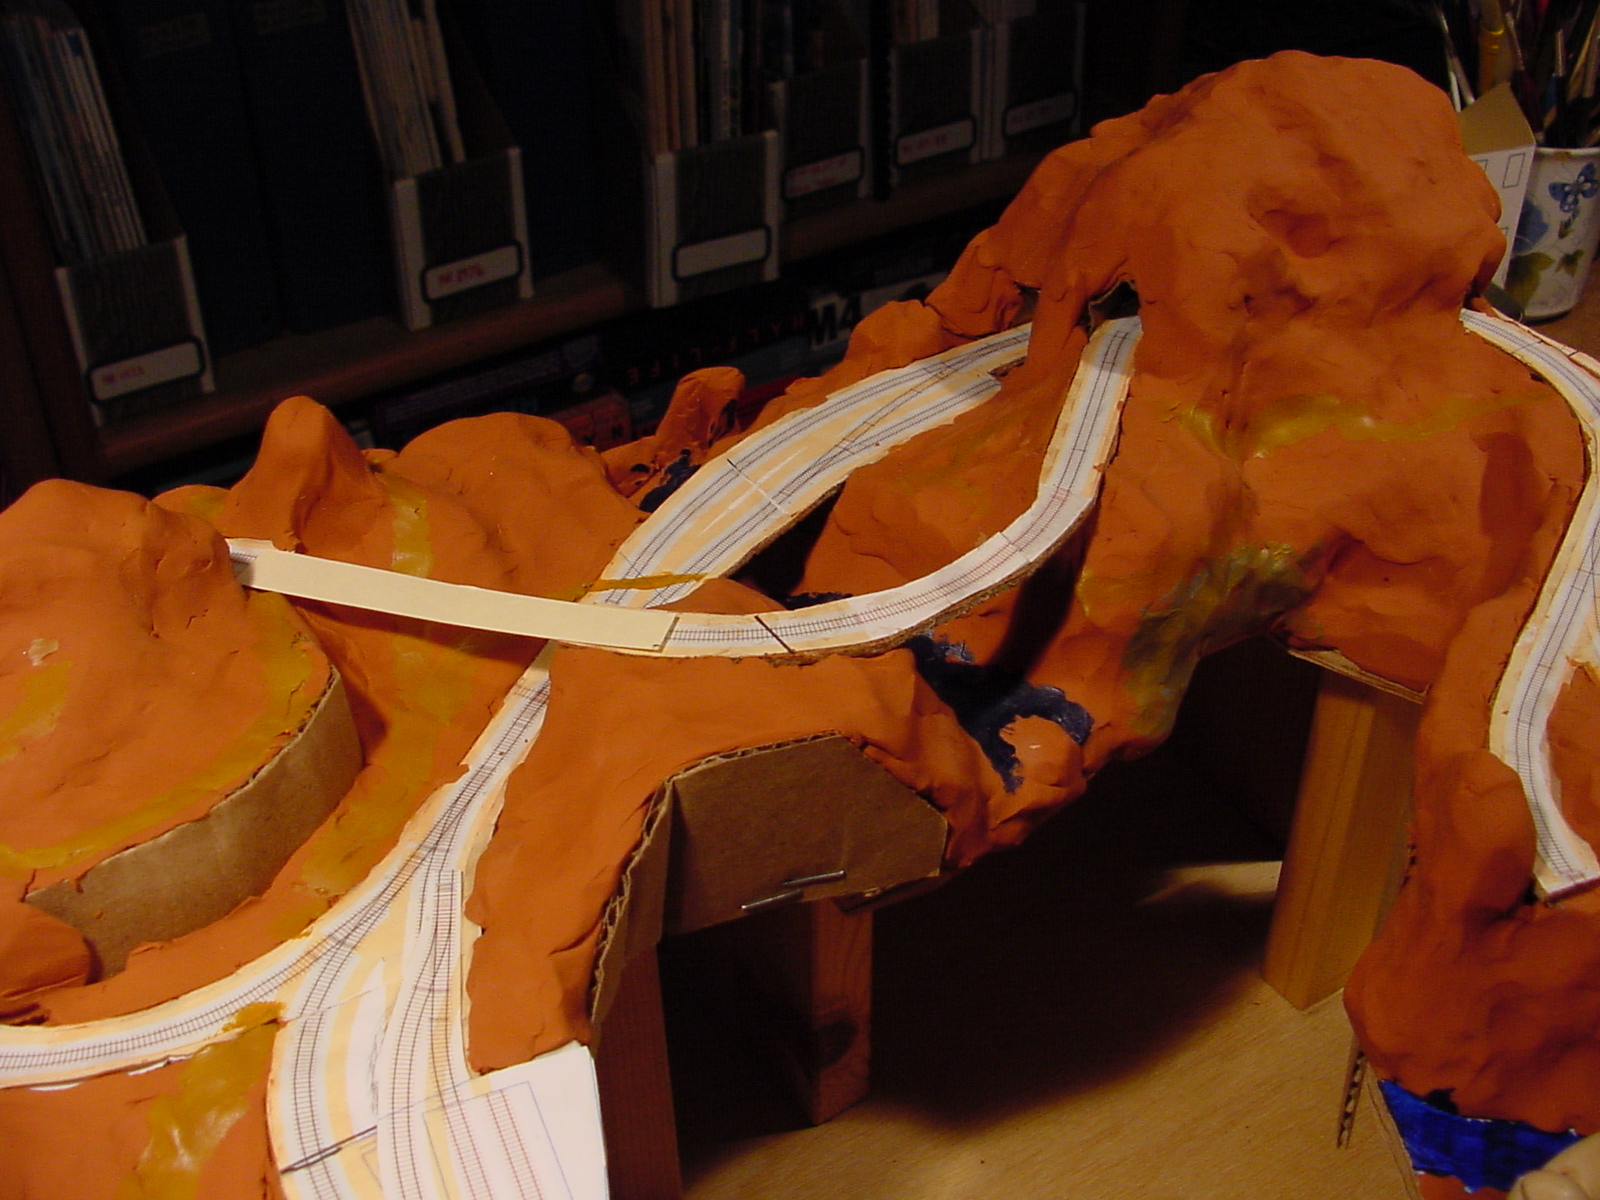
The back of the layout and the Two Tunnels area.
Between this planning model and the CAD track plan I had worked out enough of the details to proceed with construction of my layout. I really found this step a lot of fun and while I feel it is a required step to building a layout I could see building a few of these for fun just to try out different ideas for layout design.
February 10th, 2007 at 8:52 am
Just getting stared in HO found your site very interesting thanks for sharing!