January 2006
Monthly Archive
Sun 29 Jan 2006
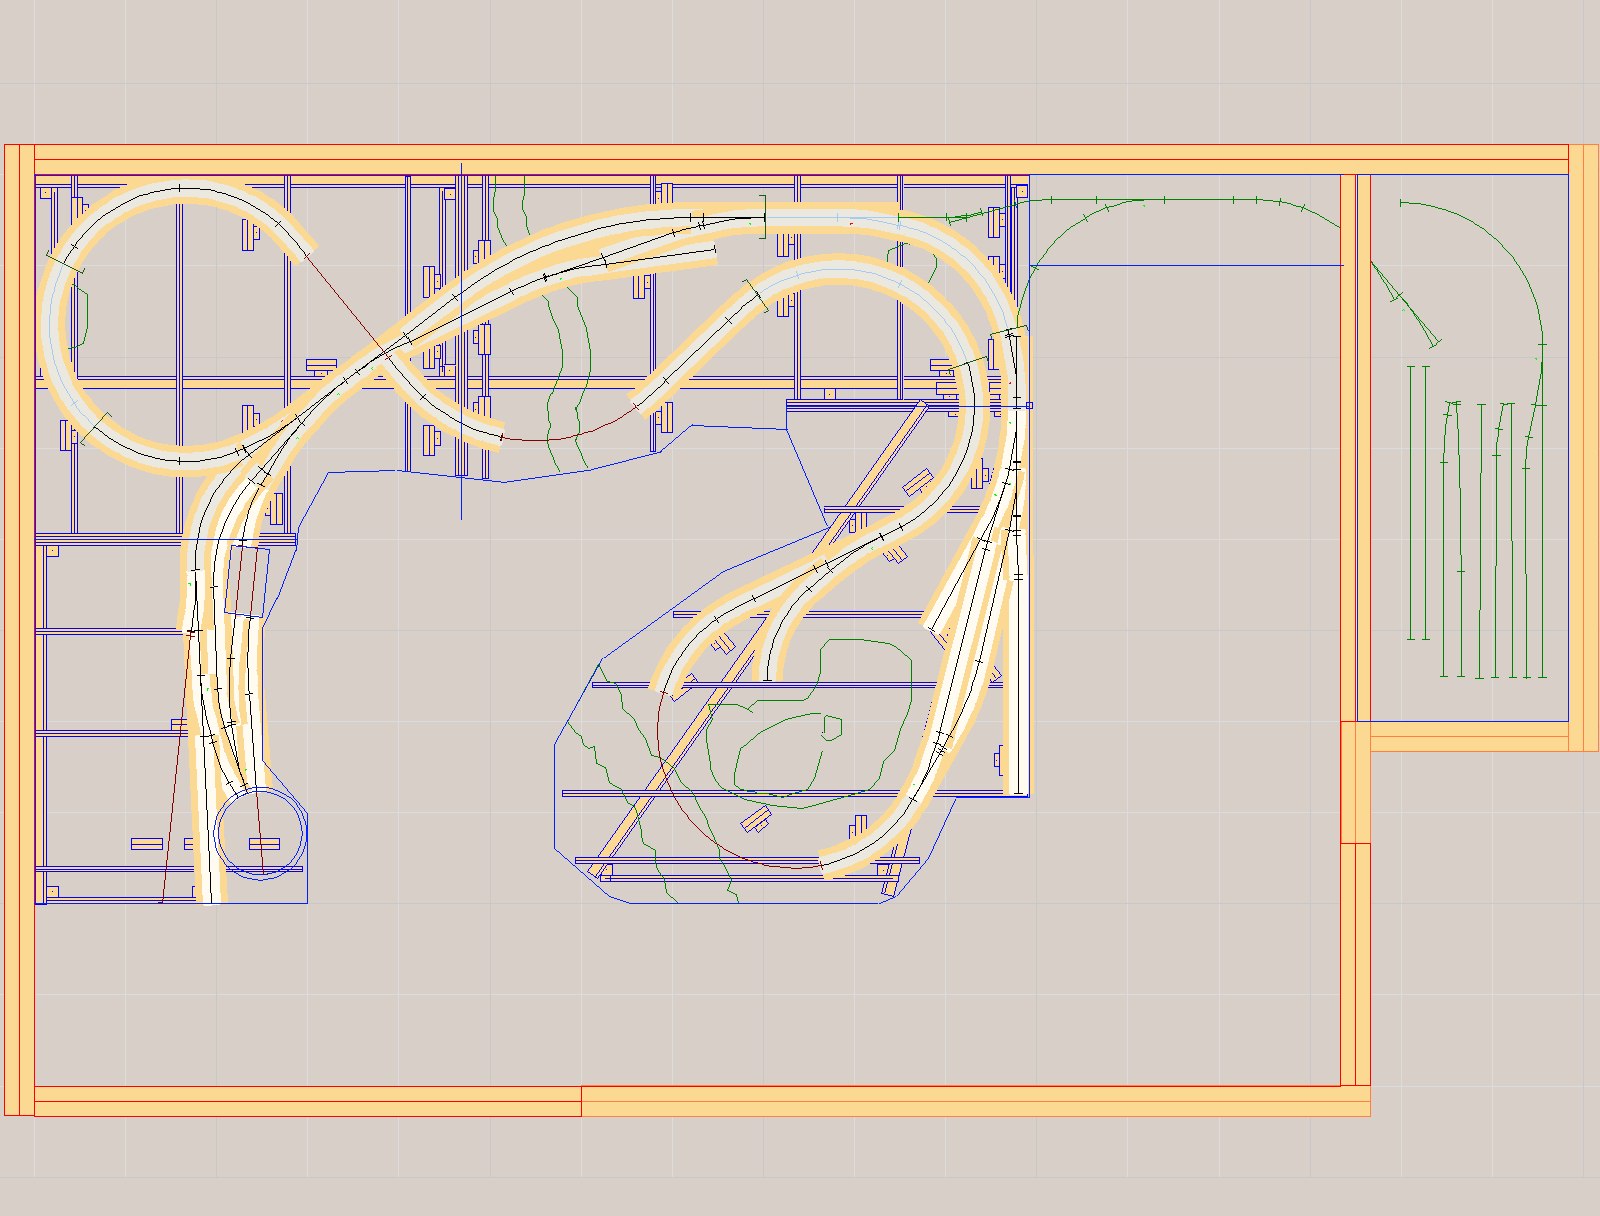
Permanent page: The Track Plan
I based my track plan on Malcolm Furlow’s 8 x 10 San Juan Central.

However I made the following changes:
- Flipped the track plan right-to-left because that fit the room I was building in better.
- Changed the plan to HO standard gauge with 18” minimum radius curves.
- Specified #5 turnouts.
- Set track “zero” height at 53-1/2” above the floor.
Because HO needs more “shoulder room” than HOn3, 18” radius turns and #5’s are bigger than the 16-18” turns and #4’s of the original plan, and because the room can fit it; I increased the size of the layout one foot on the long axis so my plan is 8’ x 11’ and is fit into a 10’ x 14’ room.
As far as the schematic layout of the tracks, curve for curve, tunnel for tunnel, bridge for bridge, the only change I made was to completely redesign the tracks at Montrose, turning it into a seaport (Tiburbon on my layout) and add a wye behind Tincup leading off through a bookcase to staging tracks in the corner.
Like the Frenchman’s Axe: the handle replaced three times, the head replaced twice, but still the same axe – I consider my plan to be largely the same as Furlow’s SJC despite all my tweaks.
I used the 3rd PlanIt CAD system (http://www.trackplanning.com/3pi.htm) to draw my track plan. Once you are up the learning curve, CAD systems offer many benefits. I’ve had work related experience with CAD systems and while 3rd PlanIt is not flawless it is certainly good enough to have been a great help in planning the layout. I would recommend it to others and there are two good Yahoo! Groups that provide community support:
3piusers • 3pi CAD Users
http://groups.yahoo.com/group/3piusers/
3rdPlanIt • 3rd PlanIt Users Group
http://groups.yahoo.com/group/3rdPlanIt/
Where did the CAD system help me the most?
Drawing the initial plan of your layout feels really hard in a CAD system compared to pencil and paper – so much so that you can begin to wonder if CAD is really the way to go.
The answer (for me) is YES, and here’s why: Plans change.
The initial CAD drawing may take longer to get down the first time than a cranking out a similar pencil and paper drawing but CHANGES to your plan are where the CAD simply kicks butt.
Here’s an example. I based my first draft using Walther’s Code 83 #4 turnouts. Then I went to order them. Turns out Walthers looked like they were going to be out of stock for weeks or months on those items. I changed course and decided to use Central Valley #5’s instead.
Using pencil and paper it would have taken me many hours to redraw the layout with different turnouts. In 3rd PlanIt it took less than an hour to make the change.
The other good thing a CAD system does is add up things like total track length, number of left/right turnouts, and tallies up the amount of lumber needed. I was able to get everything I needed in one trip to the lumber yard. I only had to go back once to buy one more 10-foot 1×4 because I made an oops and forgot to leave myself a long piece.
Stop when it’s Good Enough
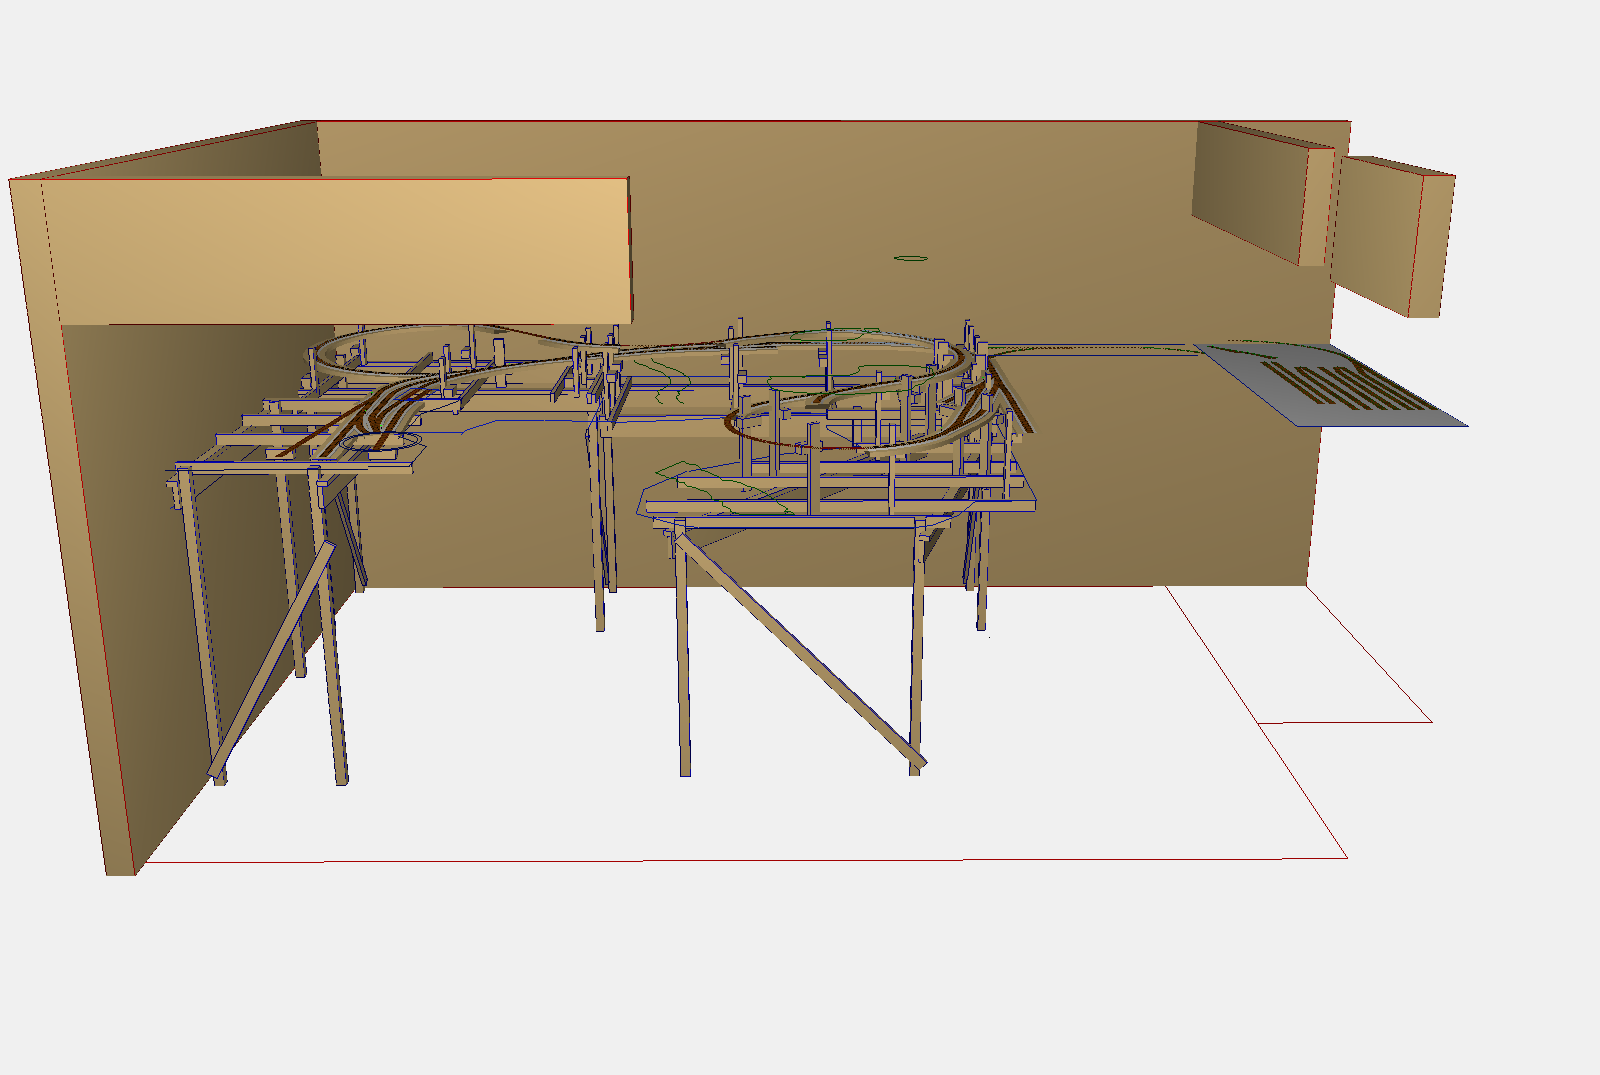
3rd PlanIt has fairly deep terrain generating and editing capabilities but at that point in the process I made the decision that the time-to-benefit ratio was not good enough for me to go deeply into that on my plan. I used a modeling clay model of the layout to work out the 3D aspects of the scenery (I’ll write about that in a future post). However, I did use the CAD to make the templates for the model-of-the-model.
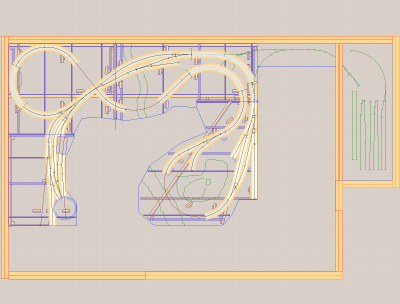
My plan and a 3D view appear below:

Sat 28 Jan 2006
I based my layout on Malcolm Furlow’s San Juan Central in HOn3 as descibed in his MR articles and his book HO Narrow Gauge Railroad You Can Build: A Narrow Gauge Project Railroad.
Starting in the November 1983 issue of Model Railroader and finishing in August 1984, Malcolm Furlow explained how he designed and built the San Juan Central in HOn3. Soon Kalmbach published the articles in book form as HO Narrow Gauge Railroad You Can Build: A Narrow Gauge Project Railroad.
This is a scan of the cover of my (now very tattered) copy I bought in the late-1980′s while working at a model train store in LA.

Long out of print, used copies currently run $60-80.
Malcolm displayed his approach to building layouts — the good and the bad — in this book.
The good:
Modest Size — The San Juan Central is only 8 x 10 overall. Fits into most common bedroom-size rooms of average homes (good for me!).
Strong visuals — Malcolm’s design emphasizes strong visual elements and is literally built for photography.
Vertical over Horizontal — Drama is created by nearly 30 inches (0.8m) of vertical separation between the lowest and highest locations on the layout.
The bad:
Tight turns — As designed, the SJC minimum radius is 15″. What I know of how Malcolm works makes me suspect the trackplan was made on the fly and that the actual layout has even tighter turns but the plans were later redrawn with 16, 17, and 18″ radius turns.
Limited operational possibilities — The SJC emphasizes spectacular scenery. Combined with modest size this means there are not many different ways to move cars and trains around the layout.
“Bald spots” — The SJC has some places that don’t work very well. They tend to be transitions between different spectacular views of the layout.
Photos
overall

Top (click for larger view)
What happened to it?
The SJC is currently owned by Charlie Getz who has lovingly restored it to better-than-new condition. Charlie hosted vistors during the 2004 National Narrow Gauage convention in Santa Clara, California and I have several photos of it online.
Sat 28 Jan 2006
Posted by Daniel Swearingen under
UncategorizedComments Off
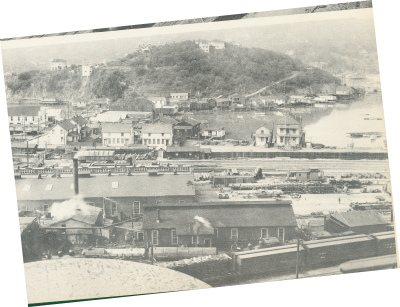
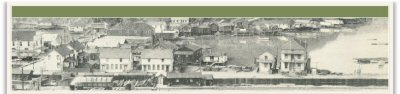
I wanted a top banner that was consistent with the look and theme of the model railroad I’m building. I scanned an image of Tiburon, California taken in 1922 found in the book The Northwestern Pacific.
I rotated the scan a bit to straighten the portion I wanted to clip out.
Then simply clipped and pasted it into the top banner that was supplied with the WordPress theme I’m using.
Thu 26 Jan 2006
Posted by Daniel Swearingen under
Layout DesignComments Off
Of all the different gauges and scales to choose from, why HO? It was a really tough choice. Permanent page: Why HO Gauge?
There are lots of scales people use to build their layouts. When I actually started the project and said to myself “I’m pulling the trigger on building a layout today” I limited my choices to
HOn3
HO
Sn3
On30
Constraints and Influences
Physical properties of the scales
The larger scales (1:48 or larger) allow better detail and generally your model trains will have better operating characteristics. The smaller scales (1:87) allow more terrain, allow more scale miles of track for a given space, take more work to detail and more work to operate well. Sn3 is truly in the middle.
Space and concept:
As I discuss elsewhere I want to build a layout that borrows heavily from Furlow’s HOn3 San Juan Central. This layout was 8 ‘ x 10′. I could fit a layout only slightly bigger than that into my available space. This tipped me towards HO or HOn3 (call it one unit of tip “towards”).
Experience
I built a small (30″ x 8′) HOn3 layout and have several pieces of HOn3 rolling stock. The trains are cute, sometimes only a bit larger than N scale. However, good operation was tough. Call it a wash.
Detailed Models
I’m a long time reader of Narrow Gauge & Shortline Gazette. Really the majority of the fine work seen in a typical issue is in larger scales. There is currently a pretty good variety of structures, a great variety of On3 rolling stock and scratchbuilding materials. On30 has a lot of energy in it these days and I love the slightly less formal atmosphere of the On30 comminuty. This tipped me towards On30 (call it one unit of tip “towards”).
Vehicles, Figures
I love model period vehicles and I want to have a full model population of figures. There is an “ok” variety of figures but a deplorable shortage of vehicles in 1:48. Yes, yes: you can use 1:43 vehicles modified but if I’m in O scale I’m going to be wanting a bit more fidelity and there’s 10% difference in size between 43:48 (call it one-half unit of tip “away”).
In HO: Lots of vehicles in the late-20′s to mid-30′s timeframe I’m looking at. Lots of figures (call it one-half unit of tip “towards”).
What do I already own?
I have many classic HO structures, a couple O scale structures, many HO standard gauge kits, several HO locomotives, one HOn3 boxcab engine. This says: HO and HO standard will be cheaper to get going. Additionally, some of these HO kits are what I’ve always wanted to have on a layout and I have them *now* (call it one unit of tip “towards”).
HO wins so far: Narrow or Standard gauge?
I love narrow gauge but I the models are small. Bachmann (with a bit of help from Life Like) now provides excellent low cost small and medium size steam engines that look and run great — and I already own several.
One of the key goals is to actually get this layout BUILT and RUNNING. So I’m going with HO standard gauge.
What price am I paying?
I believe projects turn out best when you acknowledge your compromises and confirm to yourself that you are really okay with them. Then, embrace them as guides. Boone Morrison wrote something I really agree with when he explained why he was moving from HOn3 to On3:
“HO is a great scale to build a model of a railroad, O scale is a great scale to build railroad models”
DS 1/25/2006
Tue 17 Jan 2006
I’m building an HO version of Malcolm Furlow’s San Juan Central as descibed in his HO Narrow Gauge Railroad You Can Build (1984).
Why that plan?
While I love narrow gauge, why HO standard guage and not HOn3 or anything n3?
The answers are driven by one main goal and an associated attitude. I decided that my goal for 2006 is to work continiously — at least 12 hours a week — on a model railroad and that in this year I must make significant overall progress on the layout. To meet this goal I have taken the following attiude: it does not have to be a perfect layout. It just has to be good enough. Significantly, I have also made a pledge to devote all my modelling energy this year (i.e., time and money) to the layout. This means forsaking my strong interests in all other types of models and model building.
For YEARS I have been saying to anyone who would listen that I wanted to build a layout. I’m finding it stunning that simply saying “good enough” suddenly gives me license to proceed. I started planning in October and November, building benchwork in December, and started roadbed in January 2006.
Coming posts will describe planning choices I made as well as progress reports on what I’m doing currently.
I am not paid for anything I write in this blog. I accept no advertising. The product reviews are based on my personal experience with items I purchased unless I say otherwise.
Copied at The Layout Project