February 2006
Monthly Archive
Tue 28 Feb 2006
During initial track planning I specified an 80′ turntable at Tiburbon. Eighty feet looked long enough given the types of engines I wanted to run. This worked out to 11 inches in diameter and this felt ok given the overall size of the scene.
The plan was to scratchbuild the turntable but those of you who have done this before know: it’s really easy to build a turntable badly. Fortunately, I realized this immediatly after casually cutting a rough 11 inch diameter hole in the main track sheet of Tiburbon.
First: a rough hole will not do the job.
Second: it became clear that a precisely built and aligned pit, bridge, and approach tracks are required or I will be very sorry indeed.
Third: since this turntable is in the IMMEDIATE foreground of the scene it must be tidy looking.
Enter the Walthers 90′ Turntable kit (unpowered) on sale for $31.98.
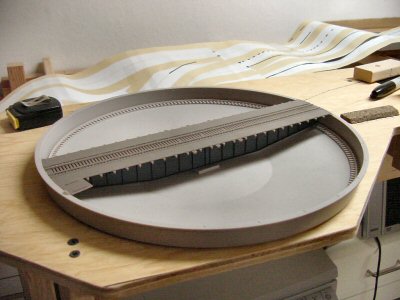
I’ve had spotty to poor experiences with Walthers plastic kits but I figured for $32 I’d get at least a few pieces I could use. So far it looks great. Simple and tidy. With some easy modifications will turn smoothly. I plan on turning by hand since the table is right at the edge (will I regret this?).
I’ll have to enlarge the existing hole but it basically fits and now I can turn a USRA 2-8-2 Mikado if I want. I’ll post details on cutting and installation soon.
Mon 27 Feb 2006
Yes, actual construction! I’m breaking from the ranks of arm-chair modelers where I have been comfortably hiding (and yet still whining) for many years.
As soon as I finalized my trackplan I built a planning model to confirm I liked the track alignment and arrangement. Now I was ready to start actually building benchwork.
One of the benefits of using a CAD system like 3rd PlanIt to design your layout is that it gives you a list of which materials needed and how much of each. Exporting this data I had:
L Girder, 1×4 = 489
Wood, 1×2 = 1635
Wood, 2×2 = 843
Where these last numbers are amount needed in inches. Converting to feet and then figuring out how many 8, 10, or 12 foot pieces I needed, I was able to make one trip to the lumber yard. Okay, one and a half trips because I oops’d at one point and did not leave myself enough long pieces so I had to run back and buy a couple extra 1x4’s.
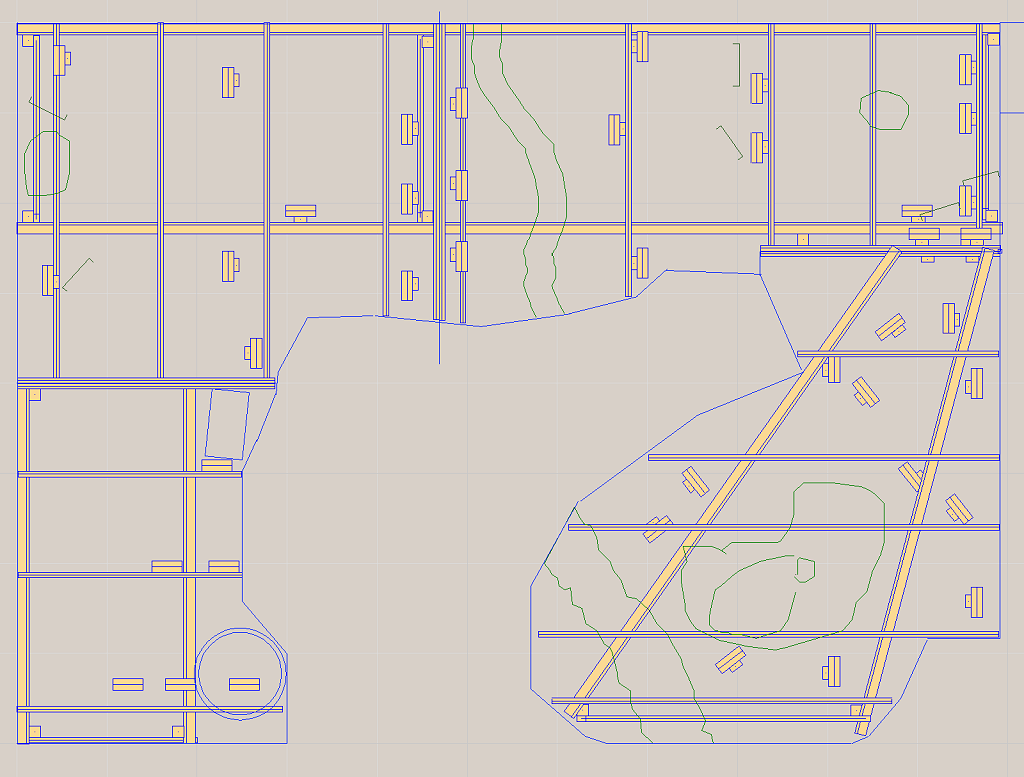
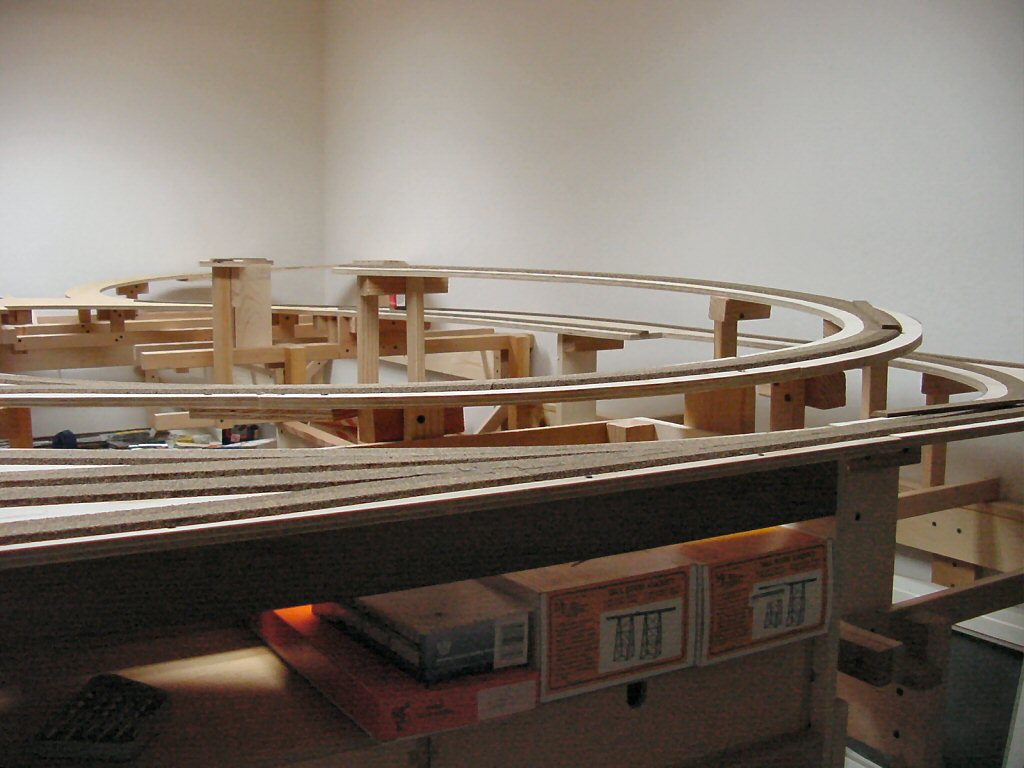
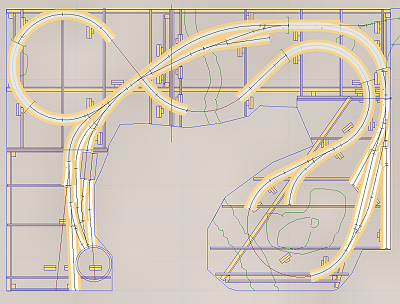
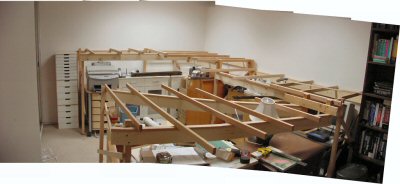
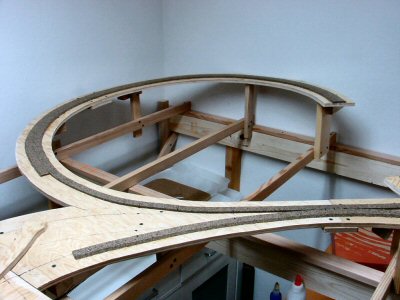
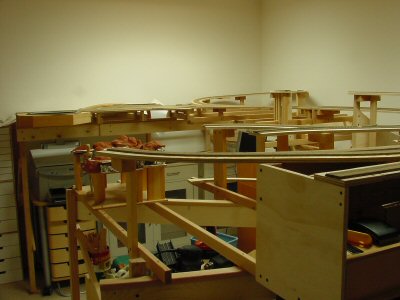
Benchwork with track.
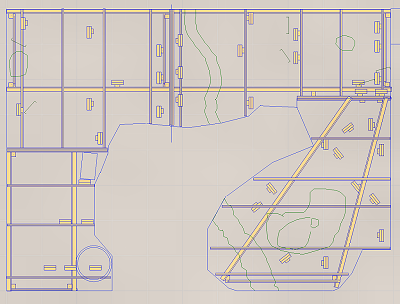
Benchwork without roadbed and track.
I’m building the layout into four big pieces. This is part of my plan to make the layout movable (but not necessarily easily portable).
It is important to get the first piece lined up well because it is much faster and easier going forward if you can just use the first section as your solid reference. Another decision I made was to build only the first section as a free-standing four legged section. All the other sections would have one end held up by its neighbor and the other end held up by its own legs. This minimized the number of legs needed and increased the amount of clear space below.
I built up the L-girders and cut all the legs and joists to length outdoors in advance, measuring from the CAD drawings.
Believe it or not, I live in an apartment. Let that sink in a second. An apartment. Not only do I live in an apartment, but my wife and I are spectacular pack rats. We have STUFF. My son has stuff too.
Therefore, one thing you will see in these pictures is that I could not actually start with an empty room. There was nowhere to put the stuff. An important factor in my design was that as I build a section, I move stuff under that section, clearing space to build the next section. That under-layout storage is important and was another motivation to have a rather high 53.5 inch track-zero height. I did have to fill the hallway and the living room with some displaced stuff over the one month it took to build the benchwork.
My son thought the whole thing was great. And yes, my wife is a saint.
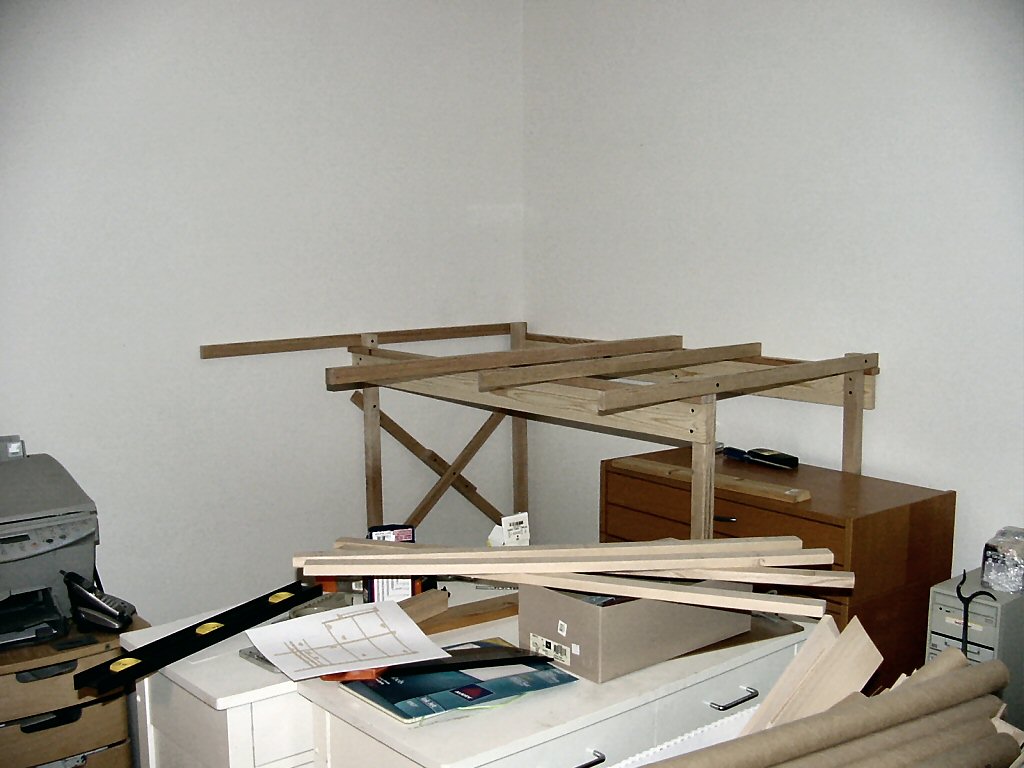
Here’s the first section going up.

Once the first section was up it’s ready to hold up the next. I put ¼ inch lag screws on the ends of all the legs to allow the height to be adjustable for any irregularities in the floor.
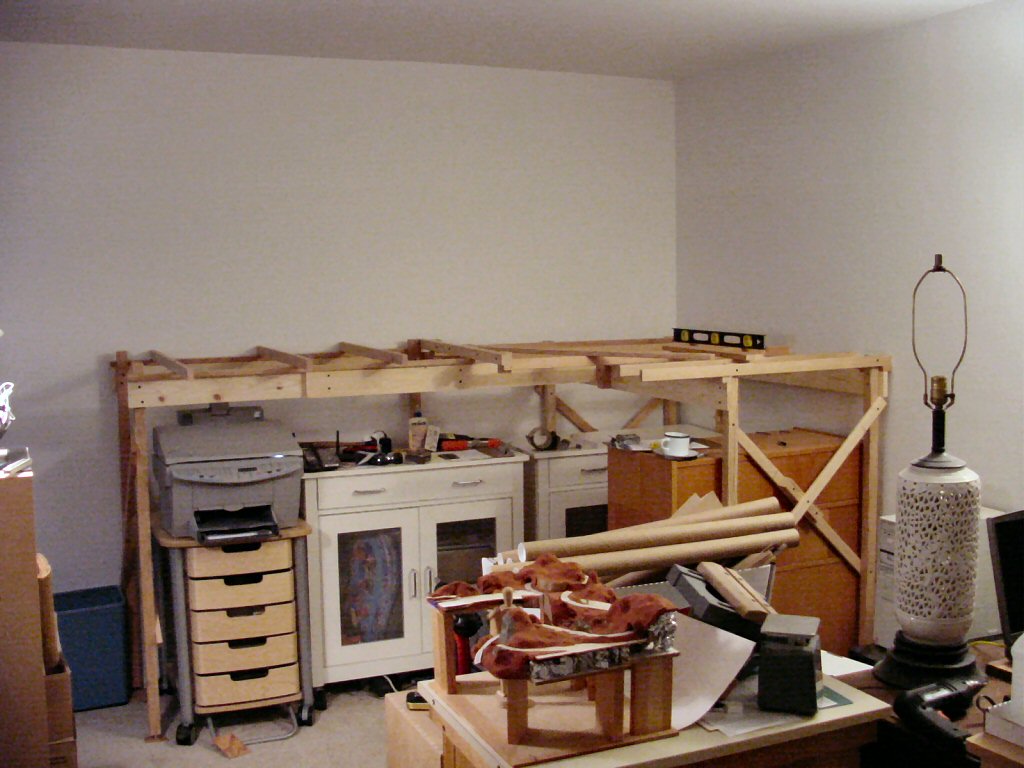
Here’s the next section and as you can see I’ve already snuggled a bunch of stuff underneath. Note everything is on wheels so it’s pretty easy to pull stuff out if I need to get underneath.

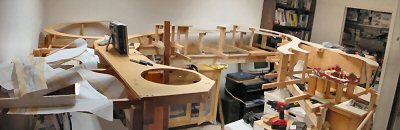
Continuing on with the third section. The sections are attached to each other only along facing 1×2 face plates at the section edges.

It finally dawned on me that I need more light in this already effectively windowless room. I bought a couple fixtures and put decent (relatively expensive) “full spectrum” tubes in them. I’m surface mounting everything since it all has to come out some day. I’ve tidied up the cords much better since this photo.

Note: this is just a start on the light. Fluorescents are an efficient way to get the bulk of the light into the space. I plan on adding many small halogen spots to give good shadows and a warmer color.
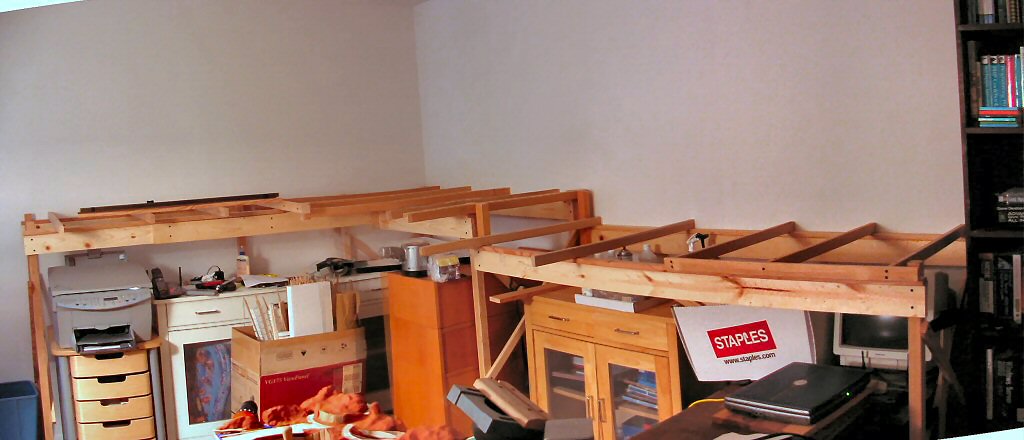
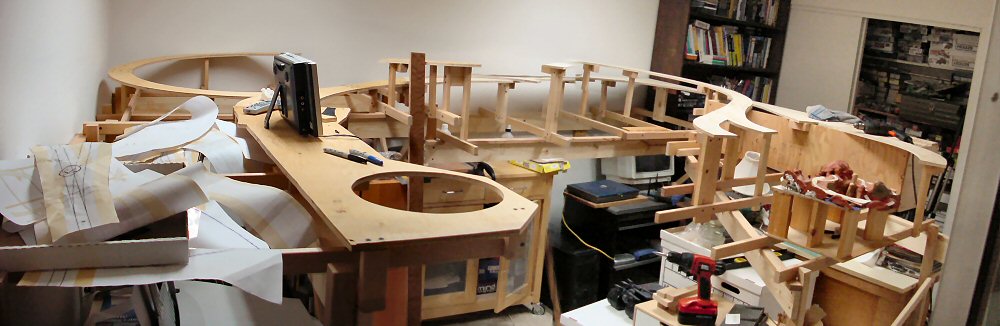
Last section.
In several of these last shots you can see that I’m using an image stitching program to combine shots giving a wider-angle view.
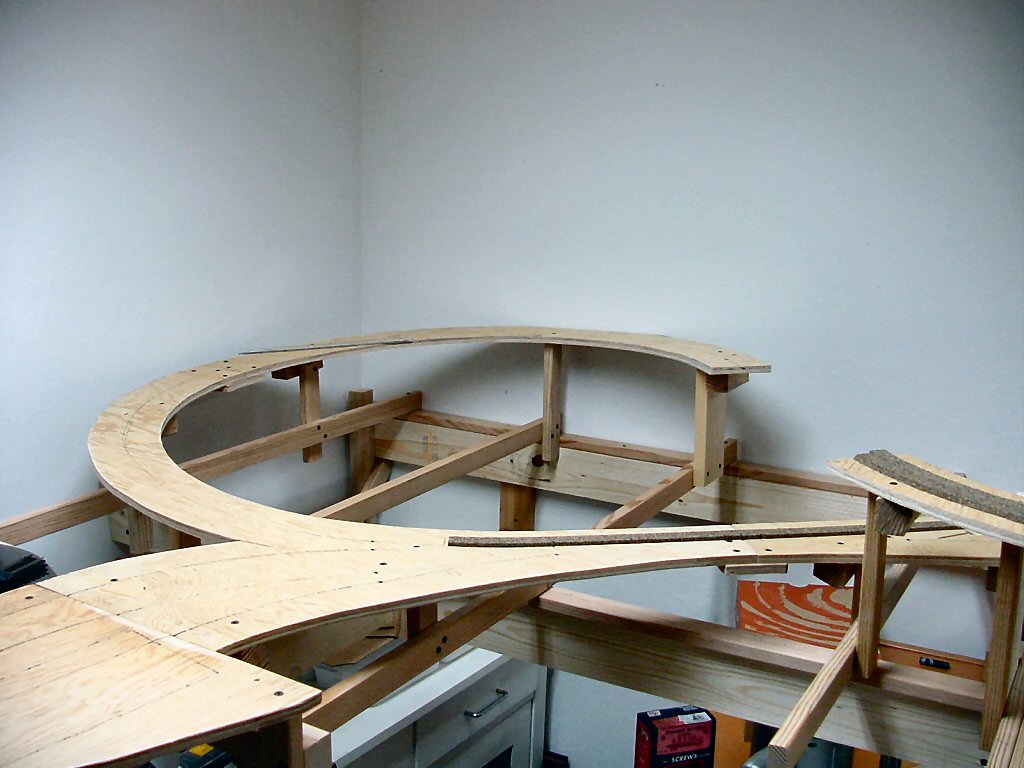
Roadway – note I use the term “roadway” to refer to the wood structure beneath the roadbed where “roadbed” is the stuff you actually put track DIRECTLY on. Some people say “sub-roadbed” — I use ½” plywood.
Building the roadway is one of those things that is REALLY hard without two things: the CAD system printing out full size paper templates and a saber saw. As far as I’m concerned there’s no other way to do it.
I actually made a paper model of the pieces of roadway to estimate how many sheets of plywood I’d need (three 4’ x 4’ sheets). By the by, unless you need several REALLY long runs, having the lumber yard cut 4×8 sheets of plywood into 4×4 sheets makes your life MUCH easier.
Anyhow, I printed out the full size templates from the CAD system (lovingly assembled from many 8-1/2 x 11 sheets of paper) and staple them to the plywood. I just staple them on long enough to copy their outline onto the wood using a nice new black sharpie pen. You can use a pencil if you want but the thick black ink line is easier to follow while cutting.
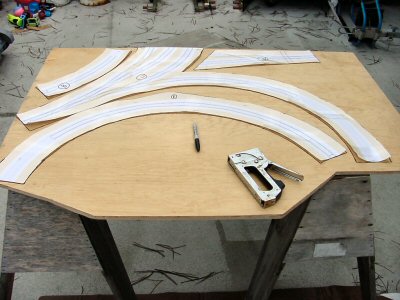
SAVE the templates: you will use them again later.
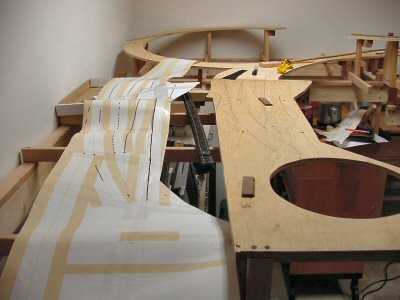
I don’t have any photos of actually cutting the plywood. It was threatening rain that weekend so I was hustling along fast enough to get it done yet still keep all my fingers. Besides the saber saw I also use a band saw whenever the shape of the piece is such that it fits through the throat of the saw.
Remember I said keep the templates? You need them to quickly and easily lay out the turnouts and the track locations. Once the roadway was installed, I would tack the templates over the pieces and use one of my trusty sharpies to trace slowly over the track plan, letting the ink soak through and mark the wood.
I was moving fast and the benchwork is definitely good enough but one thing I would change next time: Malcolm used 1×2 risers on his San Juan Central so I figured I would too. Next time: use 1×4 risers. The 1x2’s are plenty strong but because the 2 inches is so narrow (really 1-1/2 inches) they tend to be wobbly. For a small weight penalty, 1x4’s would have been much better.

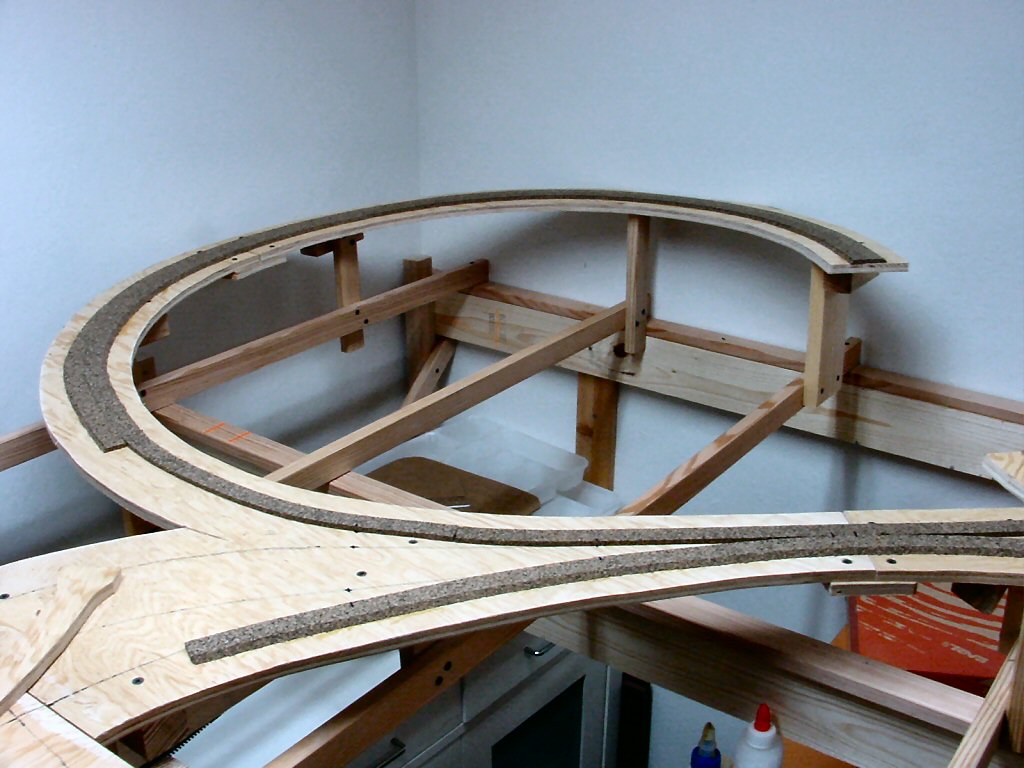
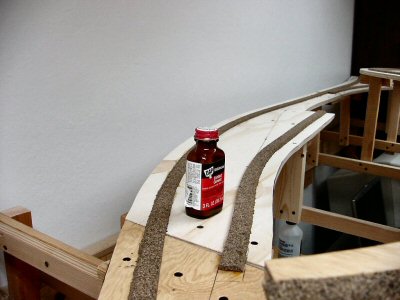
Cork Roadbed
It’s fast, relatively cheap, not too messy, and it’s good enough. If I was hand laying track I might have gone for Homasote but I just didn’t want to do it that way. Frankly, the old Tru-scale milled pine roadbed was pretty good. Now available from Trout Creek Engineering — the flat stuff you put your own ties on, not the stuff they made with ties and grooves cut into it. I’d probably do something like that before Homasote. Call me weird. The only thing halfway interesting about putting down the cork is that I would use contact cement alternatively with white glue to hold it down.

Sat 25 Feb 2006
My son has always been totally into Thomas the Tank Engine. As a parent, Thomas is ok: stories about mild interpersonal issues between locomotives, calm music, sedate editing style. As a Model Railroader, Thomas is great stuff.
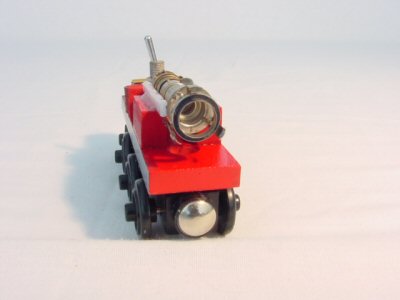
When we saw Thomas and the Jet Engine I got the idea to make a jet engine to go with his wooden Thomas set.
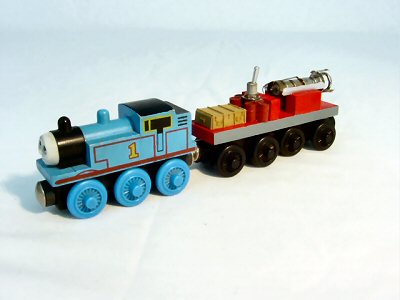
I used a kind of weird “fire engine/crane” car as the basis. I stripped off the parts above the deck and repainted.
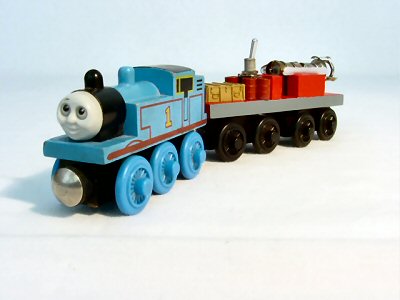
Next I added a old toggle switch, some Campbell oil drums and a Verlinden resin crate.
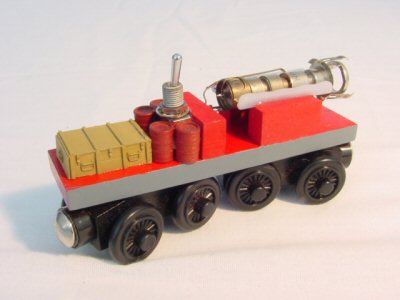
However, the crowning piece is the “jet engine” made from an old black and white TV set electron gun.
Sat 18 Feb 2006

This stage of layout design borrows heavily from architecture and theater. Indeed, examining the definitions of these words you get:
Architecture: The art and science of designing and erecting buildings.
Theater: (the most appropriate of the many definitions) A place that is the setting for dramatic events.
For me these definitions exactly span what model railroad design and construction is and combining them gives a good working definition of model railroading:
Model Railroading: The art and science of designing and erecting a place that is a miniature setting for dramatic events involving trains, terrain, and associated human activities.
When is it the right time to build a planning model? Really, whenever you get a point where you feel you need to “see” things better to proceed deeper.
As I mentioned before I used the 3rd PlanIt CAD program to design my trackplan. While 3rd PlanIt has decent terrain design and 3-D visualization capability, I found it would take me a very long time to use it to design the terrain of my layout so I used the CAD program to design just the track plan and benchwork plan. I decided to use a planning model to work out the way hills, valleys, and streams would work out on the plan.
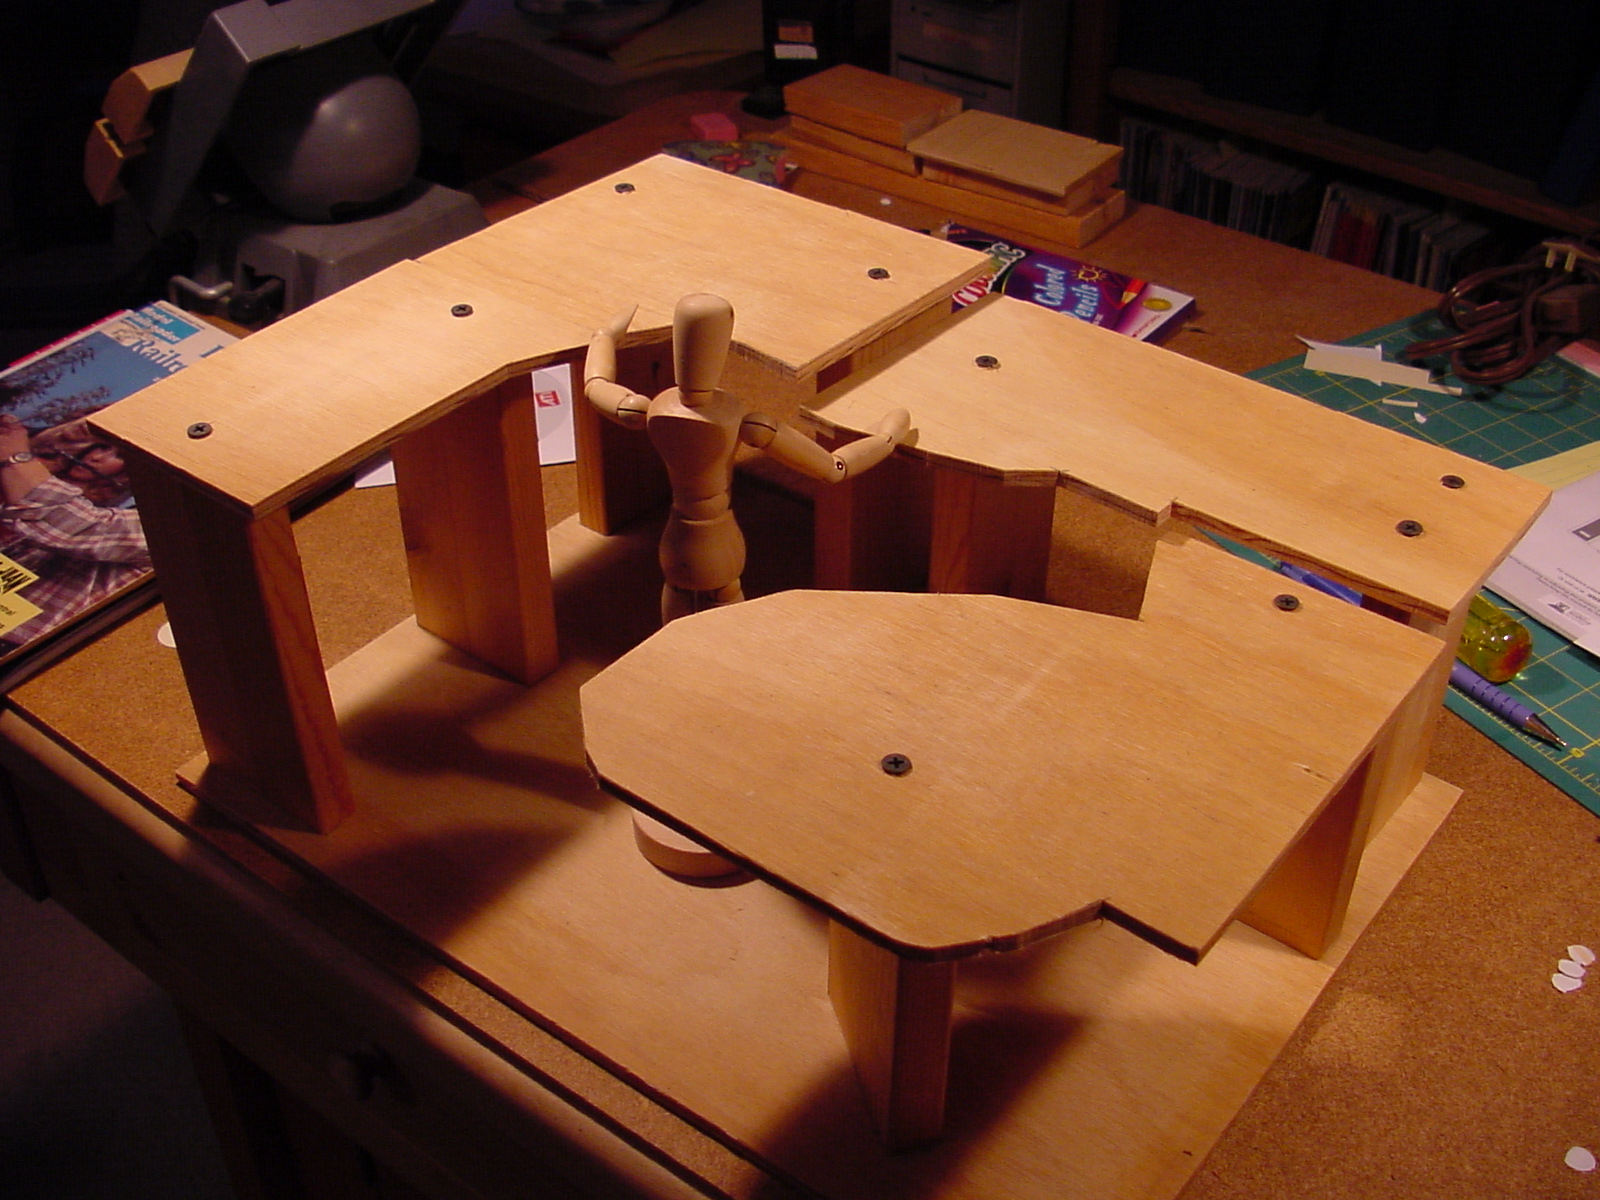
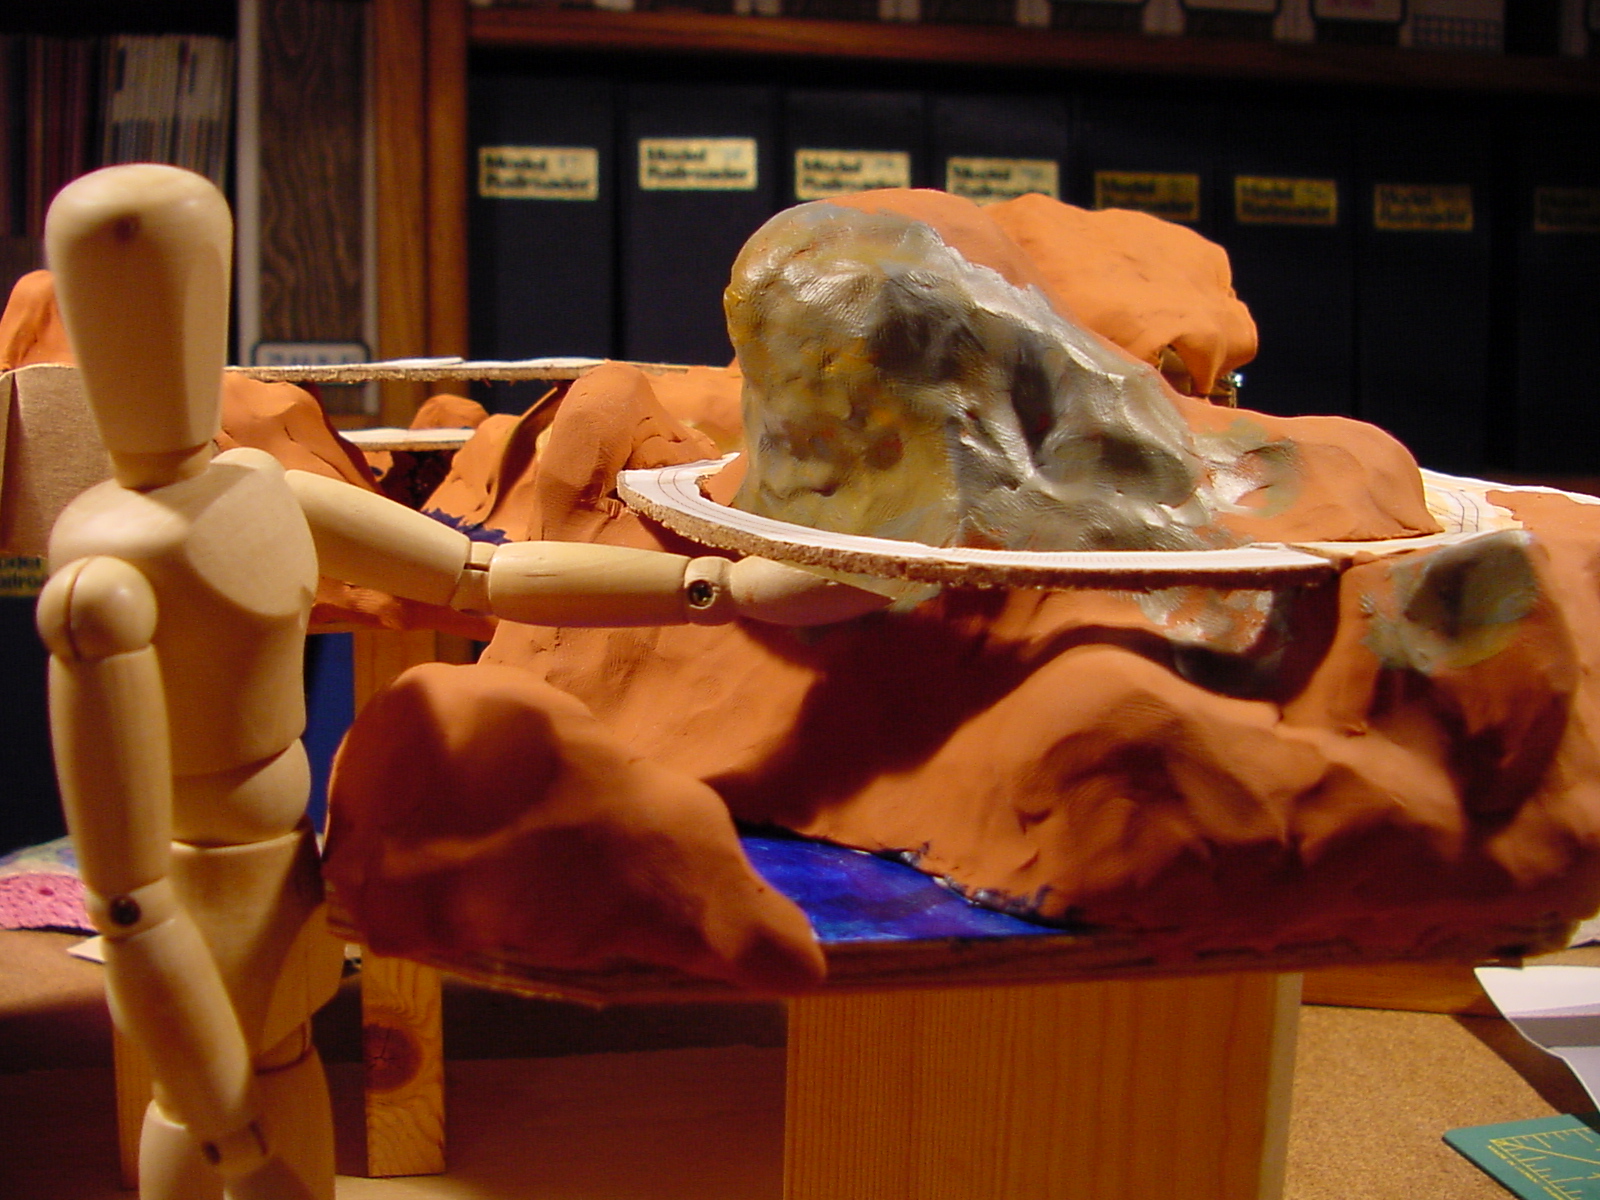
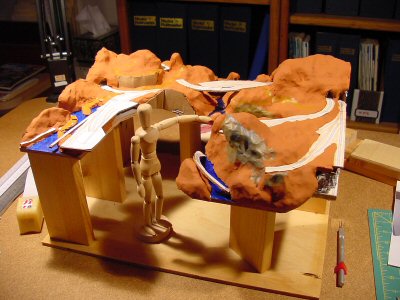
I chose a large scale: 1:8 to use for the model. This means 1/8” = 1″ (1.5 inches = 1 foot). I happen to have an artists model figure which is about 5 feet 6 inches in height in this scale.
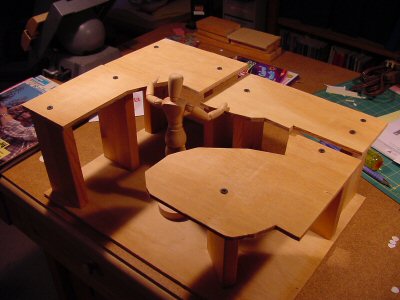
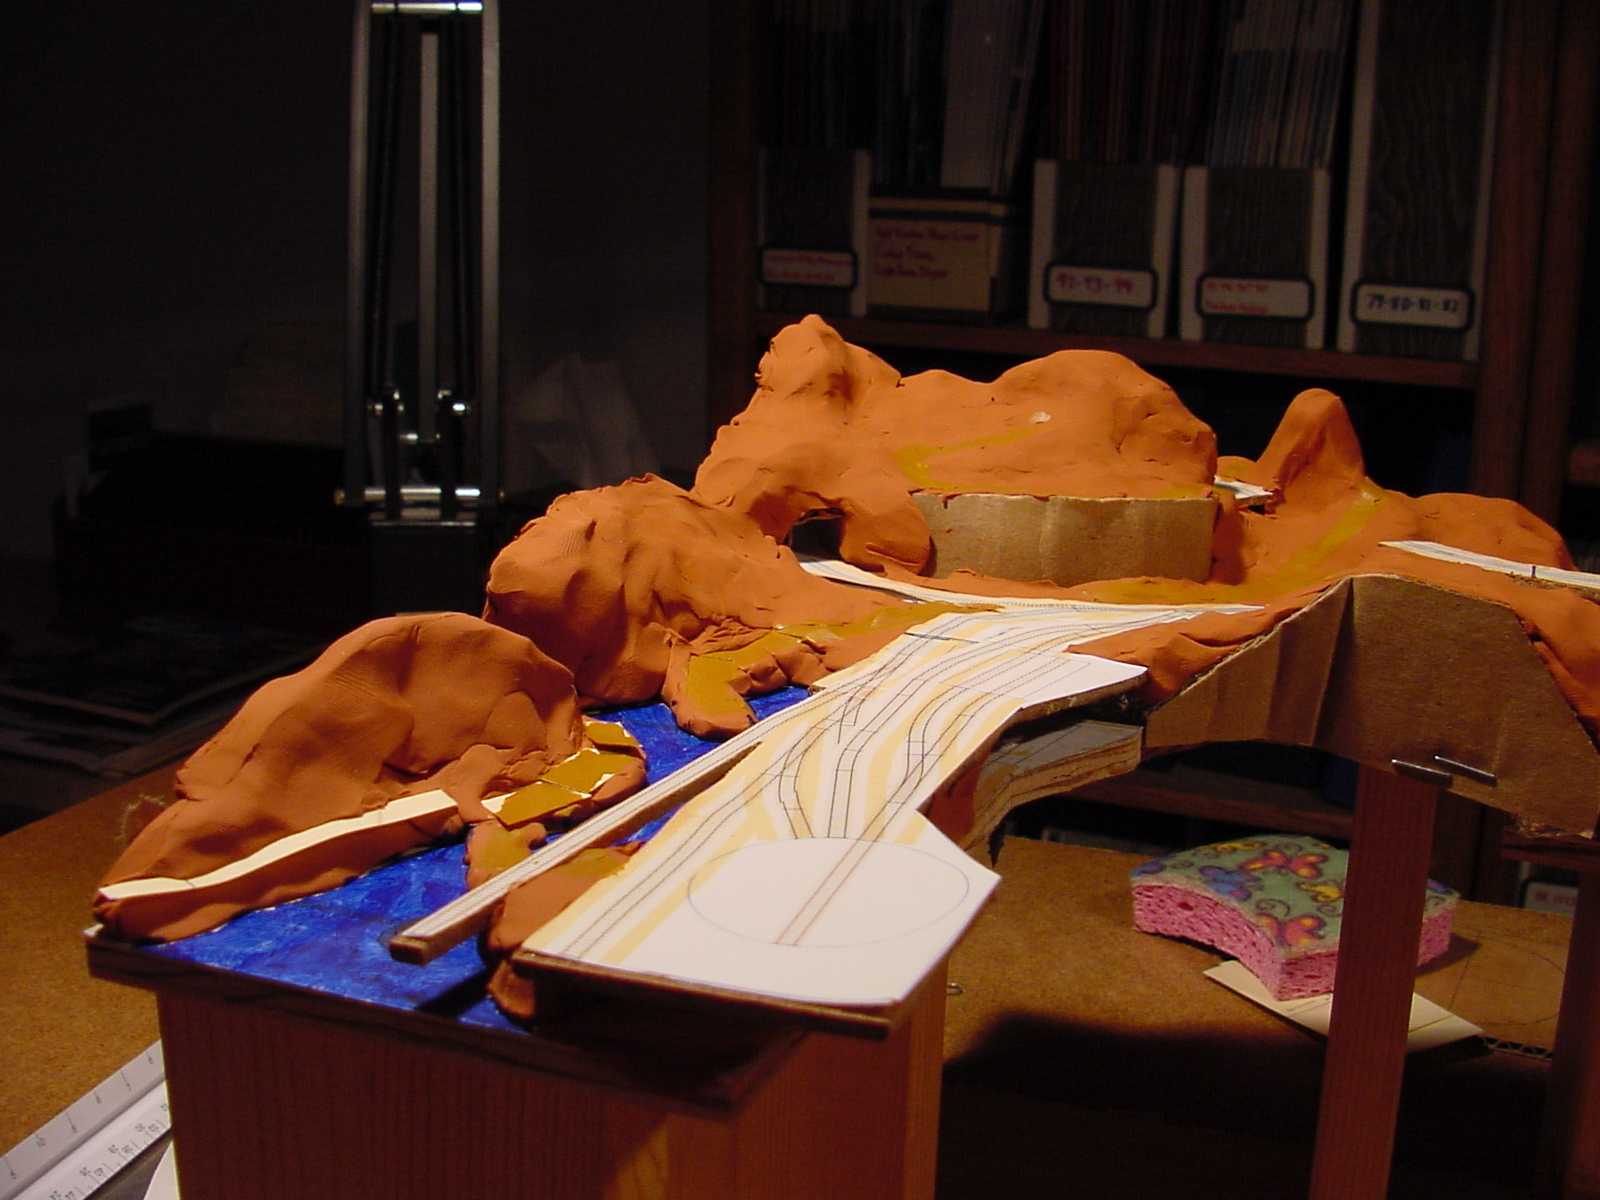
Using the CAD program and my printer I made patterns from cardstock (manila folder paper) and transferred the shaped to ¼” plywood which I cut out with a jigsaw. The ¼” thickness is not important – it’s just what I had lying around in scrap. I used some 1 x 3’s as pedestals to set the scale height of the sections.
As you can see from the photos I broke the layout up into four sections. While the layout is not portable, it needs to be moveable. The height of each section is defined by the lowest terrain planned in that area. I followed to basic height/depth plan Furlow used for his San Juan Central but offset everything higher for my track zero height of 53.5 inches from the floor.

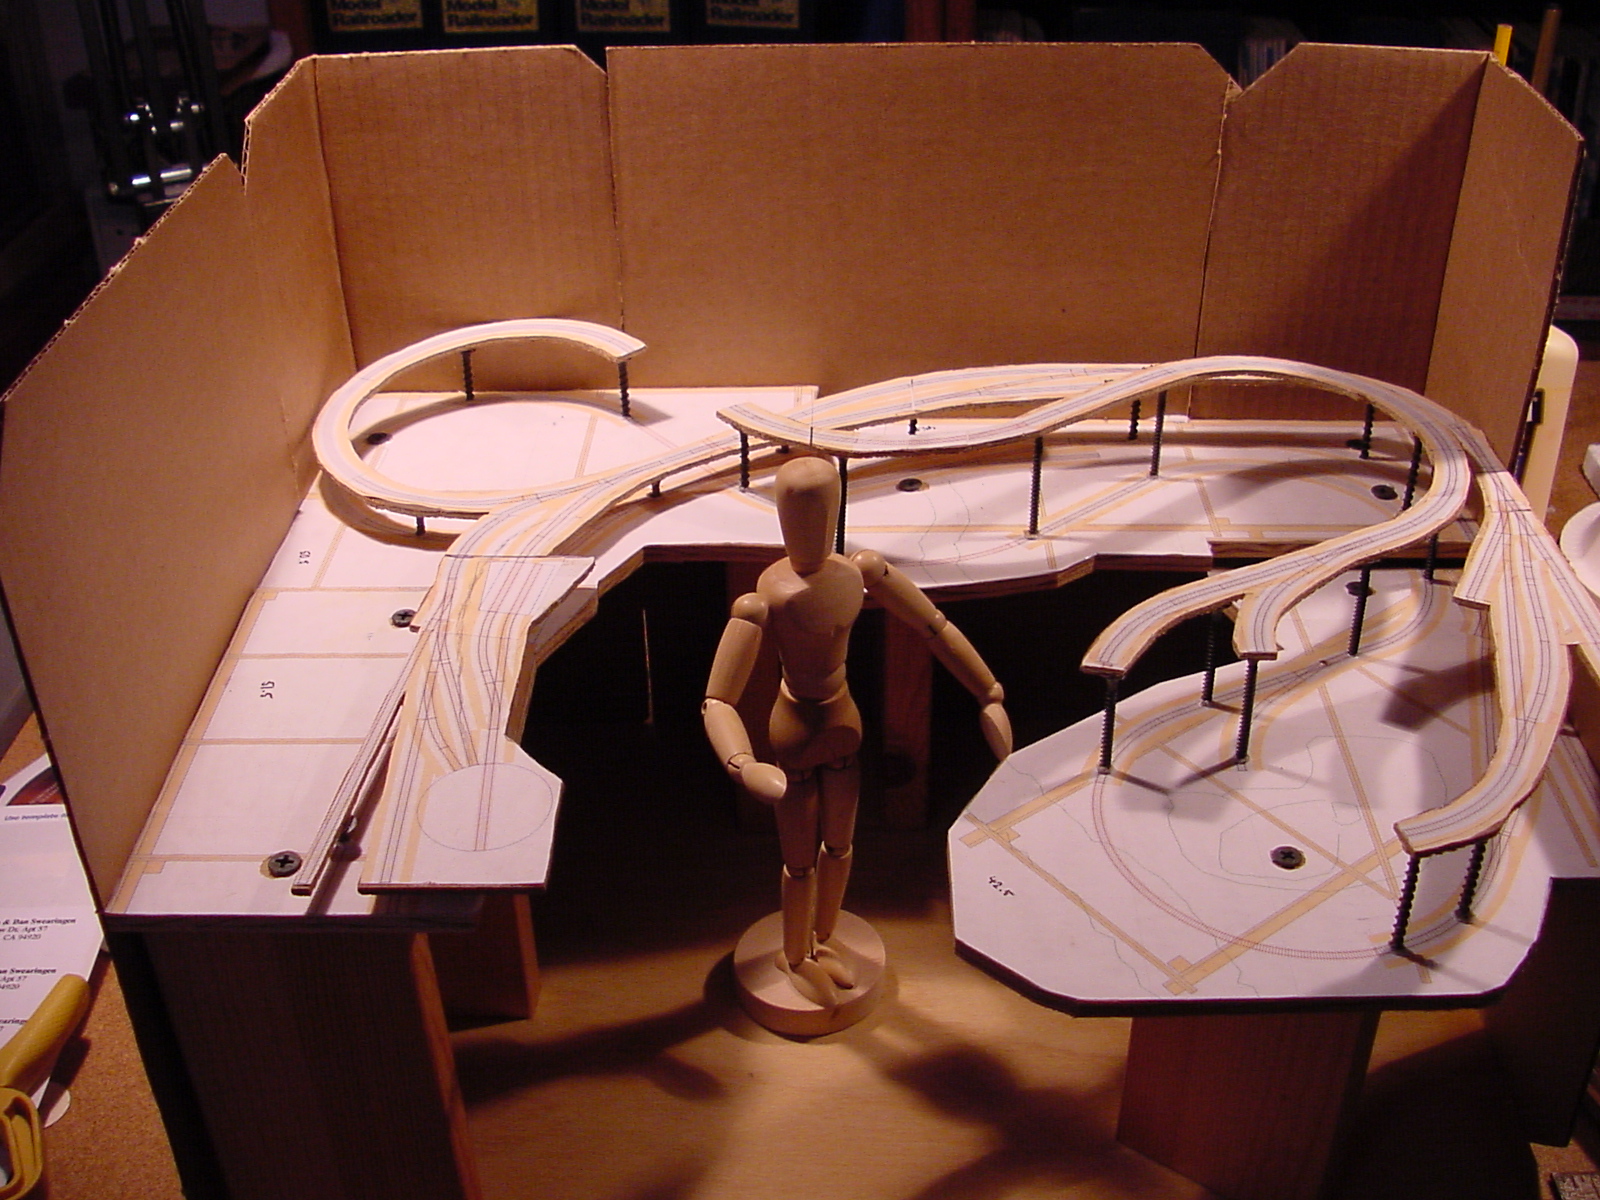
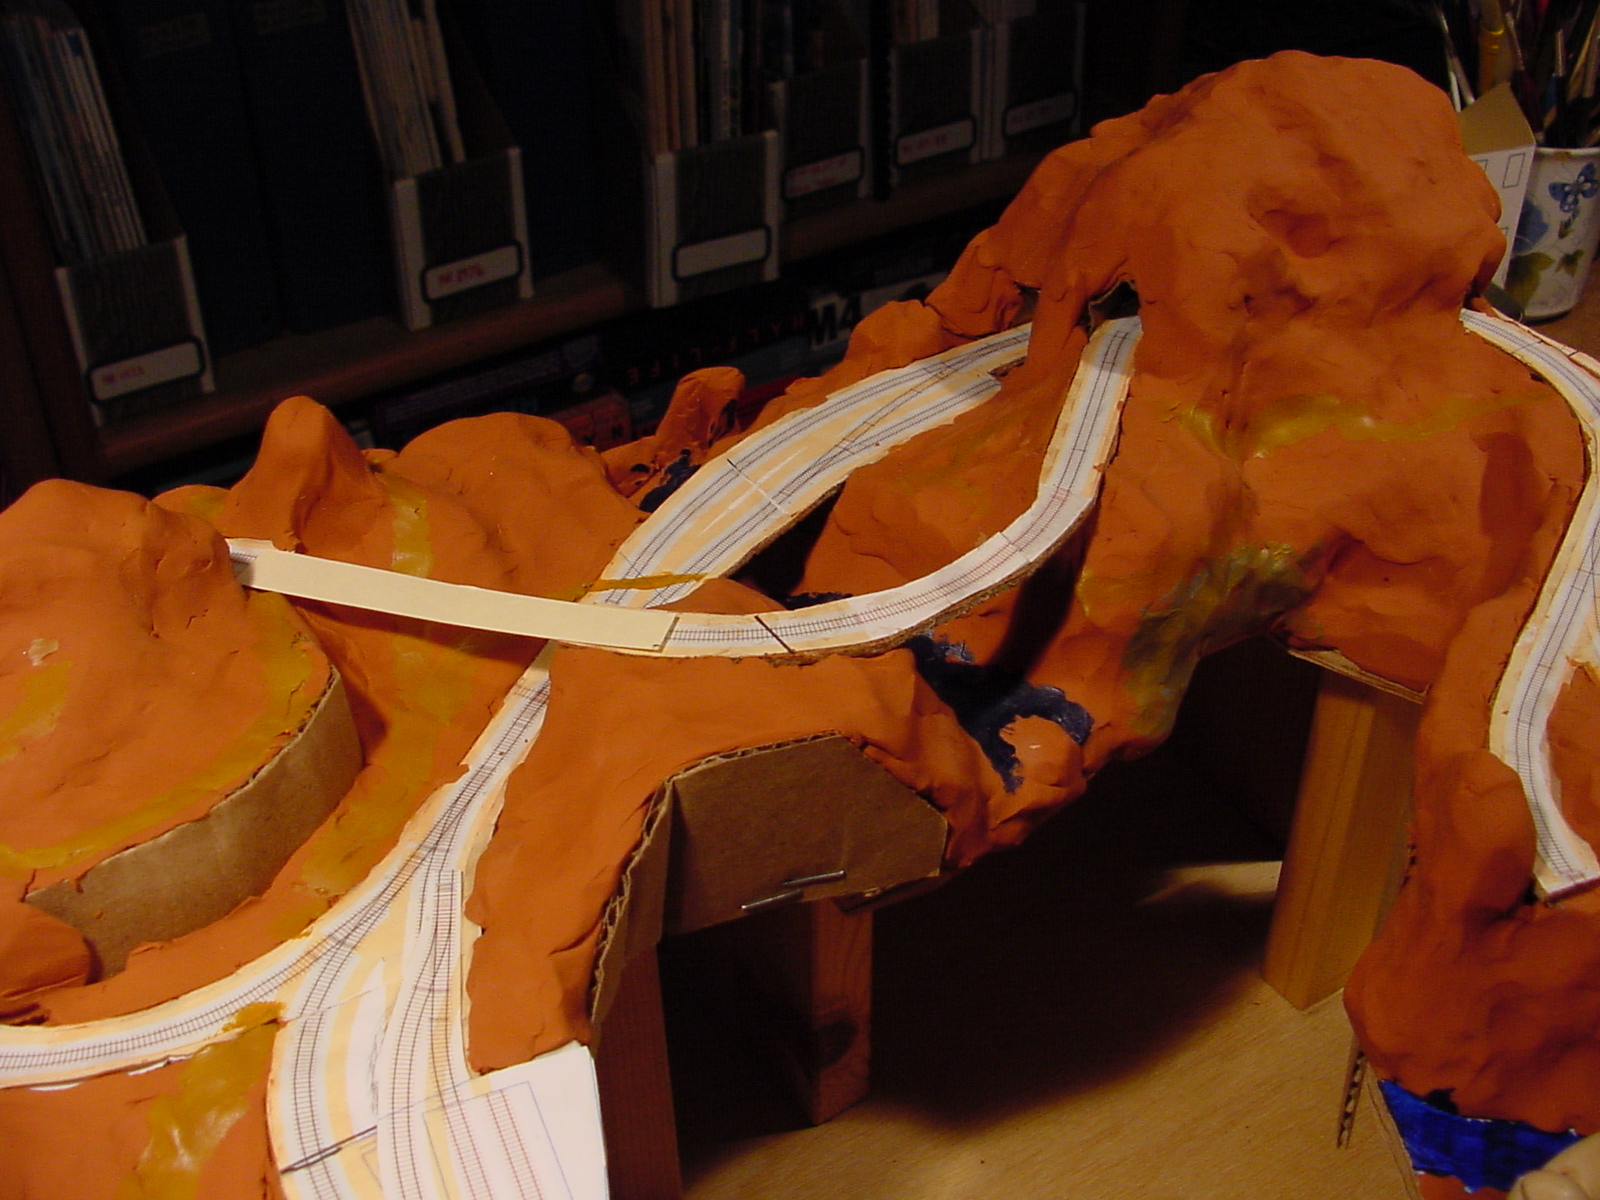
I glued a scale printout of the trackplan onto a sheet of 1/8” plywood and cut the plan out cookie-cutter style out of the thin plywood (this simulated the roadbed roadway I would eventually make for real out of ½” plywood). Then I glued a printout of the trackplan onto the layout sections and used wood screws as risers for the roadbed.

At the time I was worried I had done everything accurately enough. Comparing the model above to the current state of the layout it looks really close.
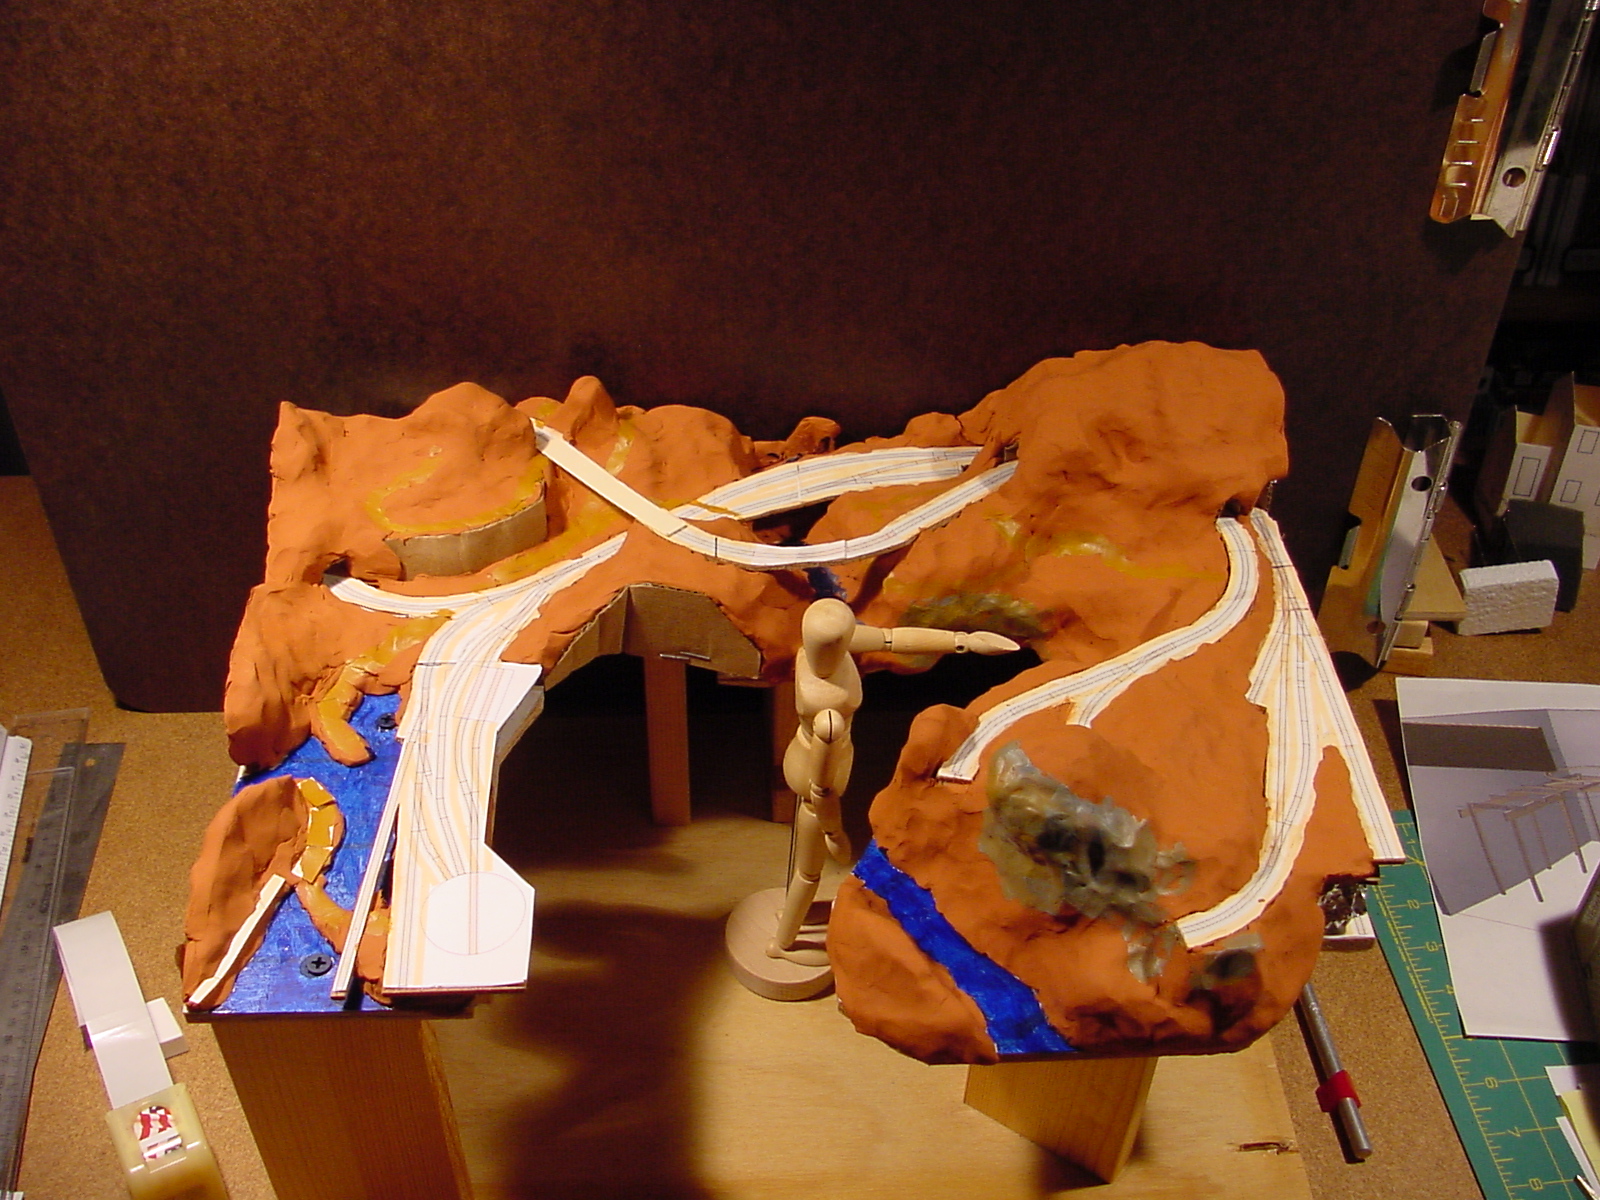
To actually model the scenery I used Sculpey (http://www.sculpey.com/) which is modeling clay that can be adjusted and shaped indefinitely and then hardened by baking in an oven (275 degrees and 15 minutes per ¼” depth). My model is big but fit nicely in our oven.
I used balls of aluminum foil to create the basic hill shapes and then covered the foil with a skin of Sculpey. Later I used acrylic paint to indicate areas that would be roads and water.
The completed model
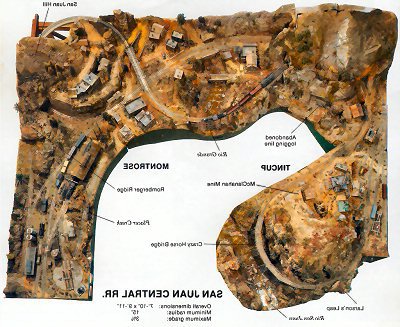
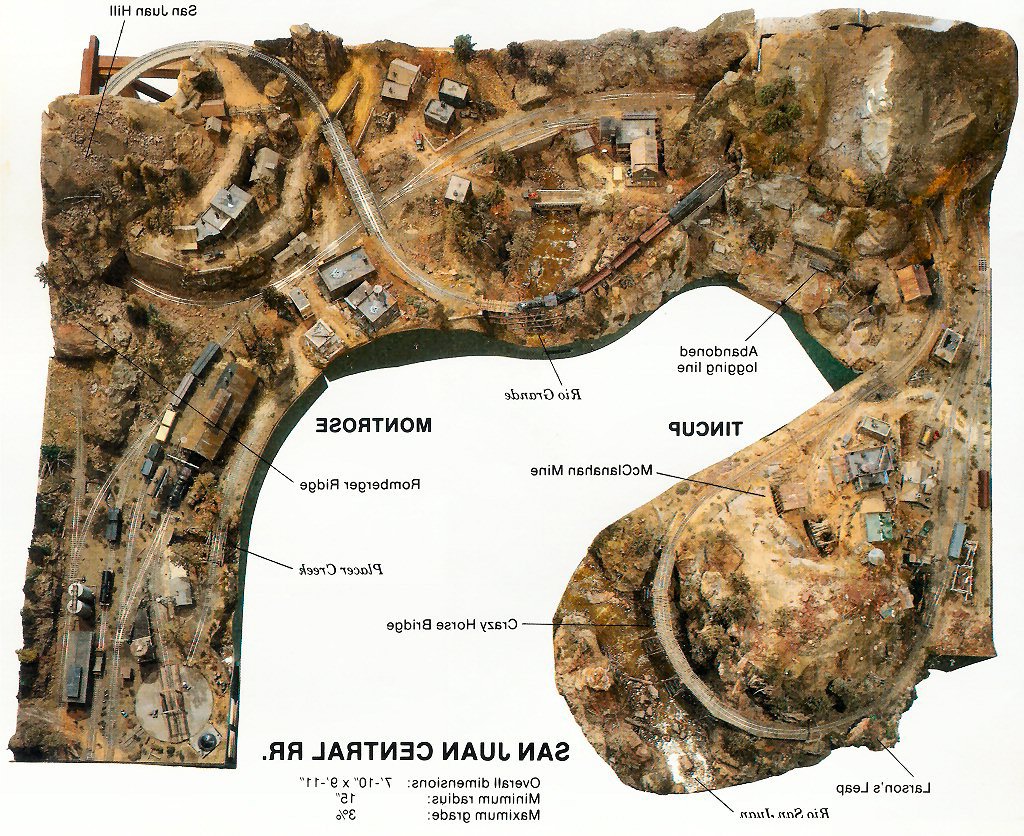
Malcolm Furlow’s San Juan Central (SJC) flipped right-left so it matches the basic configuration.
In general I followed the terrain of the SJC since I really liked the SJC looked.

Here I have the figure pointing to the Crazy Horse Bridge.

Tiburbon (a play on the name of the real town of Tiburon, California).

The back of the layout and the Two Tunnels area.
Between this planning model and the CAD track plan I had worked out enough of the details to proceed with construction of my layout. I really found this step a lot of fun and while I feel it is a required step to building a layout I could see building a few of these for fun just to try out different ideas for layout design.
Tue 14 Feb 2006
When I first decided to build a new layout I considered a shelf type plan. “Shelf” layouts have become popular for several reasons. They tend to maximize mainline length while avoiding being able to see too many adjacent runs of track. Shelf layouts were probably a direct and strong swing away from layout designs known as “spagetti bowls.” Operations oriented model railroaders — those for whom operating trains in a prototypical fashion is most important — have increasingly turned to shelf style layouts. Many layout builders also stack shelves with two or even three levels being common.
Interestingly, John Allen was a huge fan of operation and yet his layouts were firmly in the NOT a shelf, “bowl of spagetti” camp.
For my available space I initially planned a shelf layout with loops at either end and two levels at one end.

As you can see I made a 1” = 1’ scale model of the room and my layout idea. The Layout is roughed out in classic “Armstrong” squares and blobs. Squares and Blobs refer to a technique the late John Armstrong popularized to rough out the mainline location and space requirements of a layout for a given space.
The track height would be rather high: 53.5 inches above the floor because I like the trains near eye level and this was the height of an existing shelf in the closet onto which I would flow the layout. In my planning model, the pieces of paper on the floor represent pieces of furniture that would be under the layout. In some cases they are bookcases that the layout would have gone through.

In the closet would be one loop and one terminal (above). At the other end (below) the layout would split into two levels with a loop on the lower level.

This plan had maximum mainline length – almost two scale miles. Huge yard area and would have presented good operational complexity.
However, I am so glad I made this simple cardboard model because once I did, I realized I hated this plan.
For me the biggest problem with this design was that there would be no immersive scenery experience. I knew that in photographs this layout would only look good when you looked at it focused on small scenes. Any long views would glaringly show that this was a shelf running around a room with trains on it.
This was the tipping point. I had been dreaming of building a version of Malcolm Furlow’s San Juan Central (SJC) for almost 20 years so I figured I’d see how that would fit into my space.

I saw that I’d want to flip the SJC left-right and I could run track out to storage tracks in the closet. Setting an early CAD drawing of the layout into the space I could see I that this plan felt much better. The picture above might make you think I could keep the dual level part at the bottom of the picture but one of the “costs” of this design change was that my desk would no longer fit under so I had to move my desk, my workbench, and several bookcases into the nook.

Postmortem: I’m really happy with the choices and my new little nook office is actually really nice and effective.
Sat 4 Feb 2006
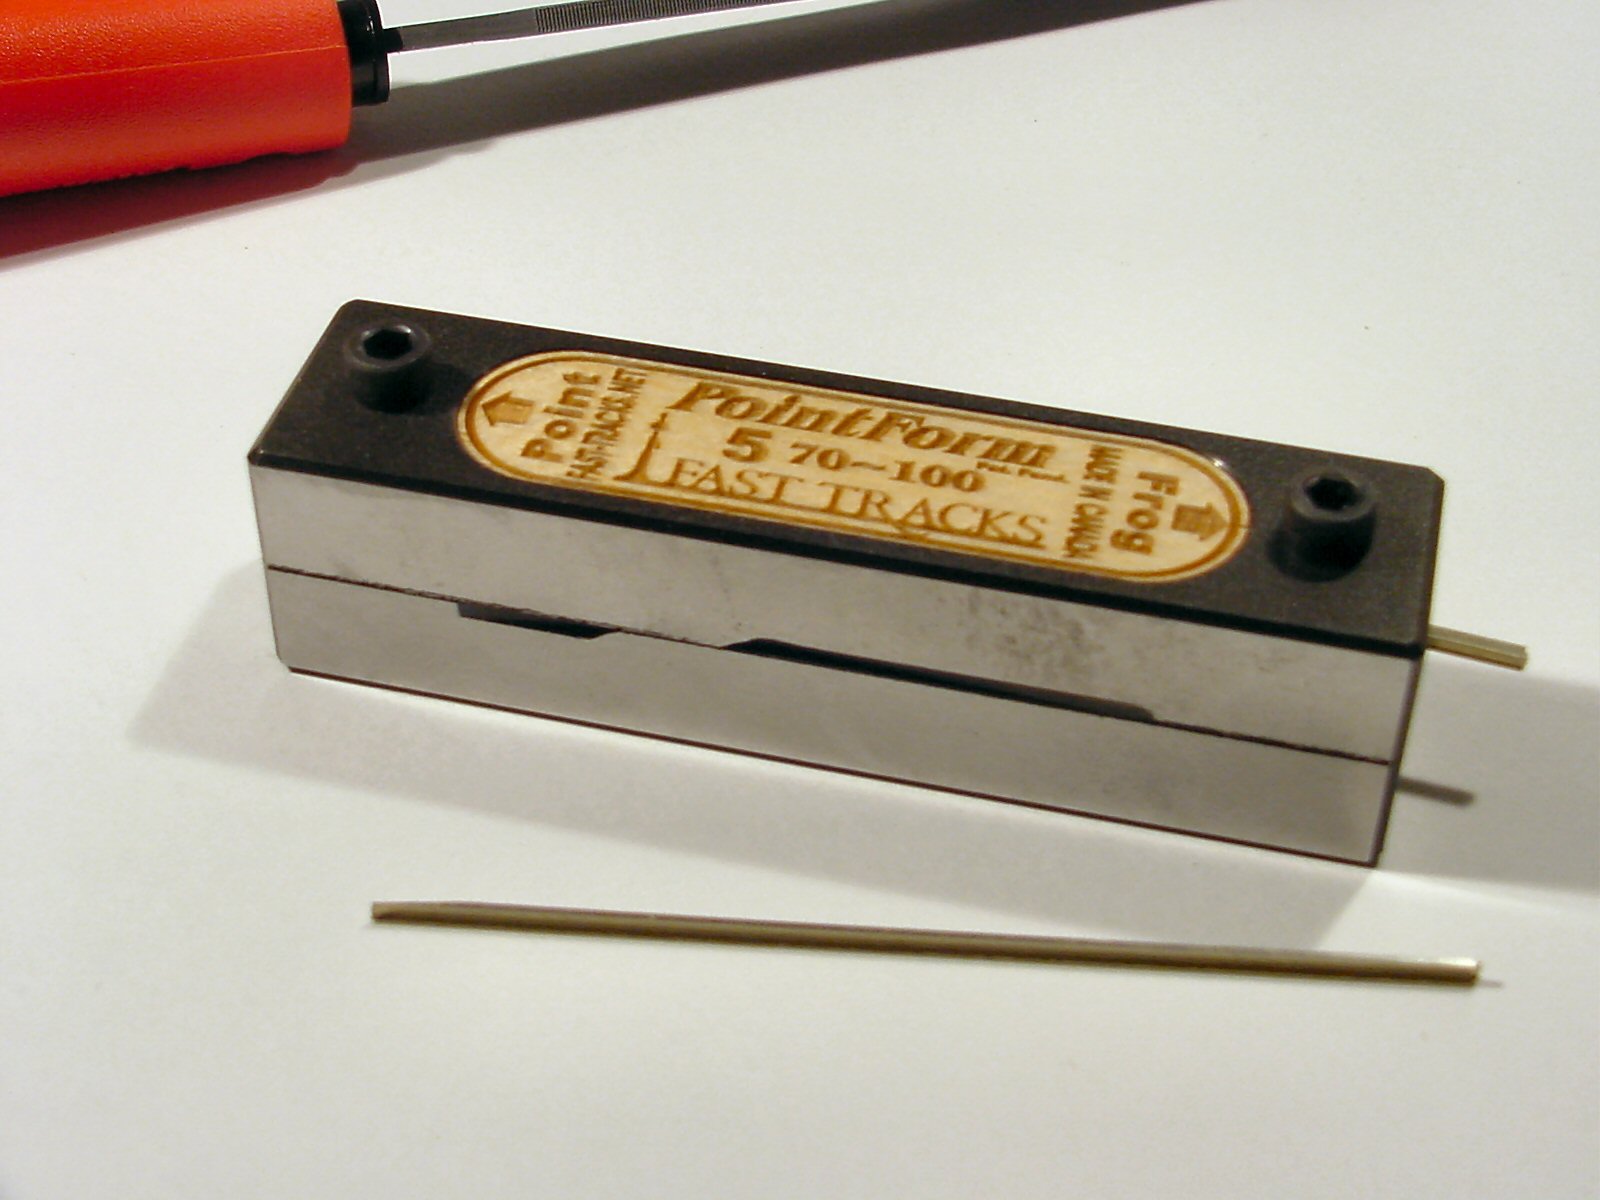
WOW. This is a gorgeous and effective tool.
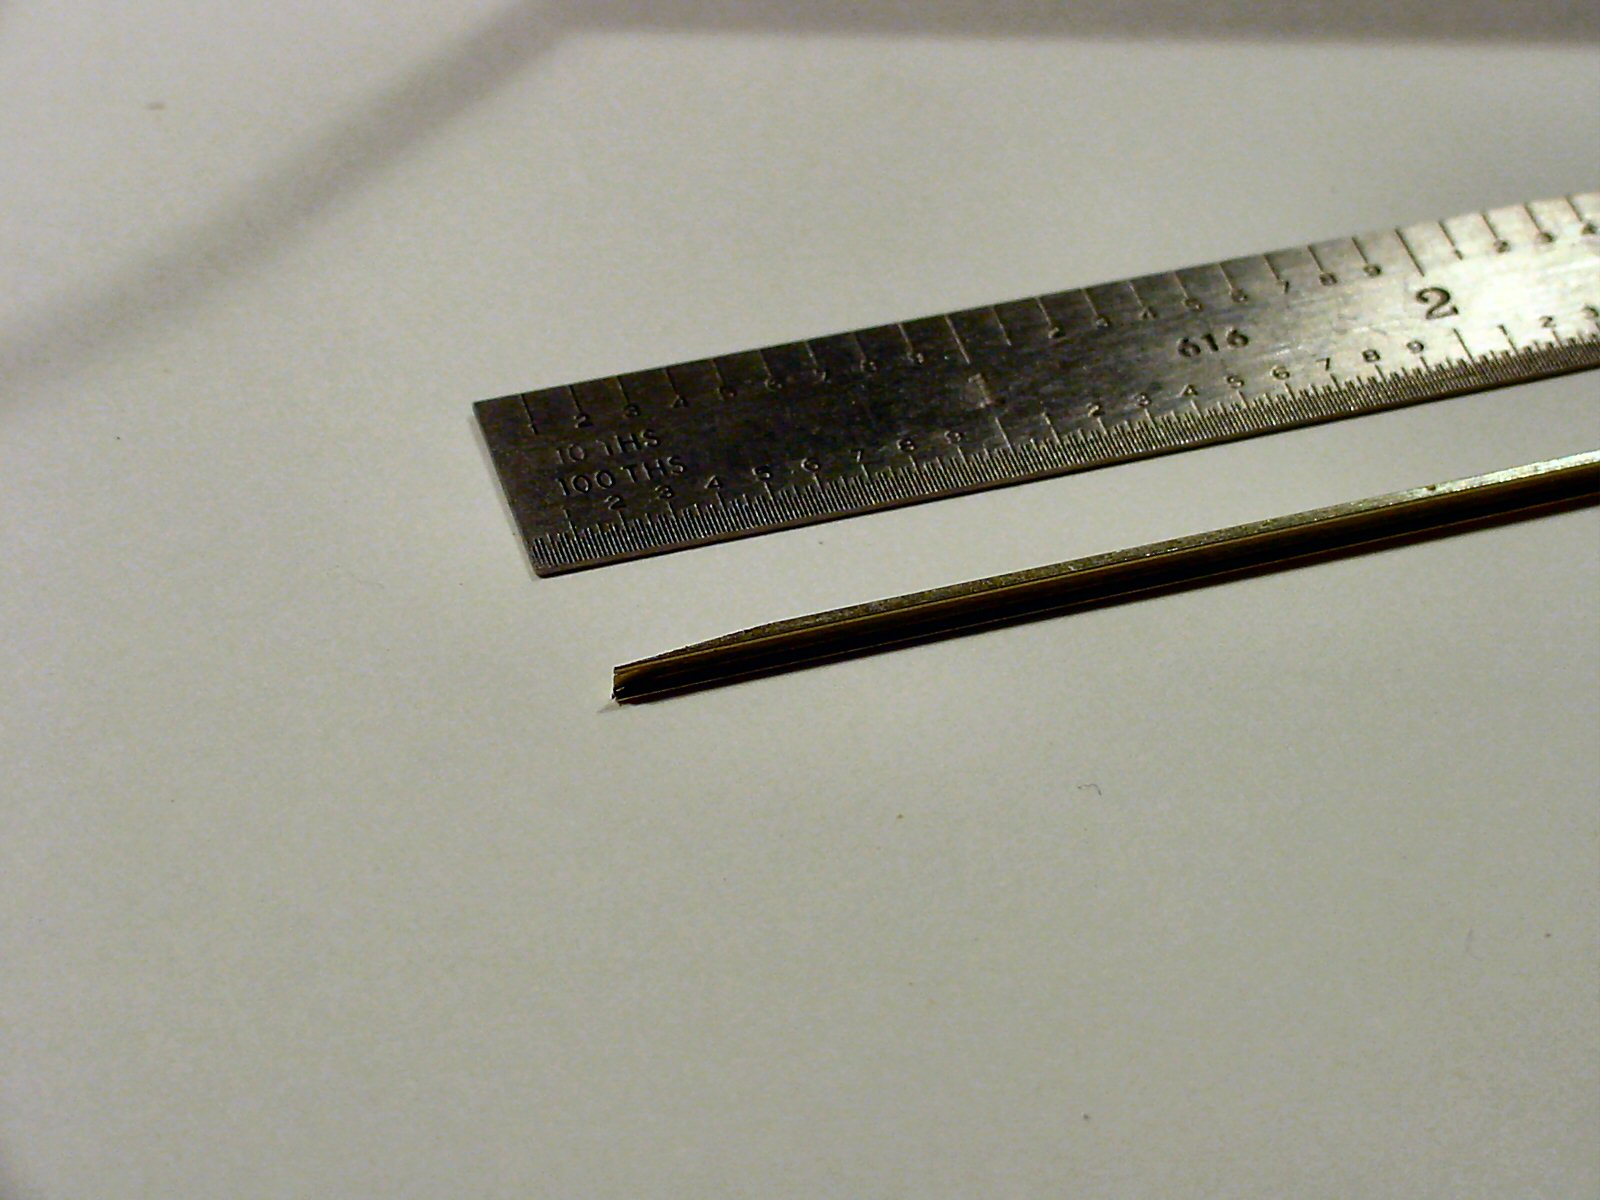
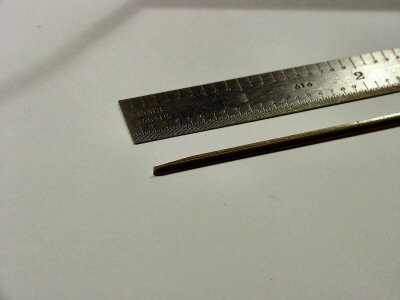
I saw a blurb about Fast Tracks products in Model Railroader and thought I’d take a look. I’m using Central Valley Model Works CVT Turnouts which require a lot of hand assembly and you have to file rails to shape for the frogs. I was worried about this so I was looking for something to make good repeatable frog rails.
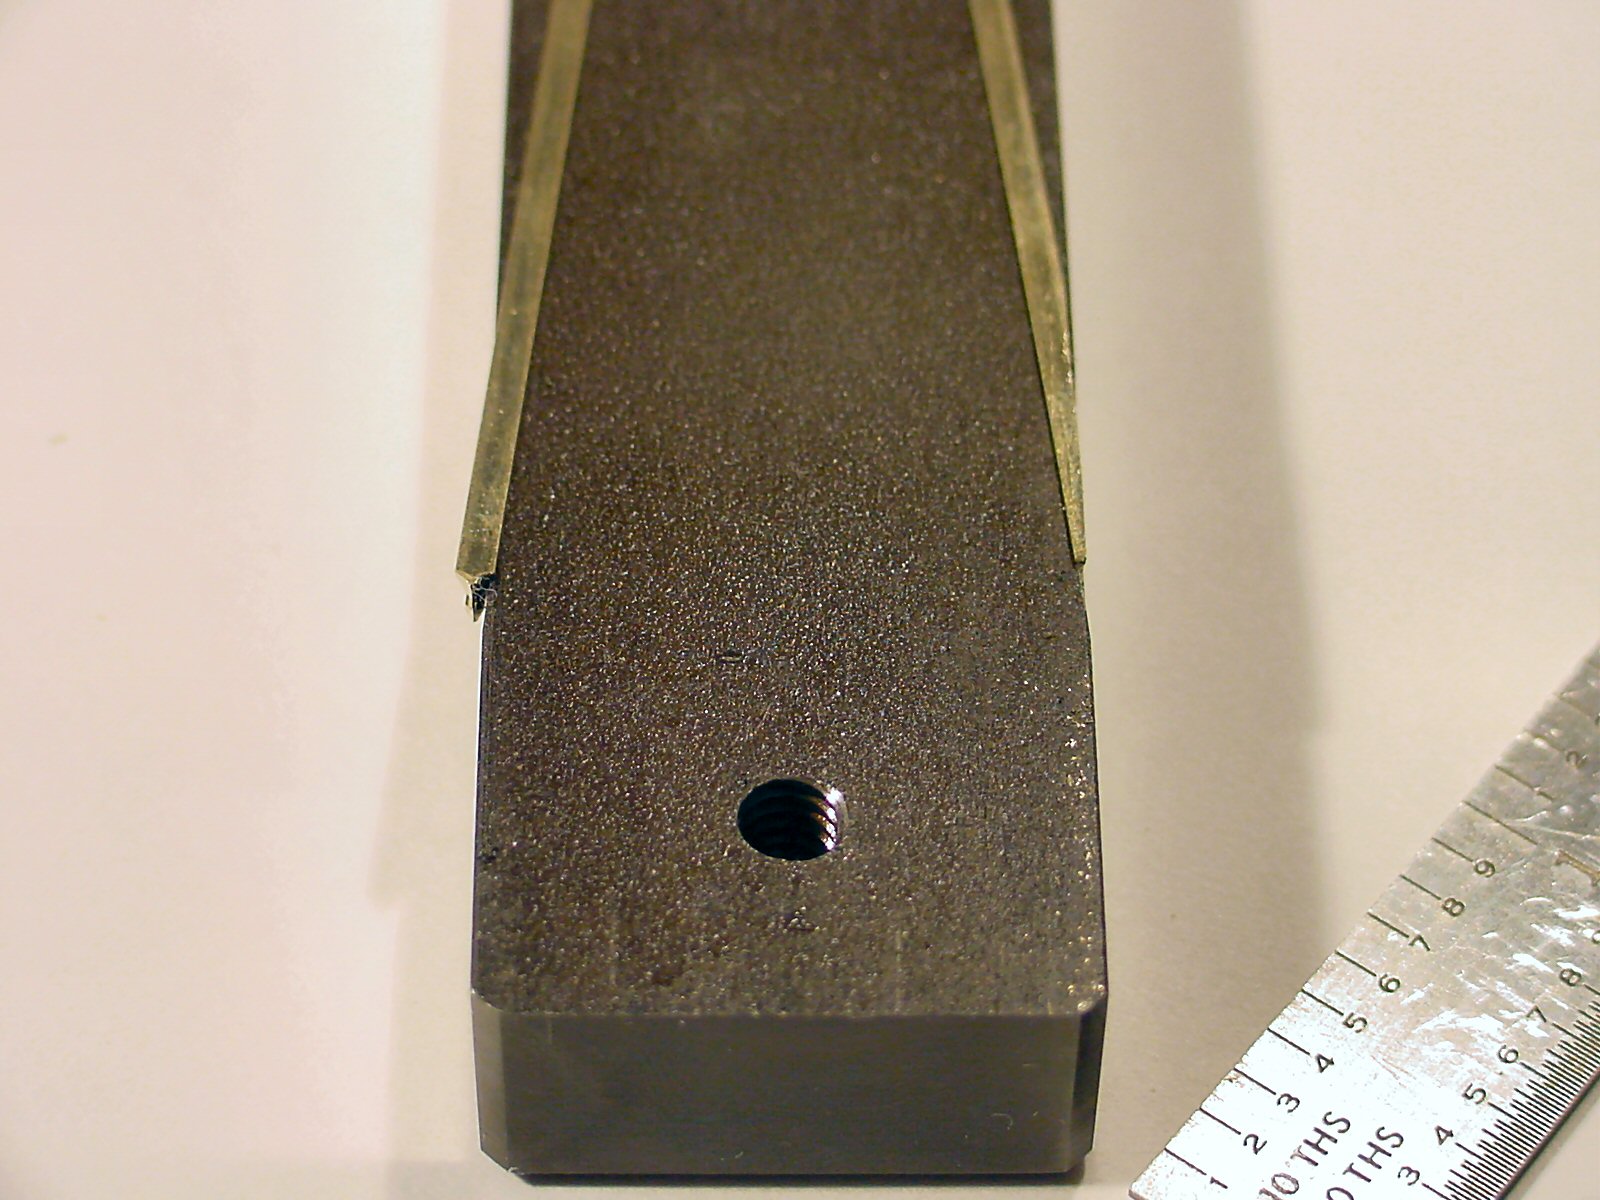
Fast Tracks makes a complete line of track building and especially turnout building tools for hand laid track. I thought the PointForm Filing Jig looked good and the website has a video of how it is used. That is very cool and sold me. They are a small operation and sometimes get swamped with orders. In my case my order arrived in about three weeks.
The fit and finish of the tools are fantastic and they work perfectly the first time. Highly recommended.
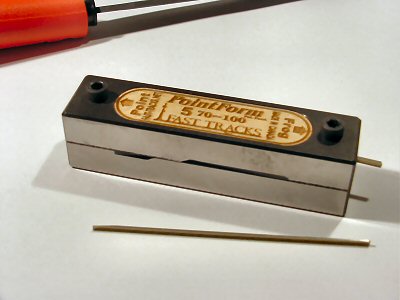

I also bought their Rail Roller and I’ll describe that soon in another post.
Sat 4 Feb 2006
Posted by Daniel Swearingen under
UncategorizedComments Off
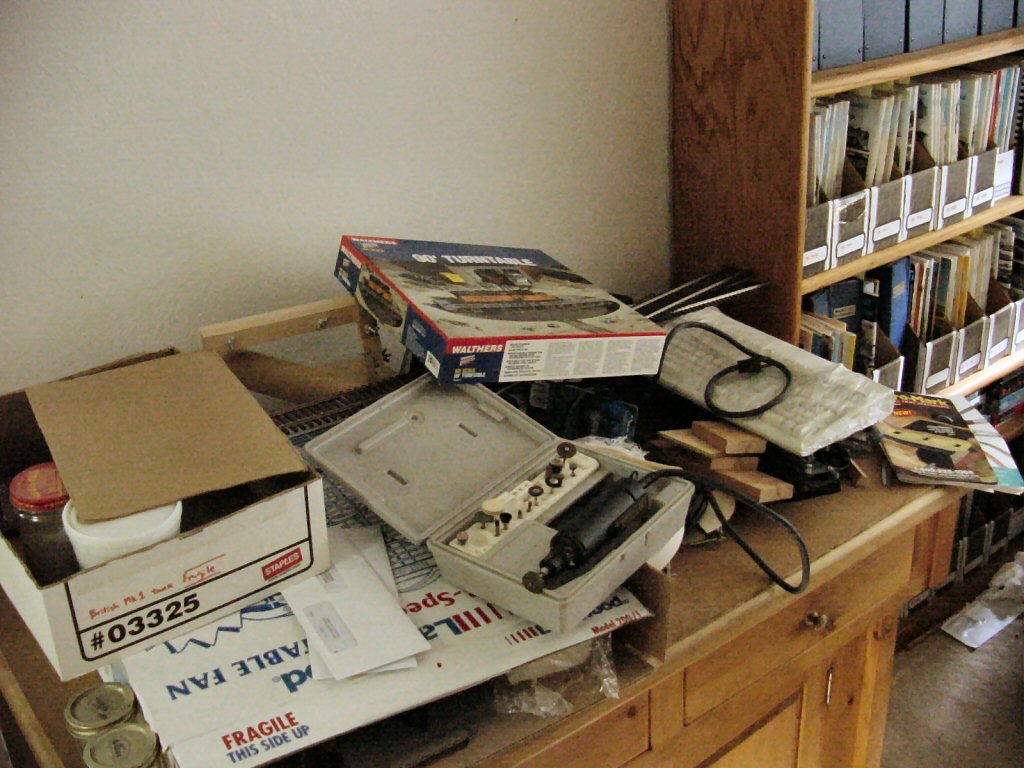
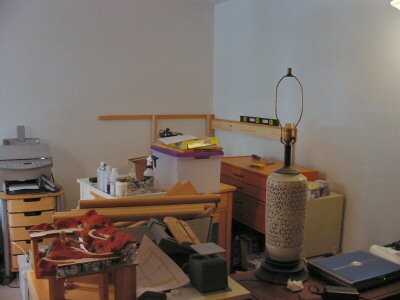
In “The 7 Habits of Highly Effective People” there is a habit called “Sharpen the Saw” which means that sometimes the fastest way to proceed forward is to stop and organize, clean, plan, etc. as opposed to just DOING.
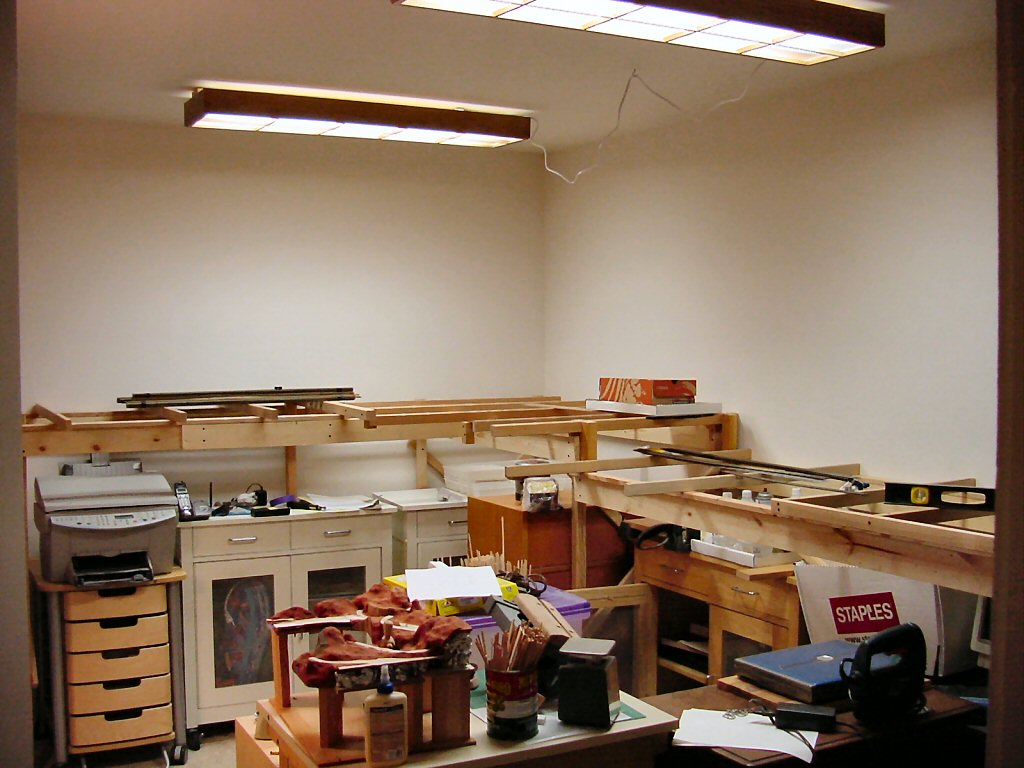
Looking at my model building workbench I think that time has come.
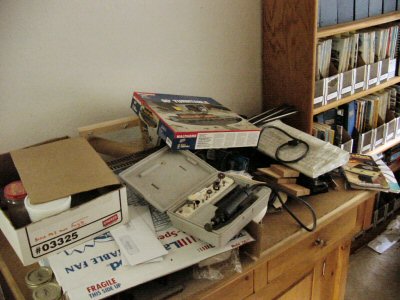
I’ve been having a hard time getting next steps done on the layout and it occurs to me that I’ve hit the point where I actually need to do some model building: turnouts, the turntable, all the bridges. You may have heard of the one-square-foot rule which says that no matter how large the workbench, most busy workbenches only have one square foot of clear space where the work happens but there’s clearly a bit of a problem here.
Wed 1 Feb 2006
I had a co-worker ask the other day what was a good way to get started in model railroading. The question brought me up short – not because it was a bad question but because I found I had a hard time answering it.
I’ve always been interested in models in general and model trains in particular. I’ve subscribed to Model Railroader and The Narrow Gauge & Shortline Gazette since the mid 70′s (and I still have all of them plus extras I’ve bought over the years). Over that time I built a lot of models and a couple model railroads.
My “start” was so long ago I hadn’t ever thought how one would get started. However, my friend’s question is a good one so, putting on my project manager’s hat, I’ve been thinking about what is a good introductory process.
Step One: Visual Brainstorm
Model railroading is a strongly visual experience so I think the first step is to collect images of model and real railroads and other scenes that you like. For many people, this is simply a matter of collecting issues of magazines like Model Railroader and making a list of photos and articles.
I have many books and magazines and I go through them and put post-its in them to mark photos or articles that I find interesting. All the photos and articles (and sketches I’ve made) become to input for the “brainstorm.” I then use a digital camera or scanner and make a huge series of images that represent all the visual elements I would love to see on my model railroad.
For the beginner, this exploratory process is about learning what kind of trains and models you find the most interesting. Modern container trains? Old time narrow gauge? British trains from the 1920’s? Before you build anything I think you should look around and find out what kind of trains and scenes with trains excite you the most.
Step Two: Build Something
Now that you have an idea what you are most interested in: build a small layout. This can be simply buying a starter set and running it on the dining room table. Or make yourself a classic 4 x 8. Or even just make a model train diorama or micro-layout.
It’s really important to jump in and build something. Model railroading is a skill like swimming, carpentry, soccer, or computer programming. To really learn how to build, run, and maintain model trains you need to jump in and do it. Consider this first layout a pure learning experience. At this point I strongly feel doing is more important than doing it right or doing it wrong. Want a tunnel, do it. Want a bridge, do it.
Step Three: Do steps One and Two all over again.
Execution is the ruin of the perfect idea
By actually building something you will inevitably learn that you did some things in a way you wish you had not done, or had done better. No problem. Next time you will know better. Therefore, to move forward there must be a Next Time. If you think about it, this is great. Total Freedom. Start fresh. Many good bits from a previous layout can be recycled into the new layout.
For the stuff you no longer want: there’s the garbage can or there’s eBay.
Beginner Resources:
Magazines:
Magazines are probably the cheapest and best resources you can get for model railroading. I have about 22 linear feet of Model Railroaders alone. In combination with the on-line Model Train Magazine Index it is an invaluable resource. Once you find you like a magazine, building a back issues collection is simply an eBay auction away.
Model Railroader – getting sometimes spotty in quality but still worth it.
Railroad Model Craftsman – in the last few years the quality of this magazine has improved considerably and is arguably now better than Model Railroader.
Narrow Gauge & Shortline Gazette – great model building and advanced techniques.
There are many other magazines, mostly specializing on particular topics but for me these are the basics. A small list of other magazines is at RailMagazines.com
Books:
I find books secondary to magazines but I do have many model train books. I find it’s best to buy them as you see you have the need for information on a particular topic. I’m going to save a discussion of my book collection for a future posting.
Web resources:
Compared to the quality of magazines and books, model Railroading is not very well represented on the web yet but there are some key resources for anyone’s brainstorming phase:
Micro Layouts — perfect beginner projects and ideas.
Australian Narrow Gauge Web-Exhibition – love this site. Not exactly what I build but great photos and ideas.