Other Models


There has been a wave of Warhammer 40K modeling and game playing sweeping my place of employment lately. A common scale is what is called “25 mm” and is taken as 1:72 scale.

I think the methods routine in this modeling genre can be really effective for HO modeling. I found a horse that no one wanted and decided to do some painting.

Step four - all done

I went for a softer, to my eye, more realistic look. Here’s how I did it:

First I assembled and primed the model.

step one: primer

The detail in the castings is really impressive.

step one: primer

Next I roughed in the main colors.

Step two: rough broad colors

I detailed the edges and details like the harness. I used a dark wash of Burnt Umber followed by highlighting with white or light brown (depending on what I was edging).

Picture 001

Lastly, I used Dullcote and Polly S “Dust” to flatten out the shine.

This is not a big model

I did the eyes with a black ball-point pen.

Picture 036

This was really fun and took me about two hours not counting drying time.

I haven’t written much lately but I’ve been building a LOT. As I mentioned in July, We moved to a new house with a workshop . The plan was to use the shop space for the layout (of course) and a workshop space for model building.

So much for plans. We’ve started teaching “build stuff” workshops on weekends for
teenagers/young adults. We started with a three month class meeting for four hours on Saturdays. That filled so we added a Sunday section. The projects are really great and since part of what the kids are doing will be blogging about their work I’ll just show a sample of what they are doing and I’ll provide a link to their blogs once they are up.

Ian is building an Airbus 380 in 1/144 scale.

Picture 004

Nick is building a micro layout in HO with a bridge and tunnel – the only model railroad project!

Picture 027

Sarah is building a fantasy diorama of a bed flying over a city at night.

Picture 059

Peter is building a super complex Gundam kit with a bagillion pieces.

Picture 012

Phoebe is making a ¾” scale room box of a Vamire’s Steampunk style home.

Picture 055

We’re all taking turns practicing airbrush and other painting techniques on my old model of the Millennium Falcon.

Millennium Falcon model

Kris is building a 1/48 scale tank for a diorama.

Picture 007

Not pictured: Reggie’s free-lanced 12” Globe, Devon’s Manga stage model and Steven’s world of eraser people.

It’s a huge amount of work but also tremendous fun.

Model ship workshop

I work hard at being a member of too many model groups. Probably as a means of making sure I never get anything done. One of my favorite groups that I don’t have time for is the Hyde Street Model Shipwrights. I love models of all kinds and I’ve found that model ship clubs, on average, are easier social groups than most model train groups. That’s just been my experience, your mileage may vary.

One of my favorite museums when I was growing up in San Francisco was the wonderful Art Deco SF Maritime museum near Fisherman’s Wharf, every room bursting with model ships and ship artifacts.

Museum_bldg

When I first joined the Hyde Street Model Shipwrights we met in the basement of that museum. However, for the last several years the museum building has been under renovation so we’ve set up a small shop in a cabin on the main deck of the old Northwestern Pacific ferry boat Eureka (National Park Service , Wikipedia). There are usually club members at the shop every Saturday.

What’s all this have to do with trains? Note that Eureka was owned by the railroad I model and started its life as the Ukiah, a combination passenger, wagon/automobile, and railroad car ferry. That’s no more than one degree of separation.

Last weekend Paul, a club member who is also a neighbor in Mill Valley, hosted the annual club picnic. Paul builds model ships on commission and has also published numerous articles on model ship building. I took the opportunity to take some pictures of Paul’s shop which he has made inside his one-car garage.

Model ship workshop

Paul divides his workspace into several tool-specific stations with several general-purpose stations where model ships take shape. In this way he keeps several projects in construction concurrently.

Model ship workshop

Above are two general stations, each with a ship model underway.

Model ship workshop

A 1:24 scale model nearing completion. This was almost four feet long overall.

Model ship workshop

Model ship workshop

A small 1:64 scale model that’s been a personal project of Paul’s for some time.

Model ship workshop

At this bench Paul makes all the little fittings for his model ships.

Model ship workshop

A half-model Paul is building on commission. This will be mounted on a wall in the owner’s home.

The good news is that my big project at work – DARPA RealWorld successfully hit its two-year midpoint milestone. RealWorld is a $40 million, 4-year project to build a framework to allow war fighters the capability to rapidly create mission rehearsal “games” leveraging commercial computer game technology. My company, Total Immersion, is under contract to DARPA to build RealWorld. The bad news has been that I’ve been so slammed working on it that all modeling work ground to a halt.

More bad news is that I’m moving next month which pushes out resuming model work a bit more.

The good news is that I’m moving to a bigger place with a large external building I can use for a shop/modeling studio! I’m really excited about it.

Now I get to see how “portable” my San Juan Central really is.

Picture 076

Ok, I’m still not getting to my trains. I had this pre-painted 1:25 scale AMT 1962 Pontiac Catalina model that I had started and I needed to get it off my workbench. I had started it thinking “Prepainted, it will take no time to build.” Ugh.

The paint job provided was quite good but because all the parts were painted I had to use Crazyglue for all assembly. The model also has serious fit problems in the front end.

If you can’t make it perfect, what to do? Make it completely imperfect. I decided to weather the car as if it had severe flood damage and I came up with an extremely lazy way to do it. I dunked the whole car in diluted latex paint.

First I took a large plastic food storage container large enough to place the car inside.

Picture 034

Next I got my special “mud” latext paint and poured enough to cover the bottom about a quarter inch deep. This color is basically Olive Drab.

Picture 035

I filled up the container with water up to the level I wanted the car submerged and stirred up the diluted paint with a stick.

Picture 037

Each evening over the next week I’d scoop up some of the “muddy water” and baste the car, wetting it completely. At the end of the week I pulled the car out and let it dry.

Picture 067

Picture 068

Picture 065

Picture 004

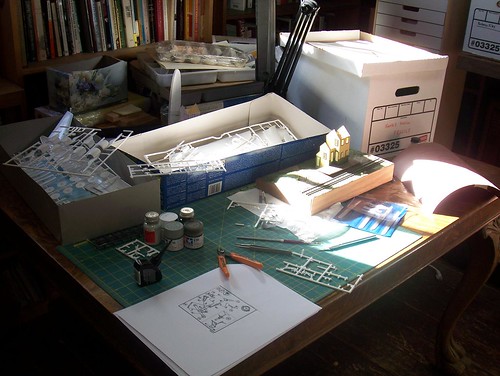
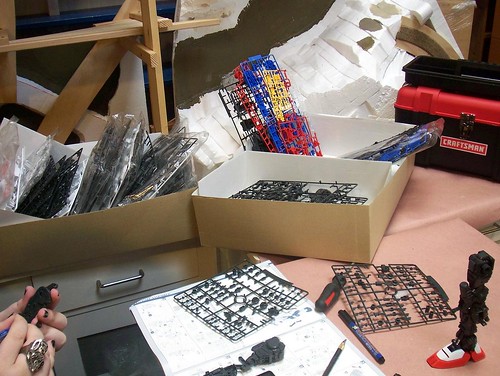
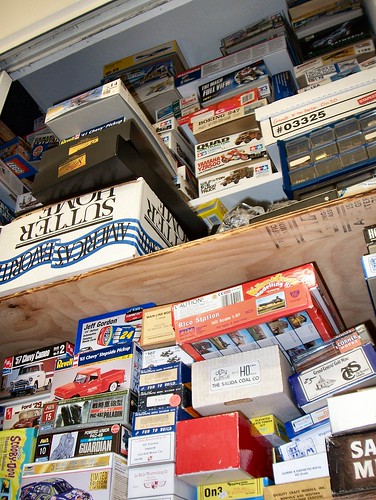
I’ve been diverted from making headway on the train layout for a couple months by work and other responsibilities. One recent rainy day I was looking at my model building backlog – a.k.a. my closet full of un-built kits:

Picture 014

I thought it would be good for my morale to just crank something out as long as it was something I could complete within a weekend plus a week of evenings (about 8-10 hours total build time).

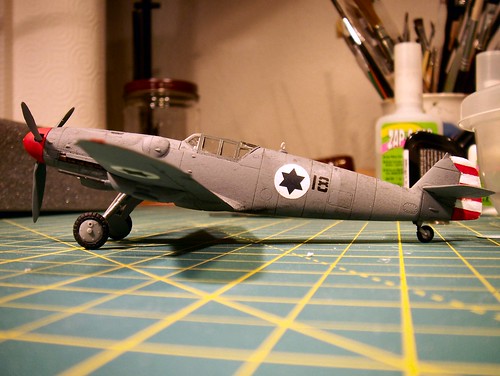
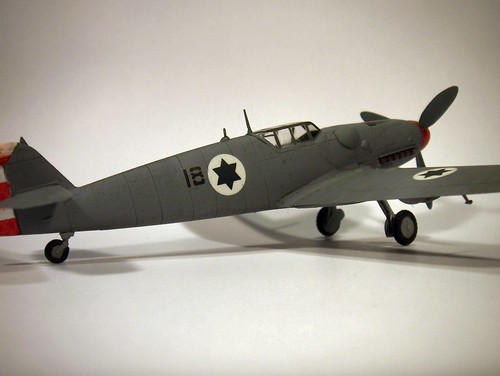
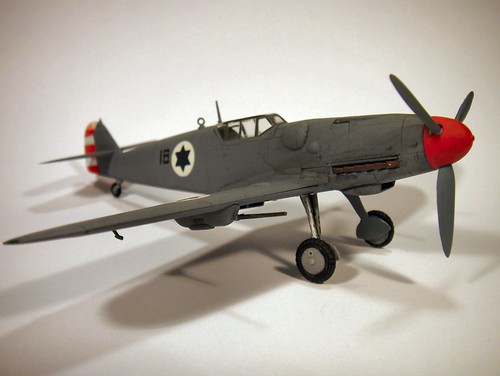
I chose a 1/72 scale Hasegawa kit of a Messerschmitt Bf109G-6 that I’ve had for years. I find myself incapable of building a kit straight from the box. I remember reading that the early Israeli Air Force flew ME-109s alongside Spitfires and Mustangs – often against Egyptian Spitfires. I had some Israeli A-4 Skyhawk decals I could use so I was all set.

If you’re a train modeler you may be asking “why is this a useful exercise?” I think the answer is that all model building projects contain common elements: research, construction, finishing, photography, self-critique. There are skills common to all successful miniature projects.

I was also trying to overcome a crisis in inertia and modeling motivation…

Research

A bit of digging showed that the plane the Israelis flew was not an ME-109 but an Avia S-199. These were produced after WWII by Czech builder Avia mating available ME-109 airframes with available Junkers Jumo-211 engines. The result was an inexpensive but unforgiving airplane that the Israelis used but retired as soon as they could.

References:

Wikipedia – Avia S-199

101 Squadron, Israel’s first fighter squadron

Rudy Augarten – avenging the Holocaust.

Construction

It was clear my model was going to be incorrect in numerous details but I was set on completing the model anyway. It had been so long since I’ve done an airplane model I had to look up the recommended construction sequence. The main trick is building enough to be ready to paint and decal the body without having too many small detail parts in your way. Fit was generally excellent for this model and I did only a minimum of seam filling and sanding work.

Finishing

I avoided using my airbrush since I do not currently have all the infrastructure in place to use it. I used a glossy gray spray paint and matching acrylic (Tamyia) paint to do the main finishing. I added decals to the glossy finish and sealed them with clear acrylic paint. The entire model was covered with a couple coats of matte finish and weathered with black acrylic paint diluted to a thin wash. This wash pooled into the panel lines and highlighted them nicely.

I installed the canopy fairly early but kept it covered with masking tape.
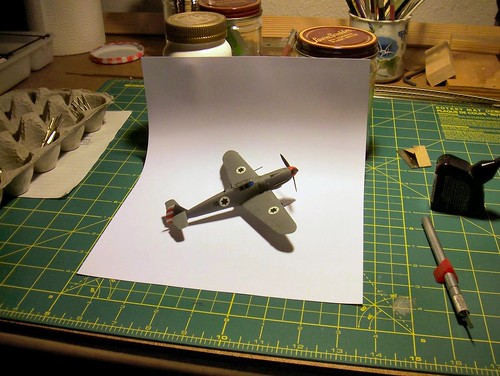
Picture 043

Photos

1/72 is a small scale in which to build a relatively small plane. The finished plane is only 5 inches long. For a model built for fun the main reason to take photographs (besides being able to share my work with the Internet) is to look for things I did right or wrong. Photos are harsh critics and see teeny details far better than my increasingly aging eyes!

Picture 015

Picture 014

Picture 013

Self-critique

Detail errors I don’t really care about: I want to get my list of errors in before I get flamed by the aerial equivalent of the rivet-counters.

The air scoop is on the wrong side of the plane for the Jumo engine. The shape of the nose near the prop is also wrong for the Jumo. The canopy on my model is the old “Galland” birdcage canopy whereas the Avias had a later model canopy with far fewer frame bars. The main wheel hubs are wrong and the markings are a fantasy I made up. I like what I built so this is really my list of “known issues that I’m not super worried about”

What do I wish I had done better?

The black wash worked great but the panel lines on the wing do not show as well as those on the fuselage.

The rudder stripes look like they were painted with a broom. I made the mistake of installing the horizontal stabilizers onto the tail before painting the stripes.

The cockpit is so dark inside it is impossible to see any details through the canopy.
Picture 046-detail

With contrast enhancement:

picture46-detail

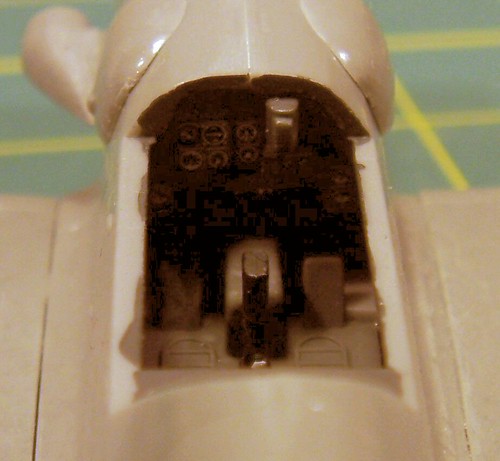
The decal “18” on the left side shows air bubble “silvering”
Picture 006

The landing gear are not aligned right and this is after resetting them straighter three times!

Sketching is a really important part of model building and design. Some of my best ideas come to me while killing time in meetings or classes that are not keeping or needing my attention. Sad but true.

This is a boat I sketched for a modeling idea about a small river steamer. I have a 16” hull under construction and this is definitely my favorite superstructure outline yet. I’ll use 1:35 scale and take advantage of all the military miniatures details available.

This design is somewhat inspired by the MARIN.

A very long seminar was a good place to do some drawings of my waterfront town of Tiburbon. Here is a rough idea about the ferryboat loading trestle.

This drawing is hard to read but if you compare to the real location on the layout:

An early drawing of Crazy Horse Canyon bridge.

This bridge and canyon has been worrying me but this initial sketch let me establish how things would look. I made a more detailed drawing in this post and determined I would only need three full towers instead of the four shown above.

I changed the shape of the mountain significantly to be more like the planning model.

Sometimes I do a full-on high quality drawing like this one of an NWP picnic car based on a photo.

The final drawing ends up a composite of the pencil drawing and digital drawing since I continue the finer detailing on my computer using a Wacom stylus pad.

This is an idea of a typical building in Tiburbon. Since there is almost no dry land beyond the roadway the buildings will all be built over the water.

In the course of building a detailed layout, which takes professionals months and amateurs years, you can forget that there are easy and fun projects that you can knock out in a few hours.

My son is interested in trains but right now he likes cars better. So far his feedback about the layout has been “where are the freeways?”

Last time we were in a hobby shop he wanted a school bus — but not a yellow one, a white one. He ended up picking a Trident #90076 ($14.99!!) School Bus. They are really good looking models. I bought two.

I pulled off the front and rear bumpers which are mounted by long pegs and these also serve to hold the body onto the chassis. I painted the body with silver since white will not cover school bus orange easily. Next I painted the body a satin white and that’s it.

I have since mounted the clear red warning lights and I picked out the turn signals and running lights with Tamyia Clear Red and Clear Orange but my son is busy playing with it now so I’ll have to add pictures later.

Ok: got a hold of the bus for a nanosecond.

Next Page »