Building an HOn3 La Belle Pacific Coast boxcar craftsman kit
This is a web page that I’m moving from my old static site to within my blog.
Updated 8/06/05
Introduction
Like many modelers I have a closet full of un-built kits waiting for the day “when I have time.” It’s finally dawning on me that I really would be happier (and get more done) if I just got up and started building these things – even if the goal is just to make room to even buy MORE un-built kits.
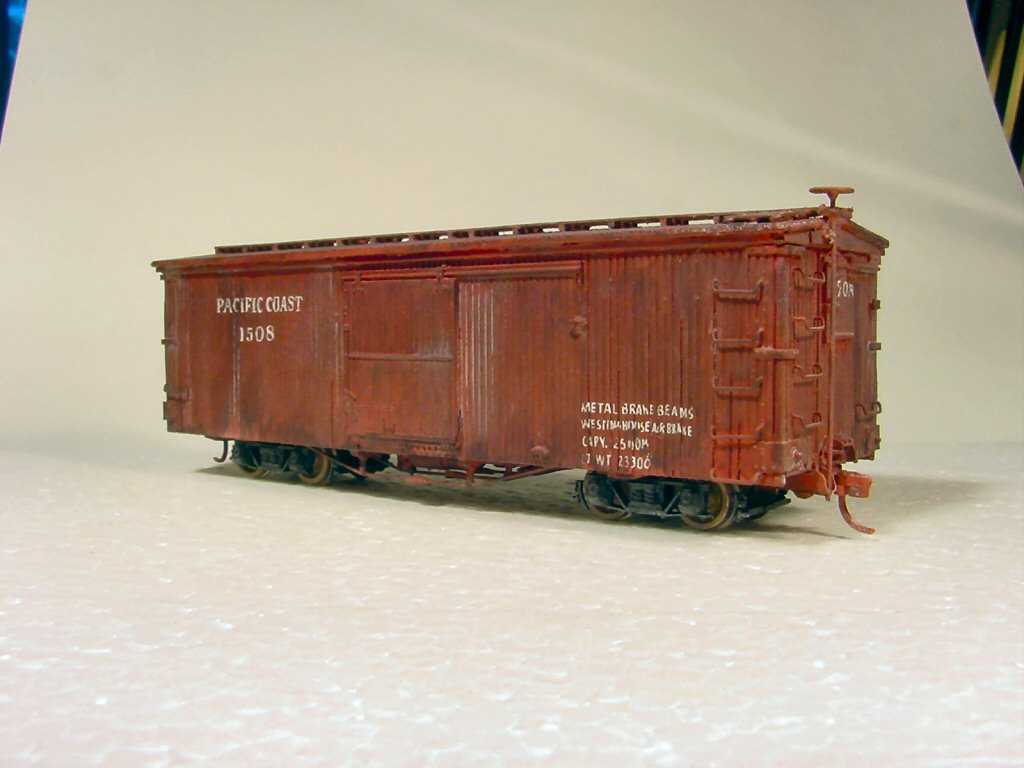
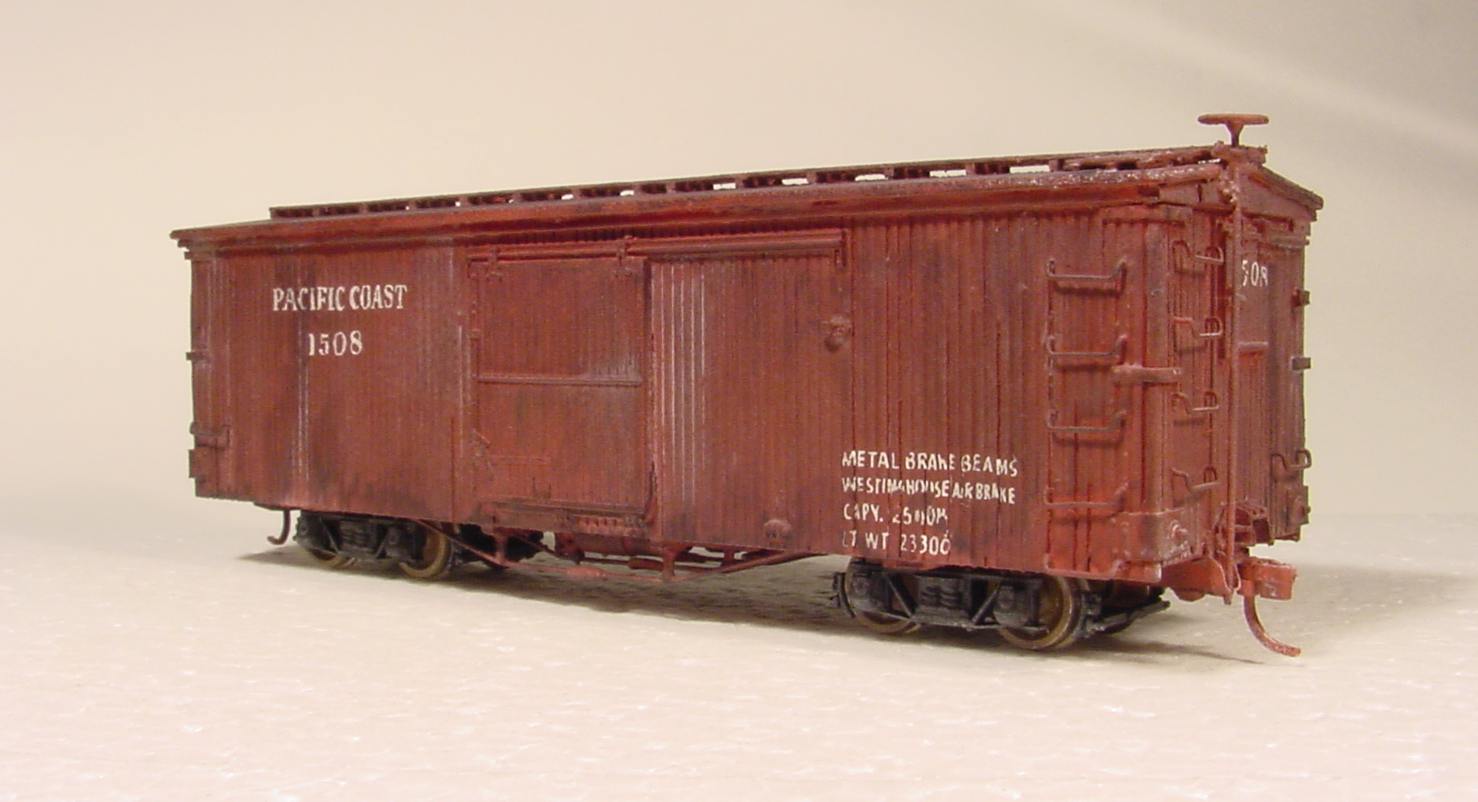
This is a journal of how I built a particular kit, La Belle kit #30 Pacific Coast Box Car in HOn3.
I must emphasize that this documents how I DID IT and not necessarily how I SHOULD HAVE done it. When 20/20 hindsight allows I’ll comment on better ways to do things that did not go as well as possible. Over time I am also confident that the great Internet Model Railroading community will email me many useful (and probably a some useless) tips and if I like them I will add them into this article “when I have time.”
My hope is that this article is as useful as I have found Jim Vail’s excellent Getting Them Running series in the Narrow Gauge & Short Line Gazette. But the audience for this article is really me myself: a year or so down the road I cannot always remember all the cool tricks (or mistakes!) I made building something and I find it really helps if I write them down. I hope you find this helpful too.�
Step 1: Reference Materials
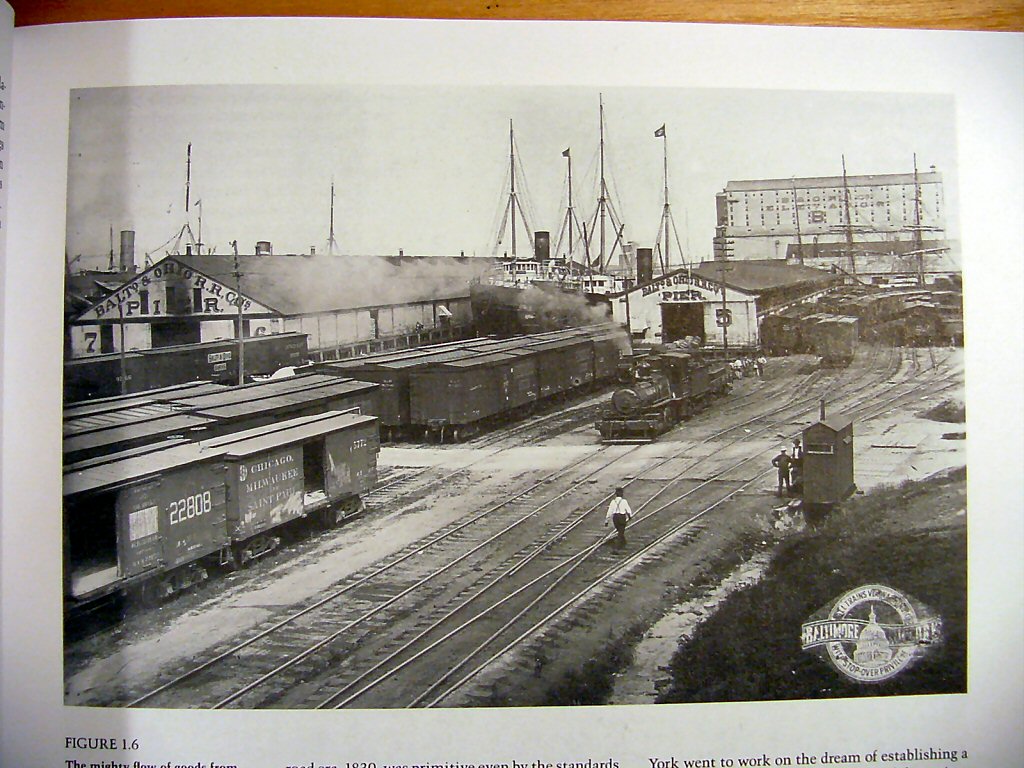
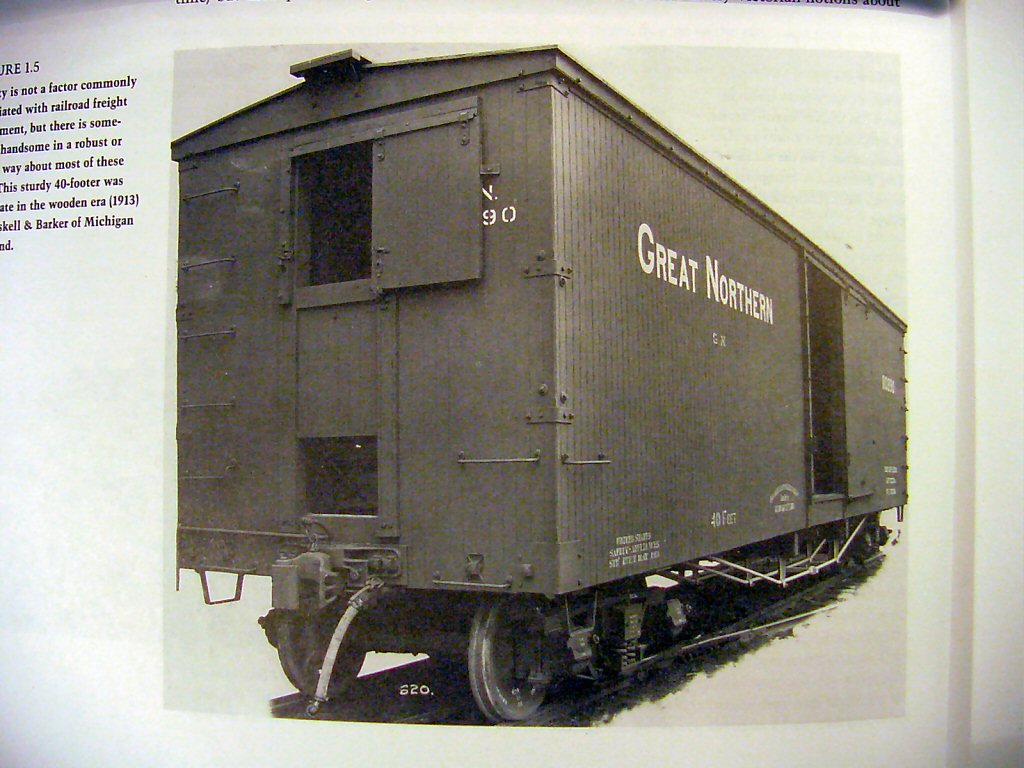
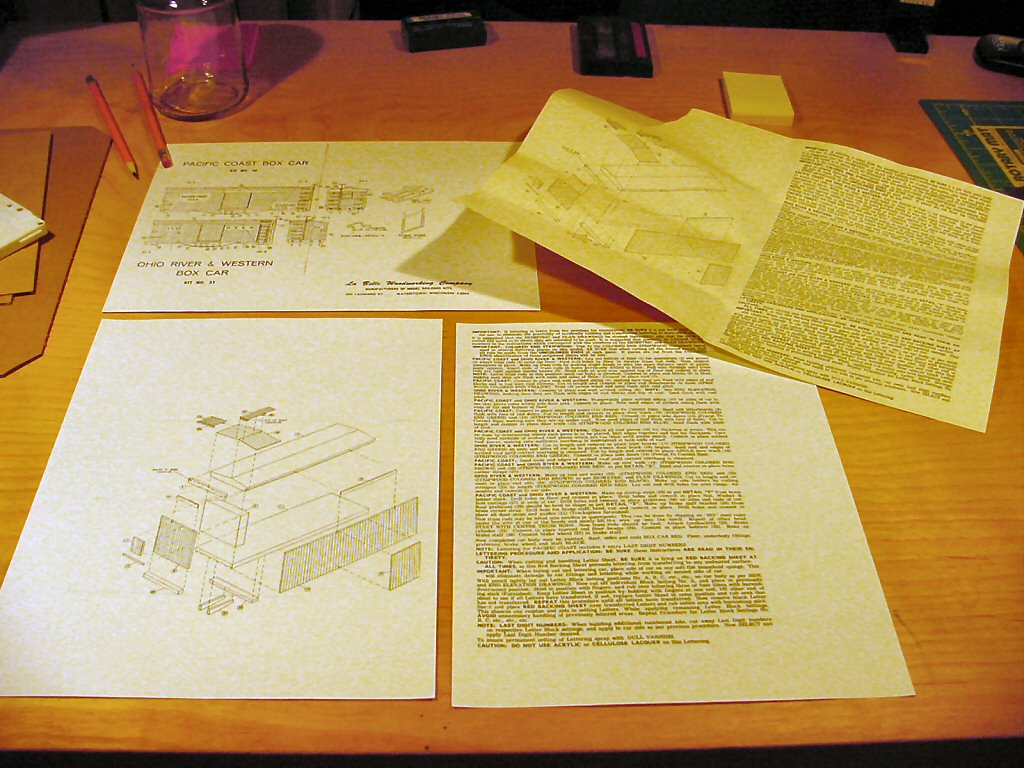
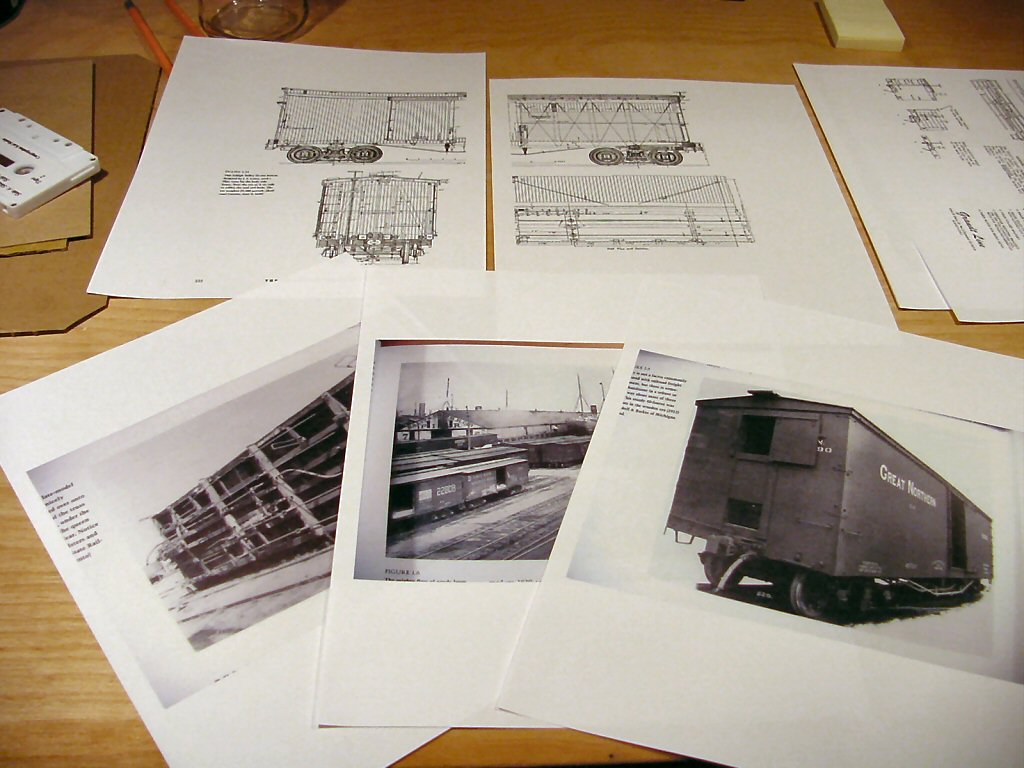
I find I like to really firmly plant in my head what the model will look like. We’re building a narrow gauge boxcar so I looked for pictures of wooden cars. I’m a long time Narrow Gauge & Short Line Gazette subscriber and there are lots of good pictures there. I also made some photocopies of pages from White’s The American Railroad Freight Car to keep on my workbench as I build.

Step 2: Photocopy the Instructions
As we all know: the workbench is a dangerous place for papers (and sometimes even models!). Between stains, paints, razor knives, coffee, elbows, any number of Bad Things can happen. I think it’s a good idea to photocopy all the instruction sheets, plans, and template sheets. File the originals somewhere safe. This also gives you nice flat sheets to work from. I also clip all these papers into a clipboard to keep them together.
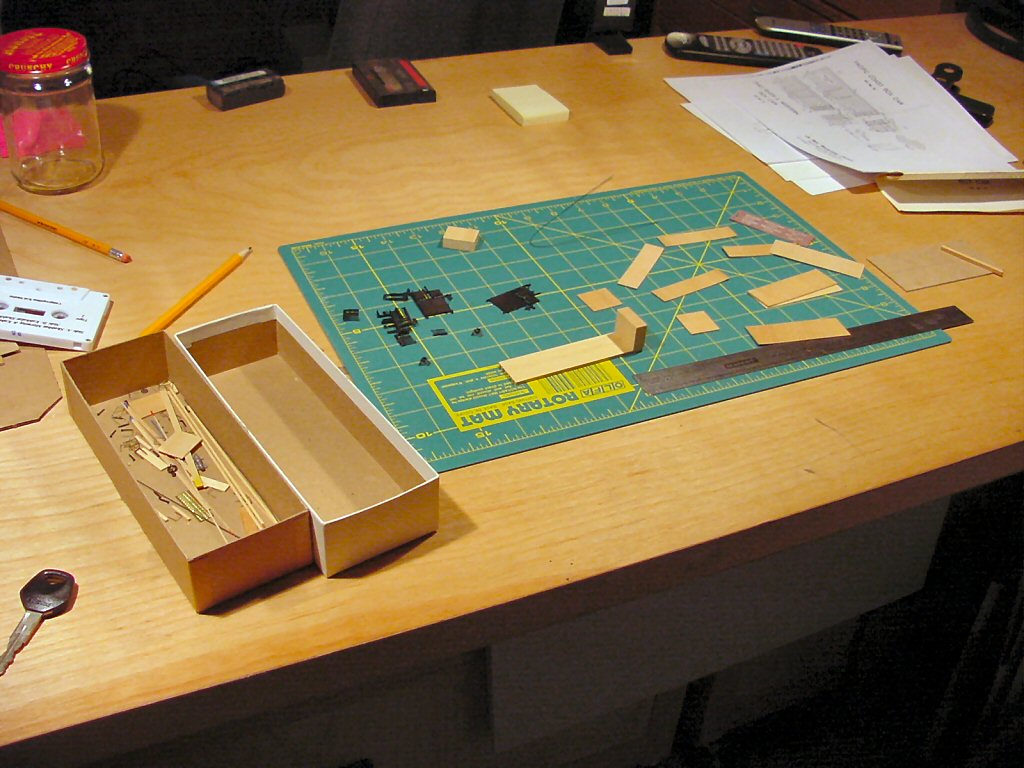
Step 3: Inventory the Parts & Select Add-ons and Detail parts
This is a good time to check that you have everything to build the kit. I tend to be a very busy person with hundreds of other things going on. If I’m missing something in the kit or even if I’m short of Boxcar Red to finish the model – I want to know now. This article is about GETTING THINGS BUILT so I’m going to suggest something maybe radical: If you are missing anything more than the most trivial easy to find item, SET THE KIT ASIDE and pick another that you are better prepared to build NOW.
If you are short of something do yourself a favor: mark the kit you set aside with a note or post-it saying what it needs and set up a kit RIP track. Every now and then I go to my kit RIP track and note what the kits there need and make it a one or two-evening project to collect, buy, or order whatever is needed to get kits back into the “active – ready to build NOW” queue.
RIP Track means “Repair In Place” and was a designated spur where cars needing minor repair would be spotted and fixed as opposed to sending them down to a car shop for major repairs.
Anyway, I had trucks (Grandt Line D&RG 3’7” wheelbase – the wrong trucks it turn out…), couplers (I use N-scale), paint, and I had a Grandt Line #5001 D&RGW Box Car Hardware set I wanted to use to dress up my kit.
| 1 | La Belle Woodworking Company Kit No. 30, Pacific Coast Box Car | |
| 1 | pr | Grandt Line #5111 HOn3 D&RG 3’7” wheelbase trucks |
| 1 | Grandt Line #5001 D&RGW Box Car Hardware set | |
| 1 | pr | Kadee (MicroTrains) N-scale couplers |
| Paints: | Bulls Eye Shellac, Rust-oleum Primer, Testor’s Dullcote, PollyS Boxcar Red, Grimy Black, Rail Brown |
|
| Weathering: | Testor’s Dullcote, PollyS Dust, ink-alcohol mix | |
The right trucks: it turns out that 4′ 6″ wheelbase trucks would have been better for this car since the bolsters are set farther in from the ends of the car to make the 3′ 6″ wheelbase trucks look right.
Step 4: Prepare Floor for Bolsters
Actual Construction!
Okay, time to really get started. La Belle kits are classics but they are not perfect. I read the Instructions (you READ the instructions, right?) and made two immediate changes:
1. Don’t use those wire truss rods – use monofilament nylon line. Save the wire, however…
2. Mark and install the bolsters early, not near the end of the project since the bolster location really locates the truss rods and brake hardware. Hindsight Alert: I’d now use Kadee’s excellent #717 HOn3 4’-6” wheelbase sprung trucks and these INCLUDE steel bolster castings.
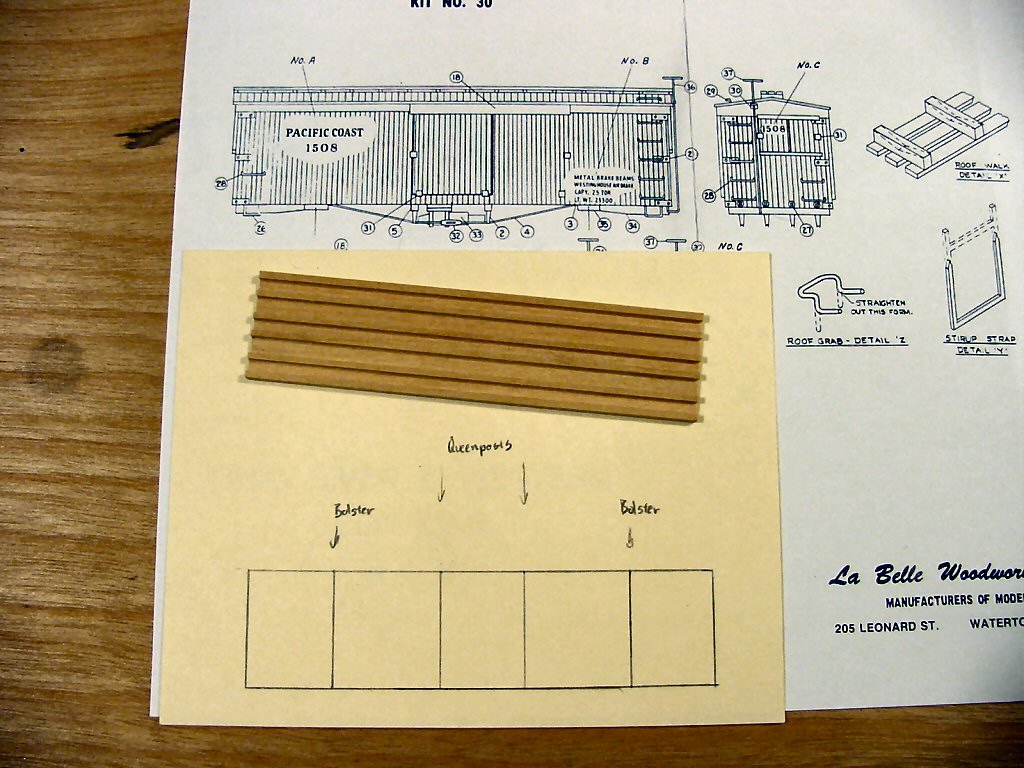
First I created a template by tracing the shape of the floor/frame piece onto a sheet of manila paper cut from a file folder.
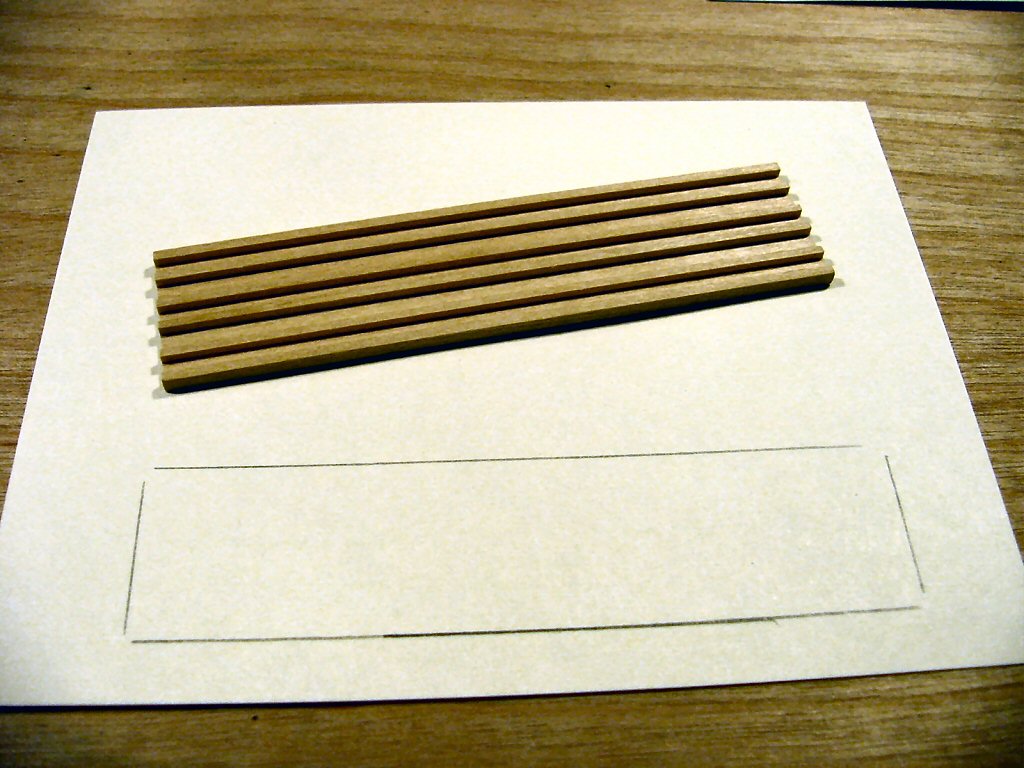
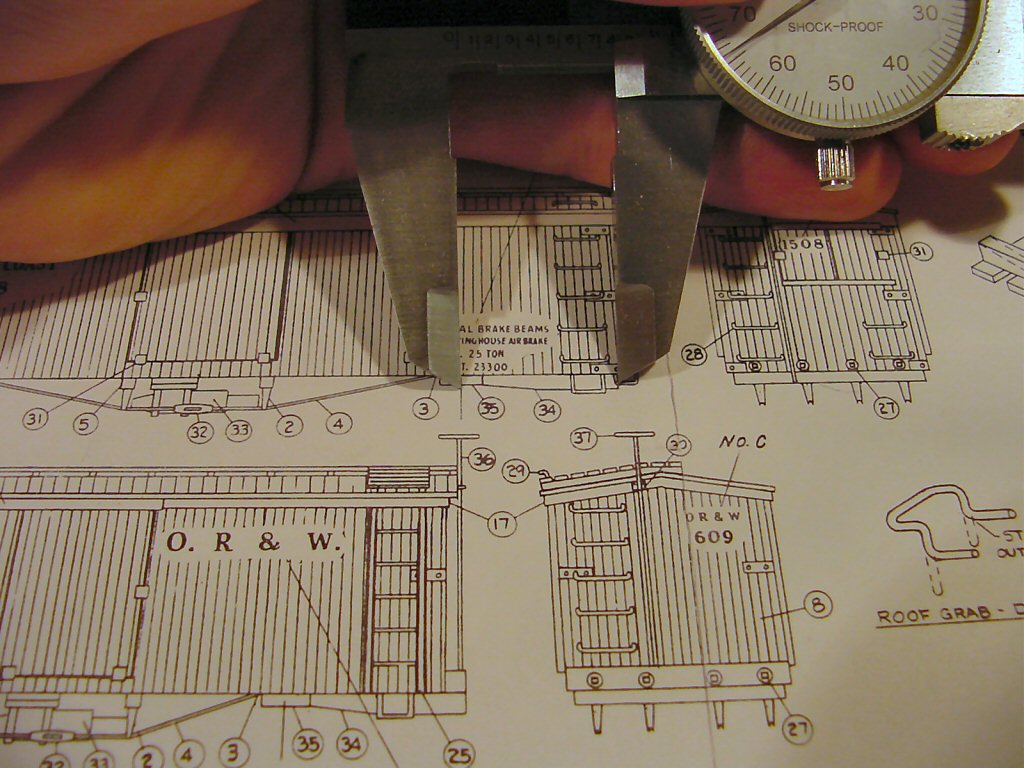
Using a caliper I measured the location of the bolsters and queen posts on the plan and transferred their location centerlines onto the template.
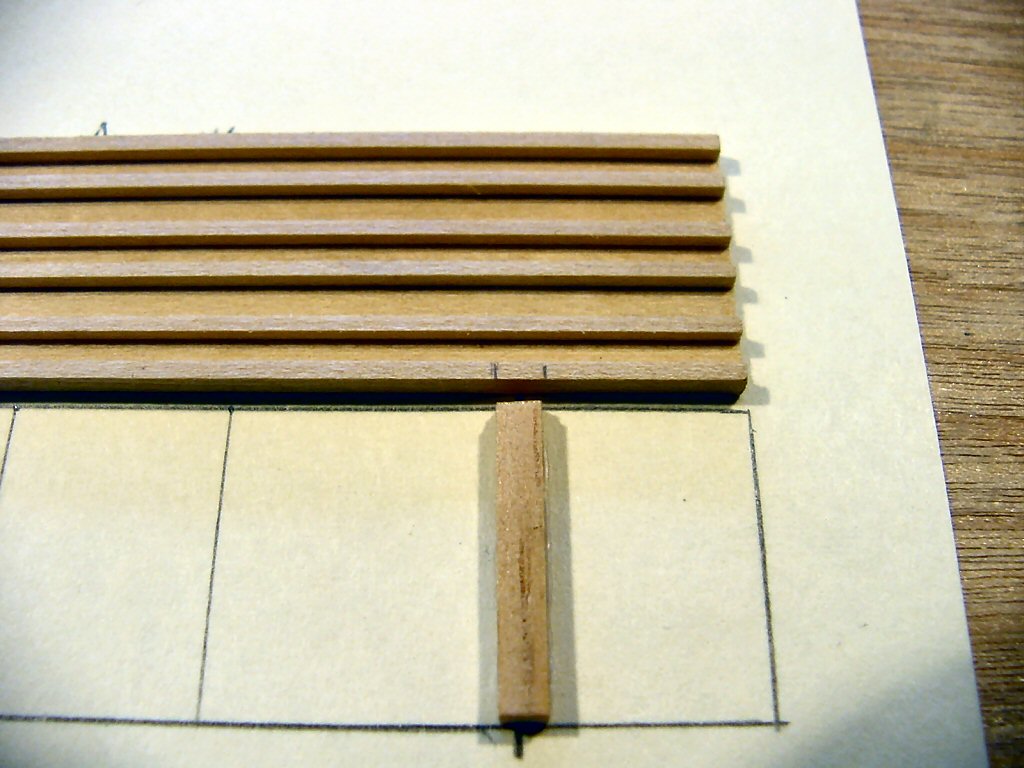
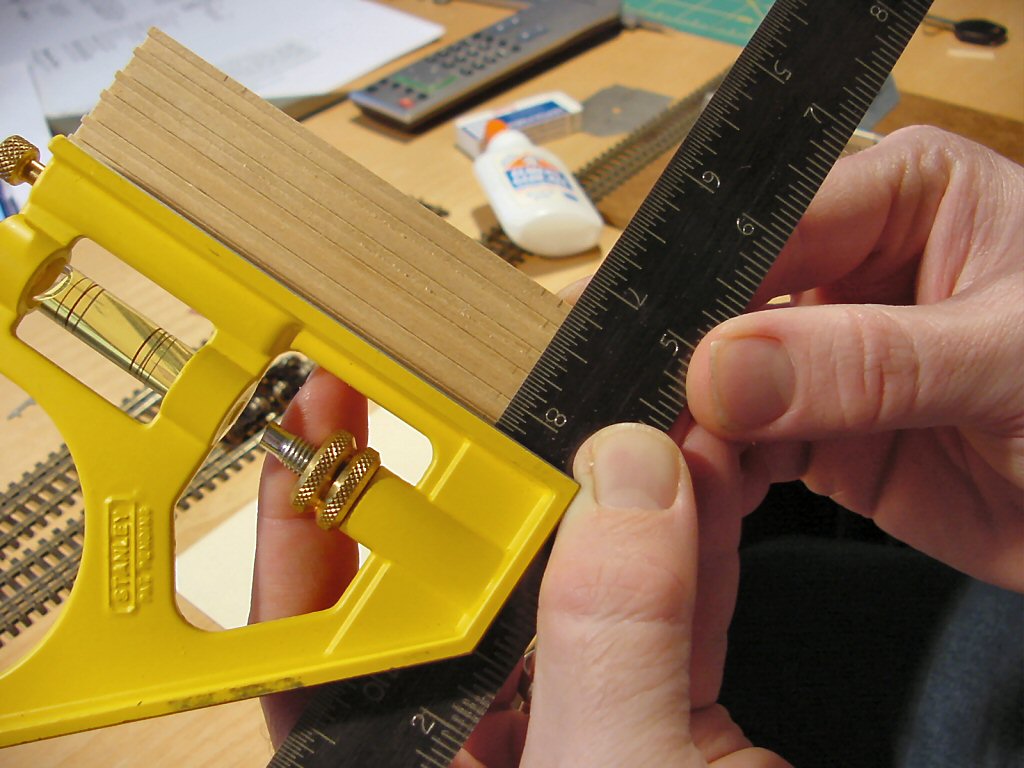
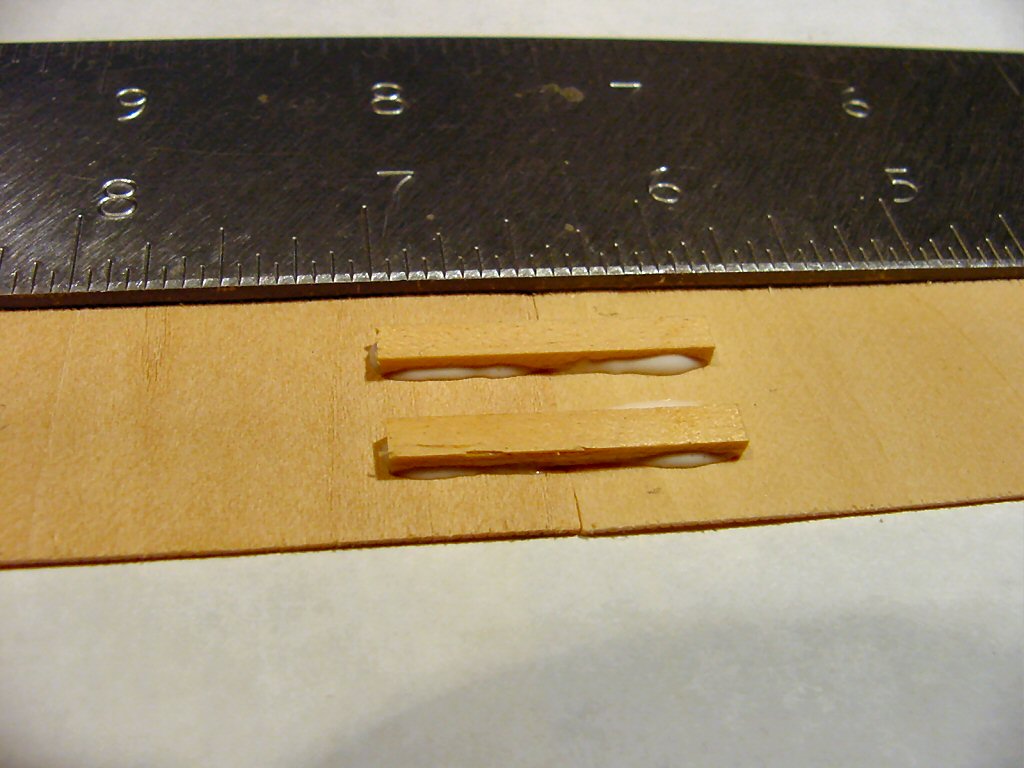
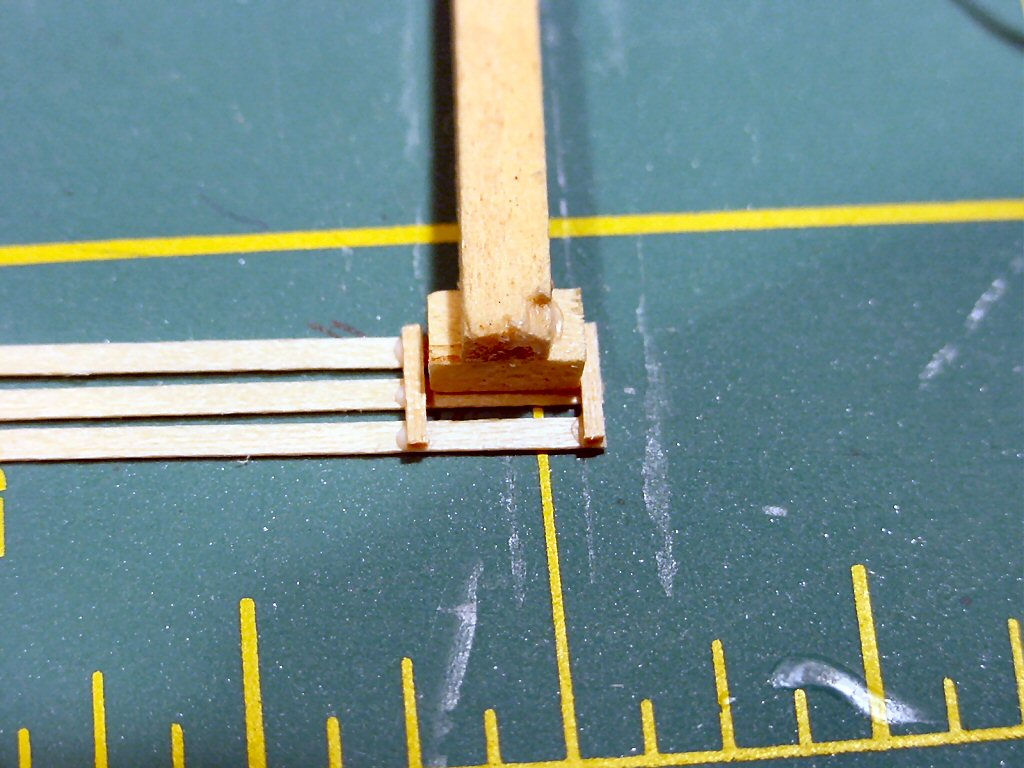
Setting the actual bolster piece on the template I marked its width onto the floor piece and used a machinist’s square to mark across the all the floor sills.
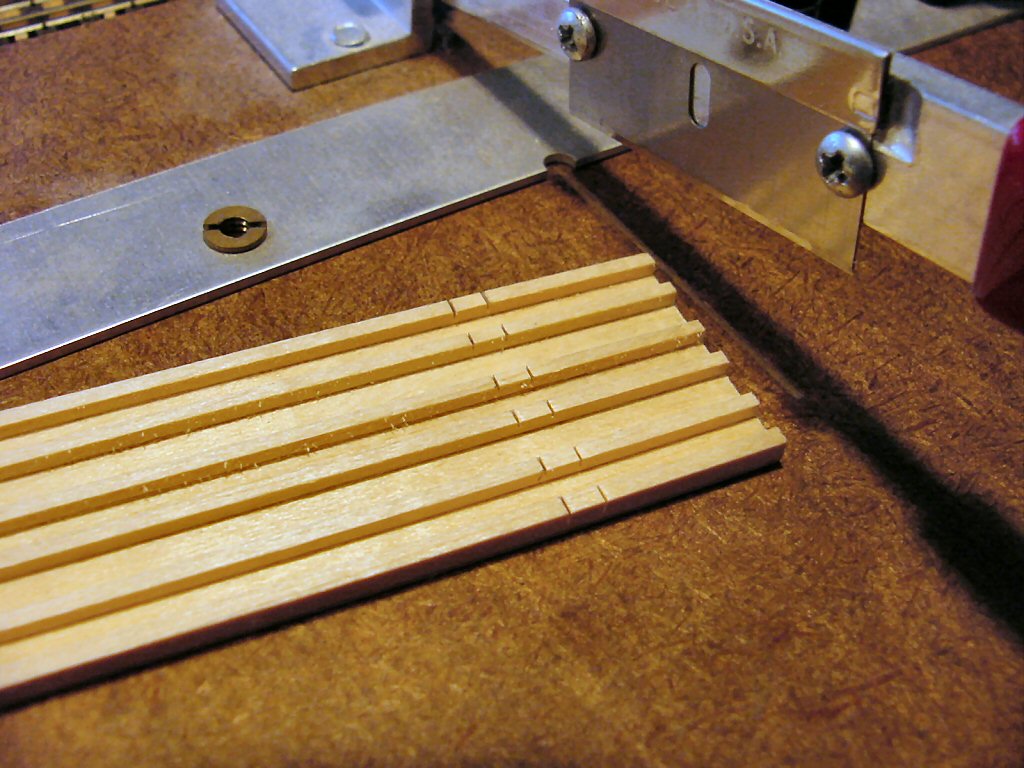
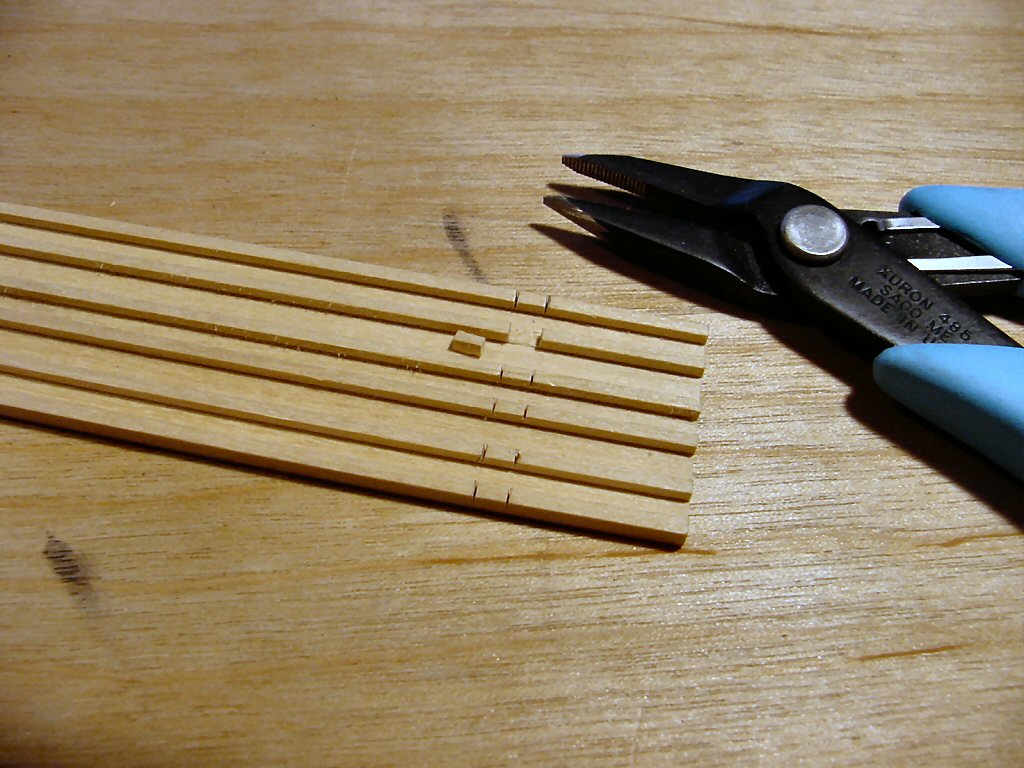
Using a Northwest Short Line Chopper I cut into the sills at the marks down to the floor level. Then I notched the sills by breaking off the waste between the cuts with a small pair of pliers. Clean up with a razor knife and file smooth.
** NOW drill holes through the floor for the truss rods ** (Install later…)
Step 5: Queen Posts and Brake Rigging
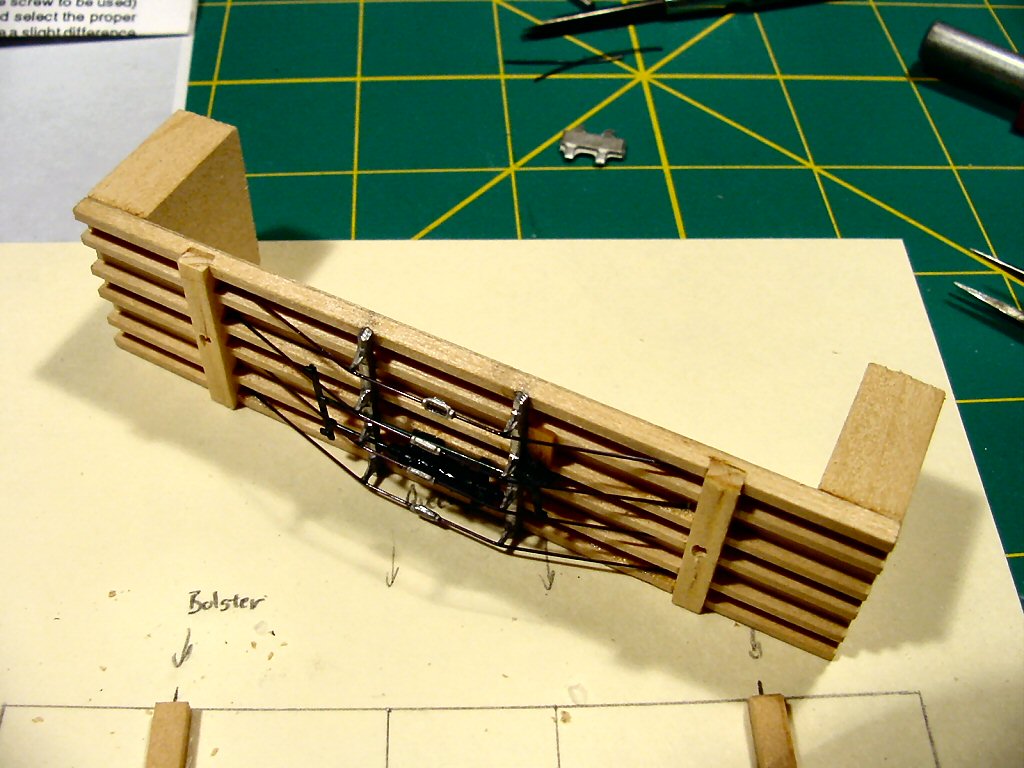
Transfering the queenpost locations from my template onto my actual floor piece I glue down the queen posts using 5-minute epoxy. I immediately add the Grandt Line brake cylinder assembly from Box Car Hardware kit also glued with the epoxy.
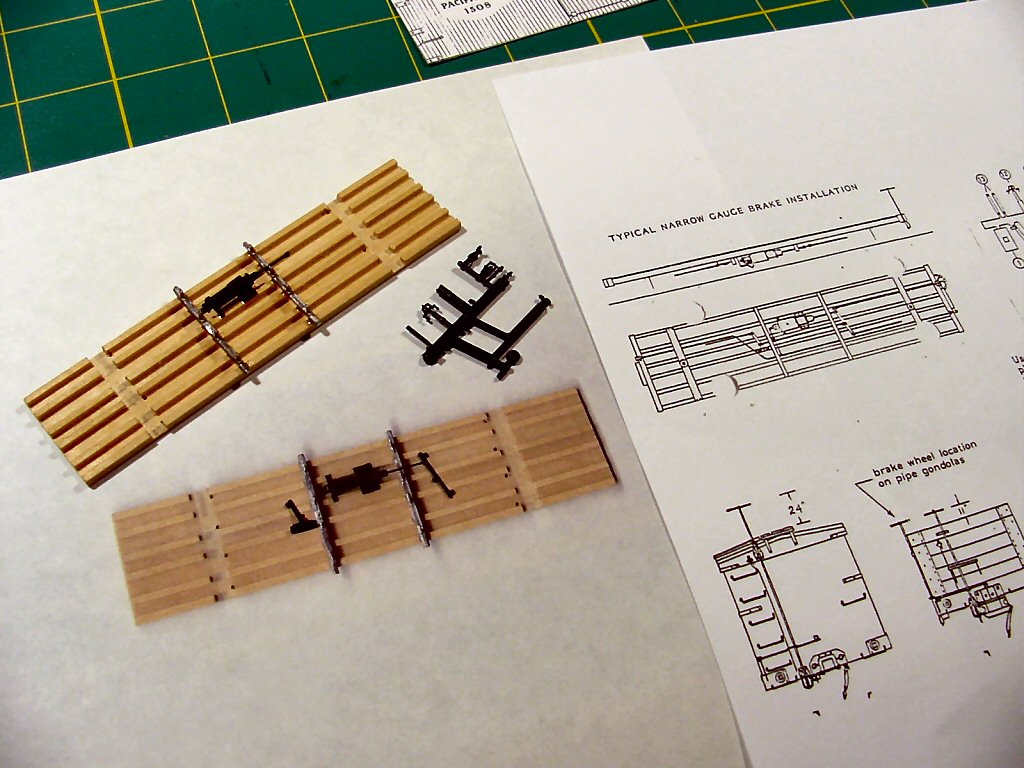
I then photocopied at 100% the result so I could lay out the brake rigging on a flat surface before assembling it all on the real frame. This made it easy to measure the size of the wire rods I had to cut. I used the wire truss-rod material provided with the La Belle kit for brake rods.
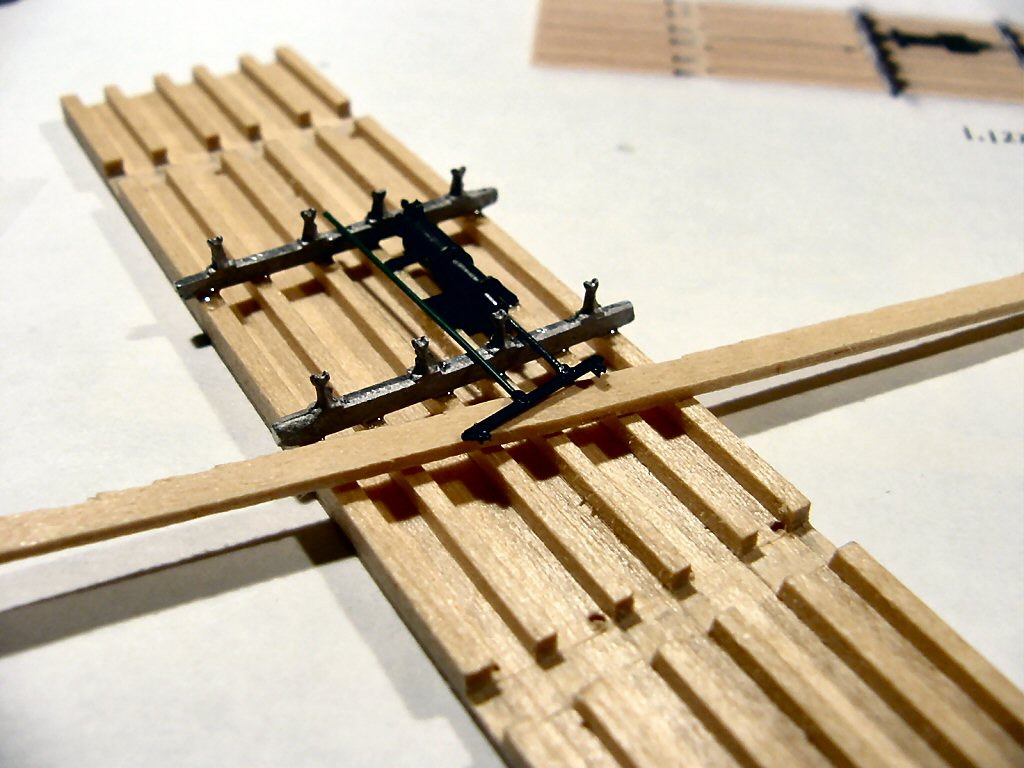
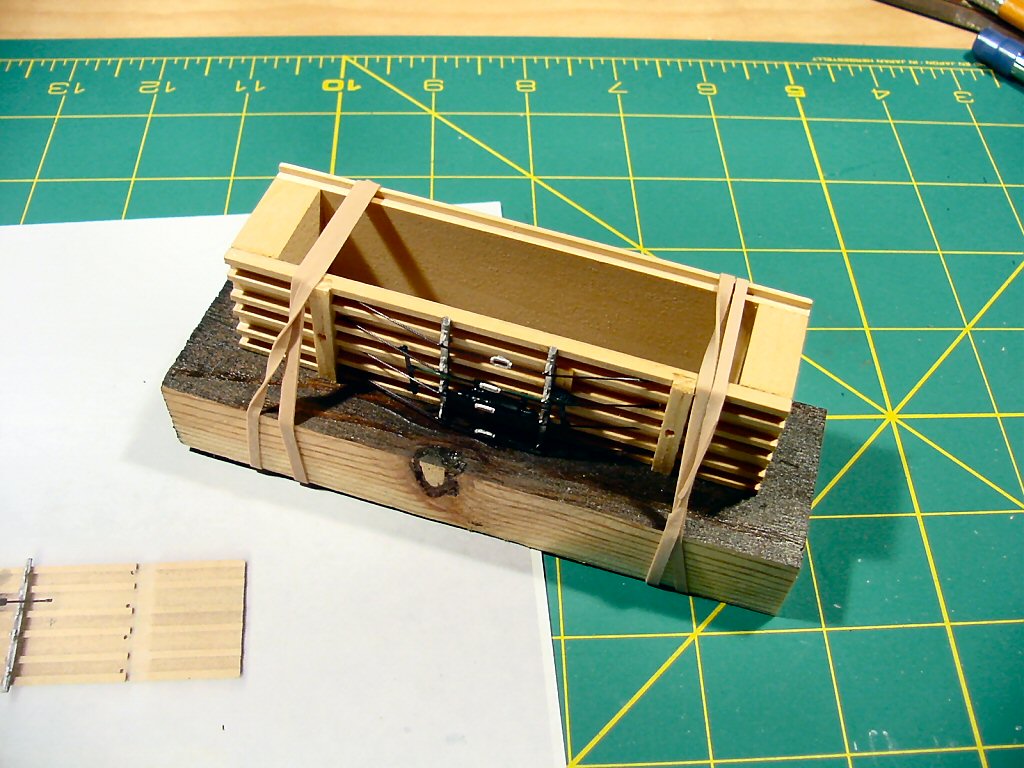
Using gap-filling ACC I glued up the brake rigging.
Step 6: Truss Rods
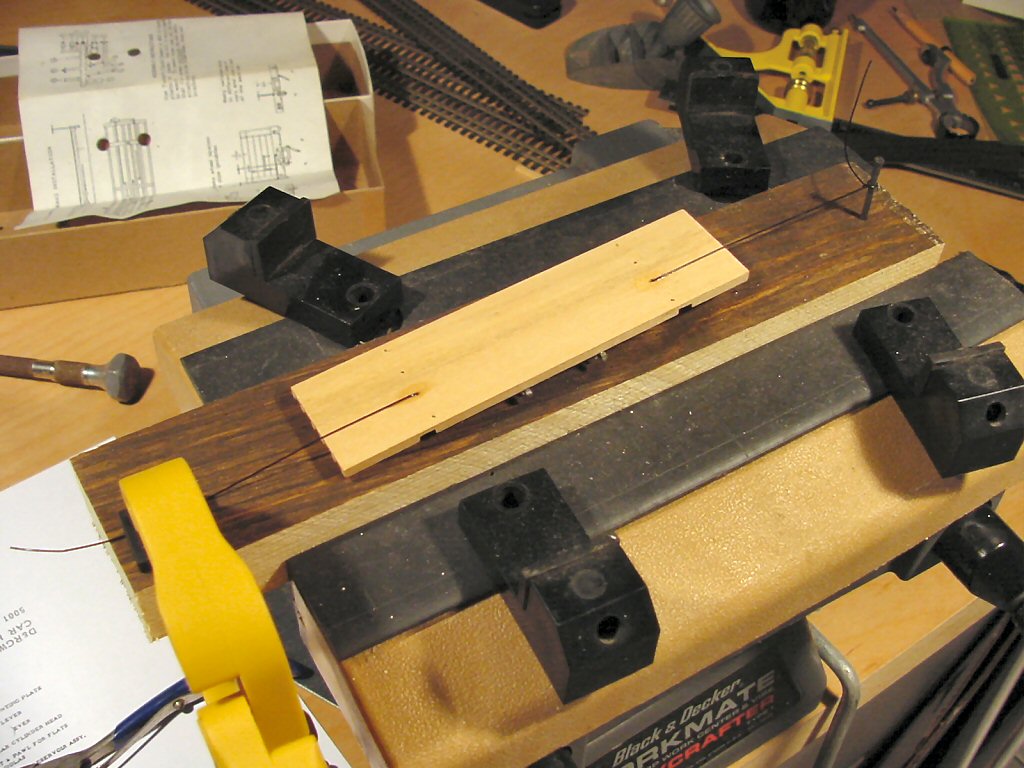
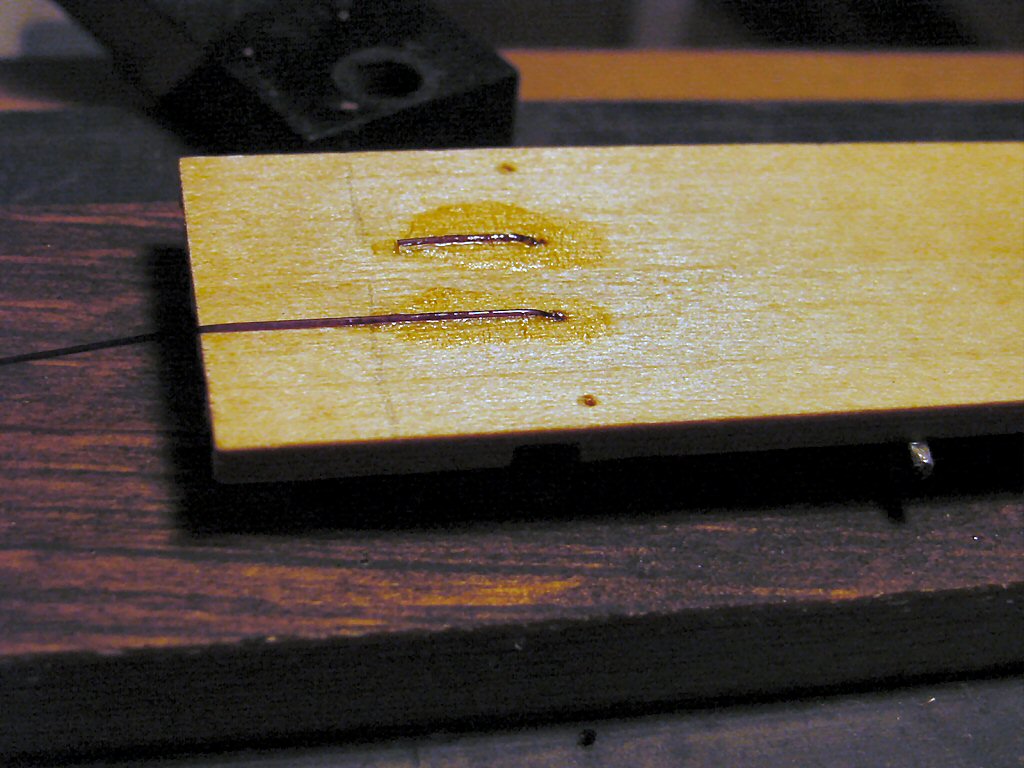
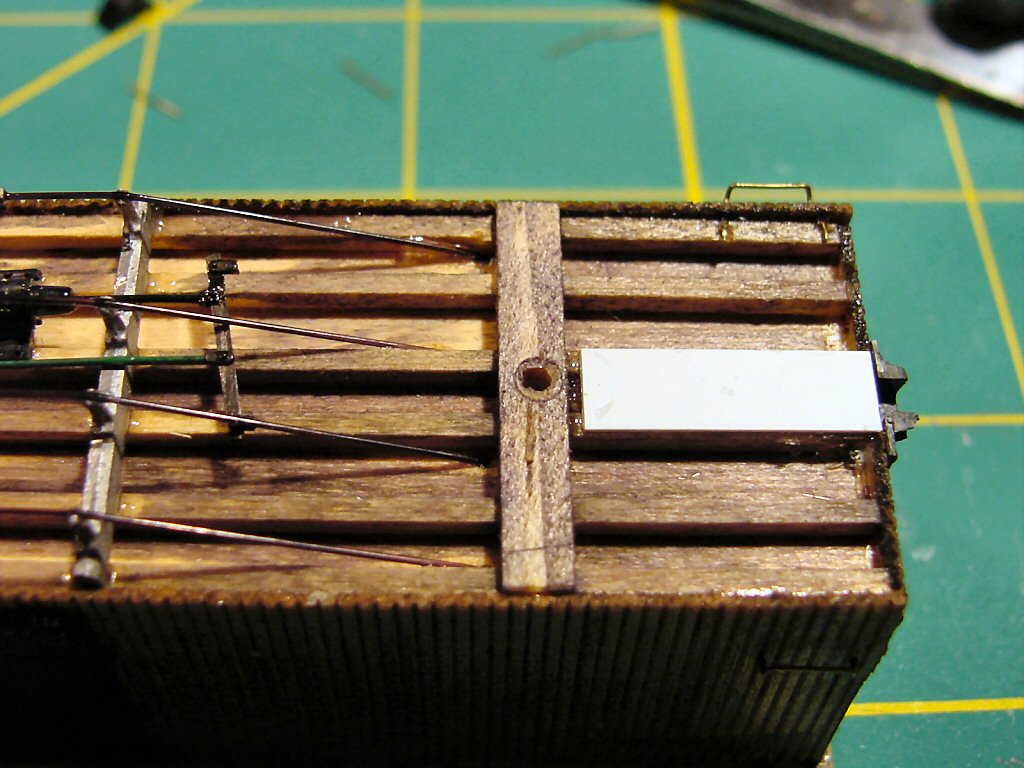
Consistent with my “done is good” approach to this kit I used the oversized white-metal turnbuckle castings included in the kit since I was out of Grandt Line castings. For the truss rods themselves I substituted Clover House #295 0.018″ Nylon Filament. To hold the filament tight during gluing I made a simple jig with a nail to tie one end of the “rod” and after threading the line through the (pre-drilled) holes – do not forget to put thread in the turnbuckles first – I clamped the other end down and flowed some gap-filling ACC around the holes in the floor.
Once dry I chopped off the excess filament with a razor knife. I chopped fairly close to the holes since I need room to glue down the end blocks of the boxcar. I’ll also be later be gluing plates of styrene onto the inside floor to hold the truck screws and these will help secure the truss strings.
Step 7: Building up the Body
Using white glue I added the bolsters. Now, before I add the end blocks is a good time to drill the holes that I’ll need to put the truck mounting screws through.
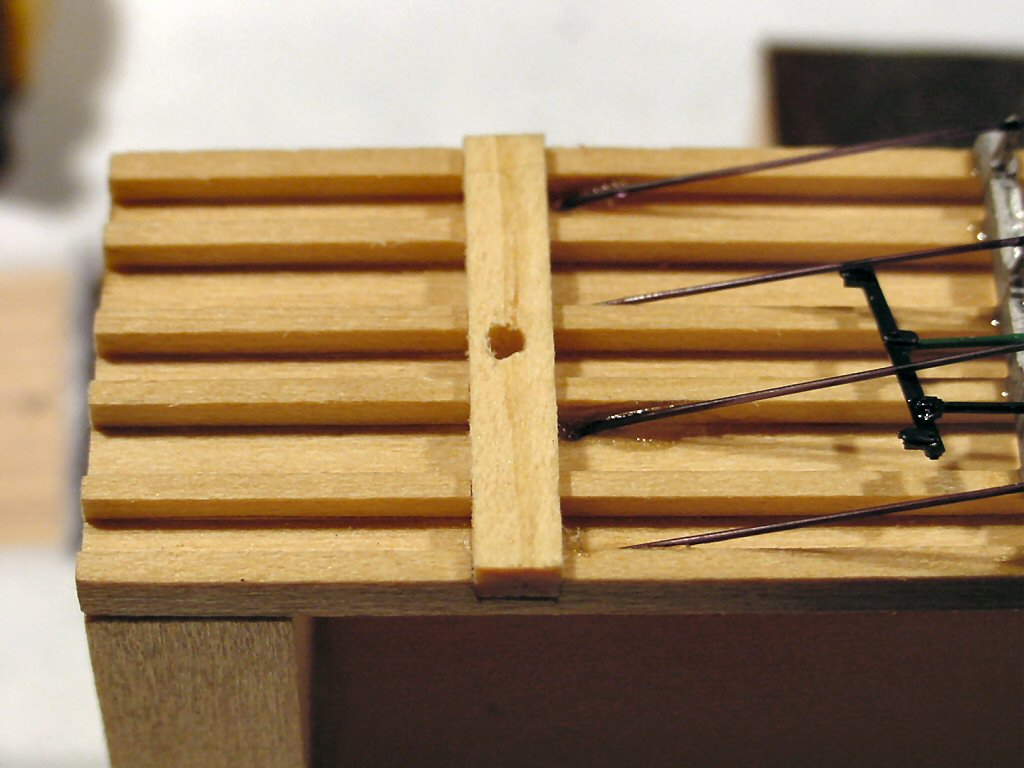
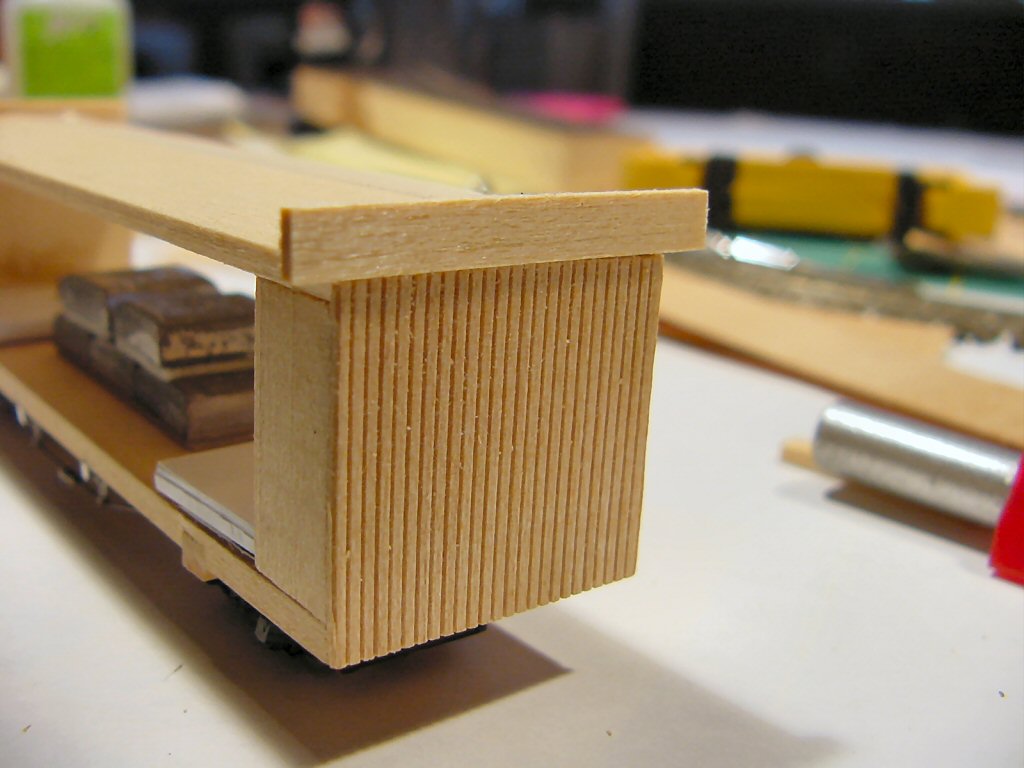
Now I glued on the end blocks being very careful to make sure all is tight and square.
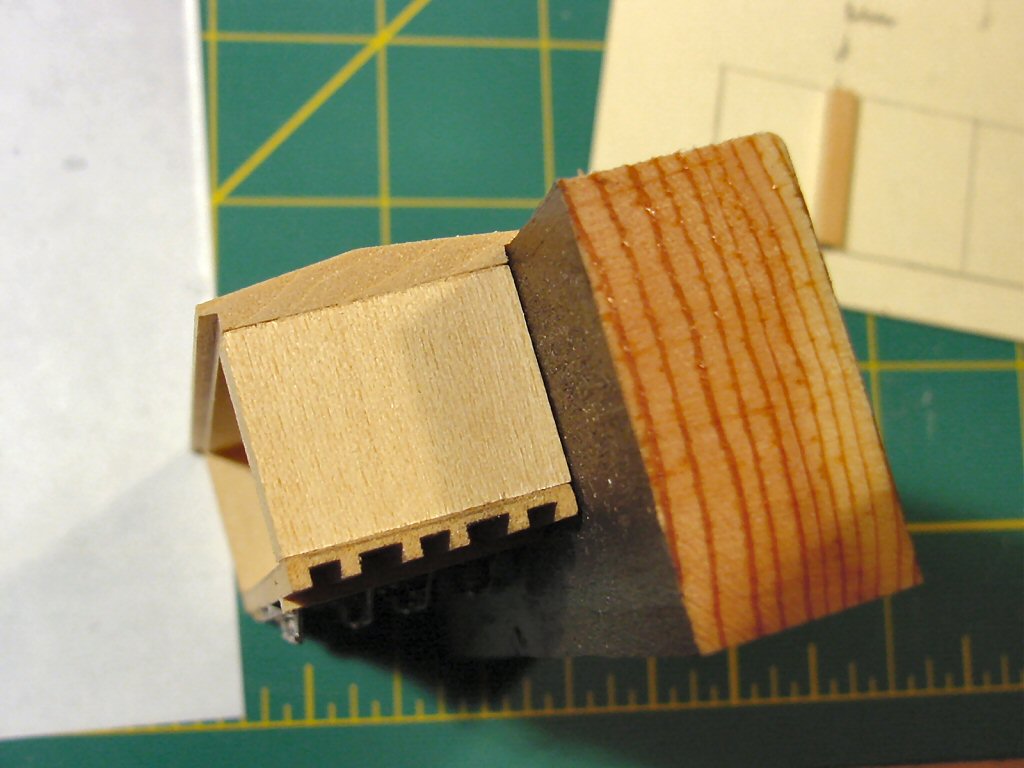
Using a crisp-edged block of wood to keep everything straight I glued on the roof and used rubber bands to hold the assembly overnight to dry.
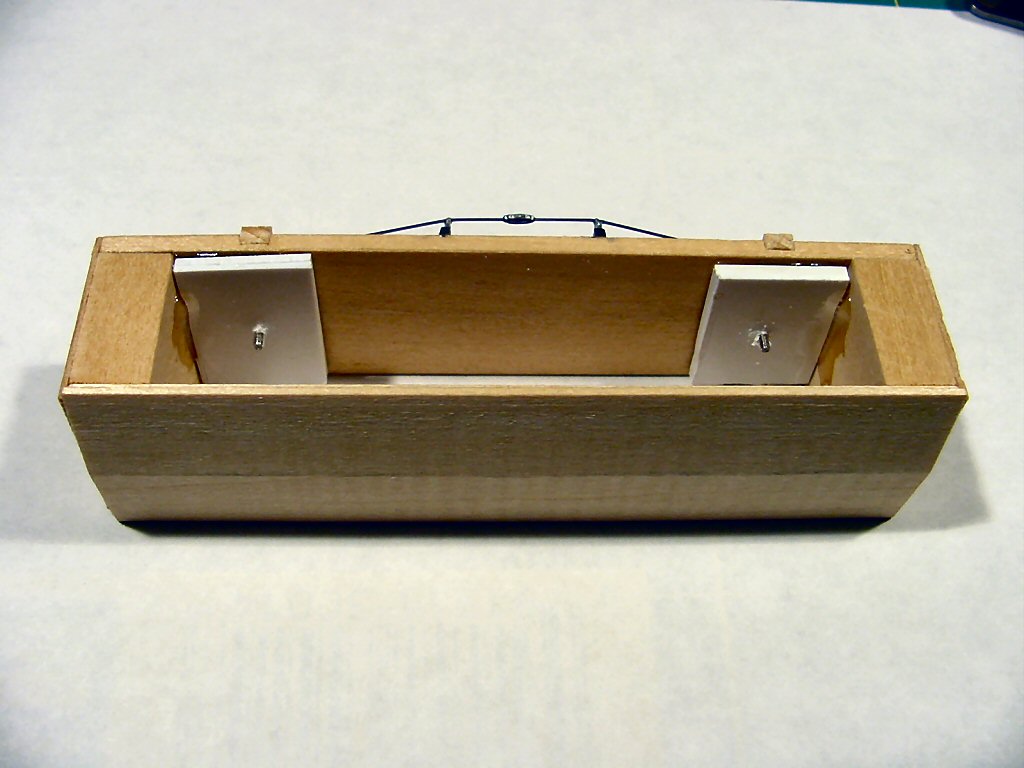
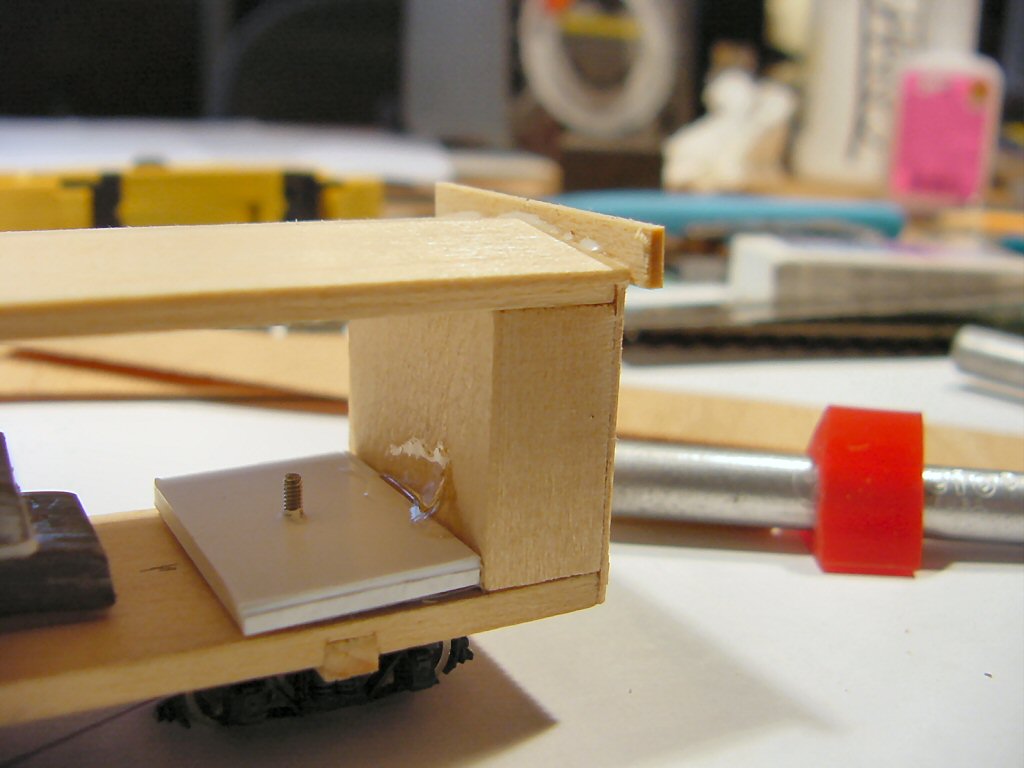
Since I was using the plain wood bolsters from the kit I use 5-minute epoxy to attach scraps of thick styrene inside the boxcar to give the truck mounting screws something to bite on.
Glue on the end pieces.
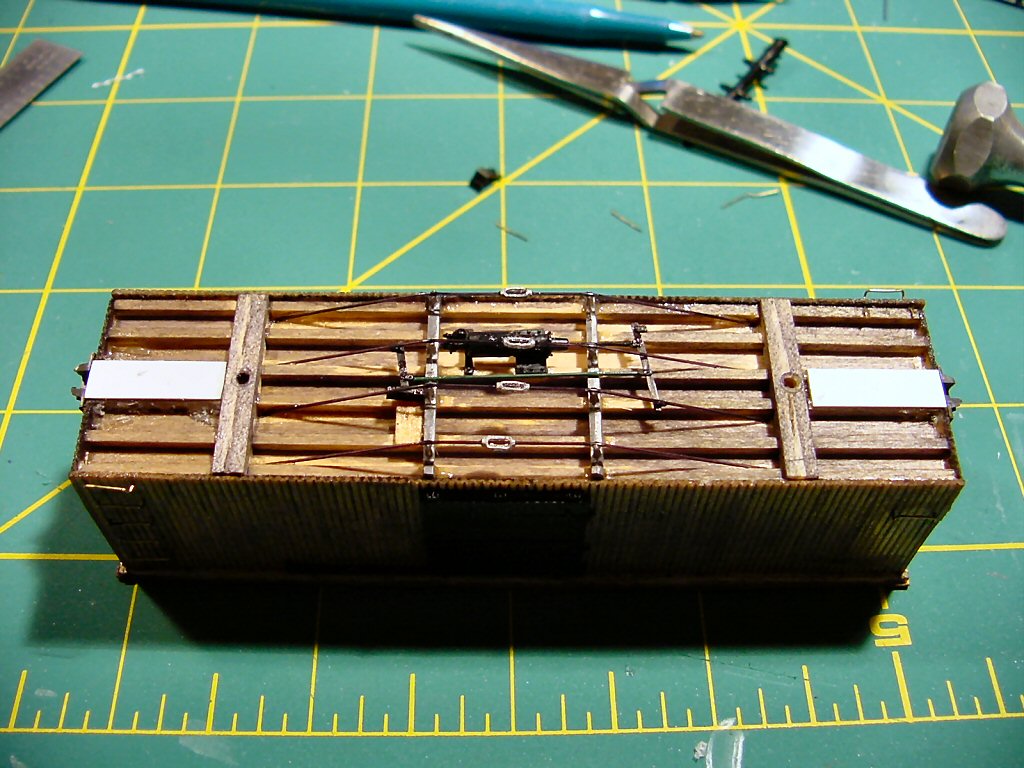
Add weight per NMRA specs. Per the standard found at the NMRA as RP-20.1 Car Weight for a 4-inch long HOn3 car. I added 1.5 oz. of lead weight, which combined with the weight of the trucks and the rest of the body pieces was just shy of the 2-¼ oz. recommended by the standard.
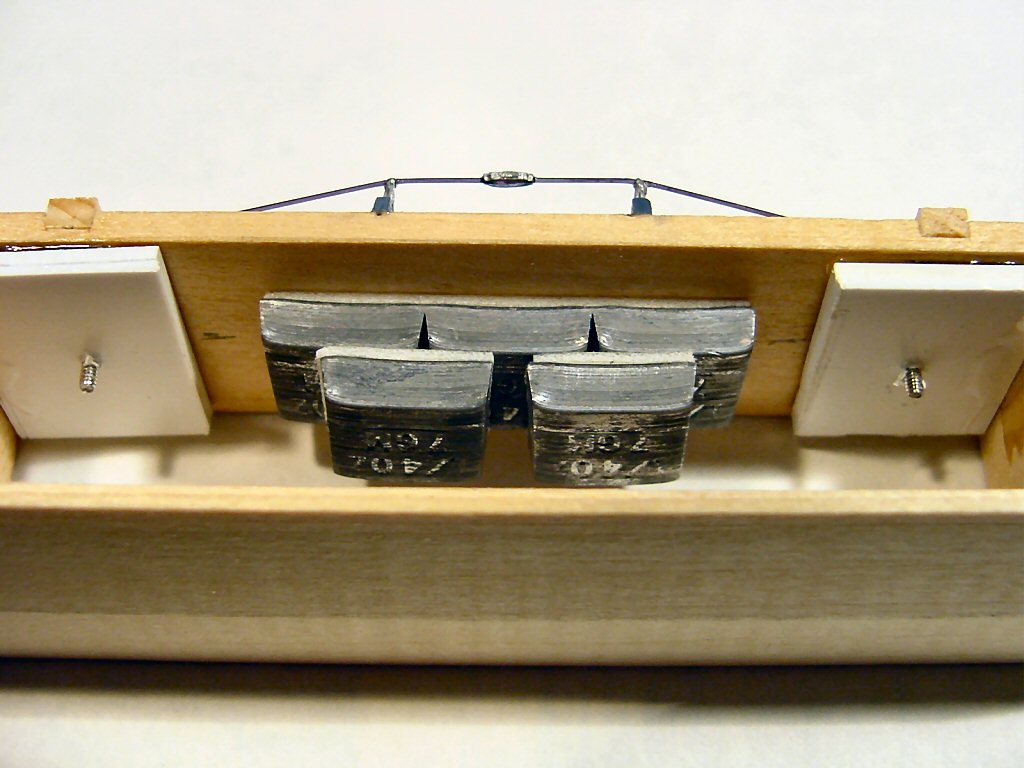
Note that once I added weight to the car I screwed the trucks on to help protect the underbody detail and the truss rods. Blocks of wood would work for this too if you are using delicate trucks that themselves need to be protected.
I added the end plates untrimmed using white glue.
Once dry I simply pressed each end on a cutting surface and chopped the excess of with a sharp knife.
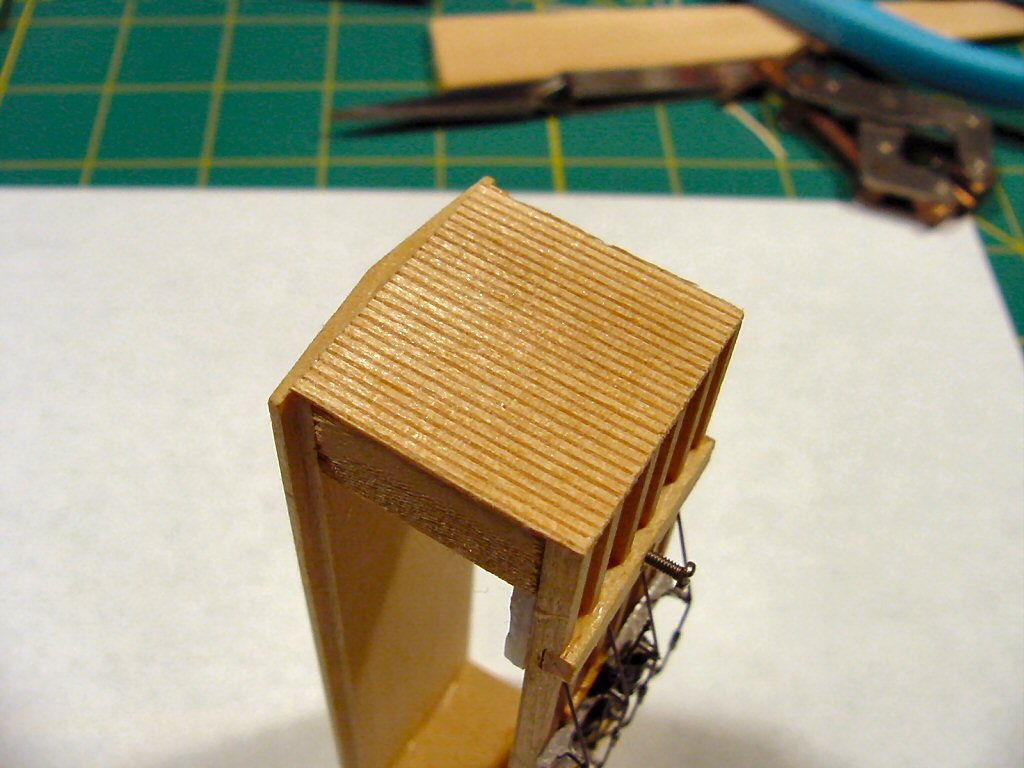
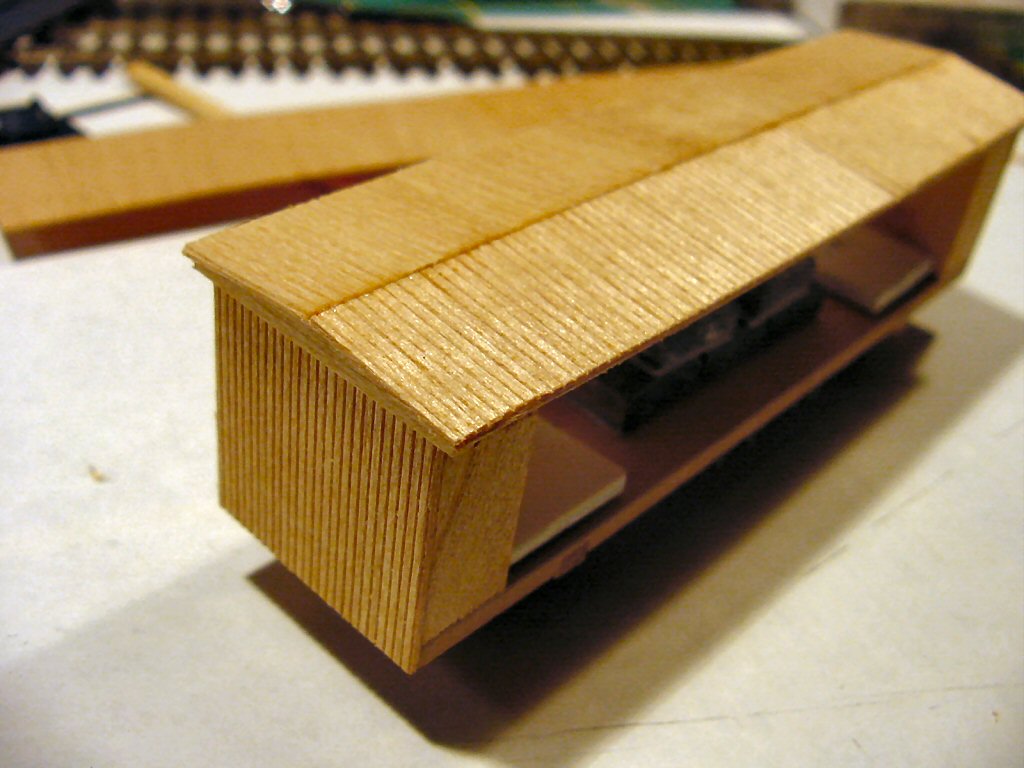
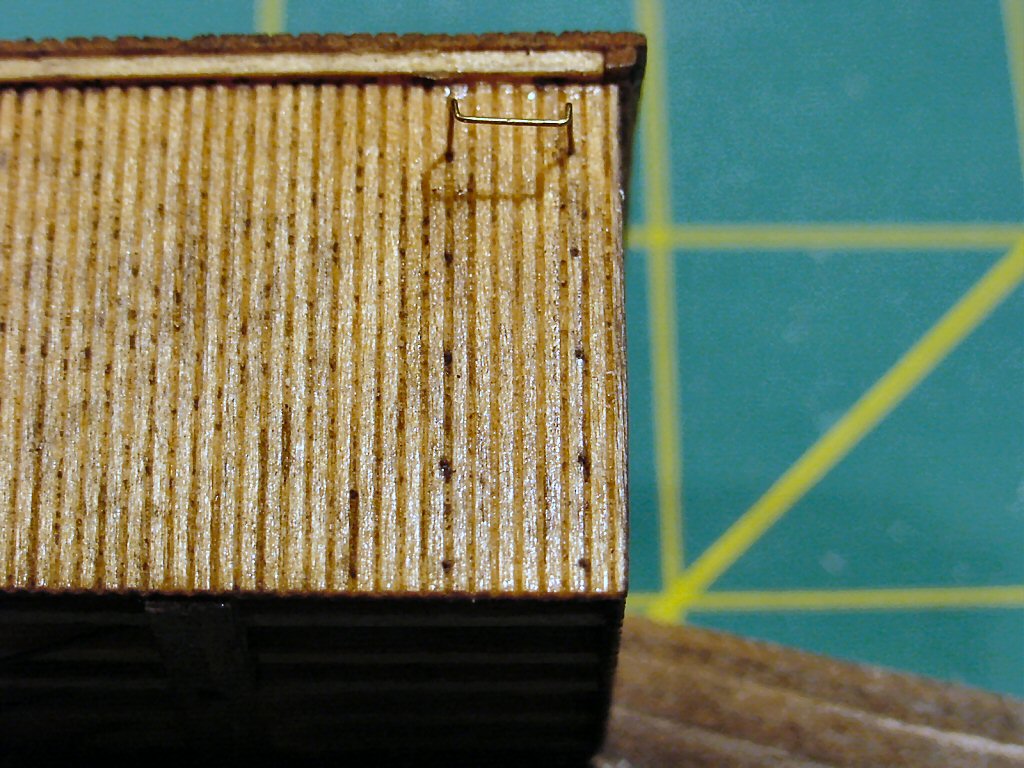
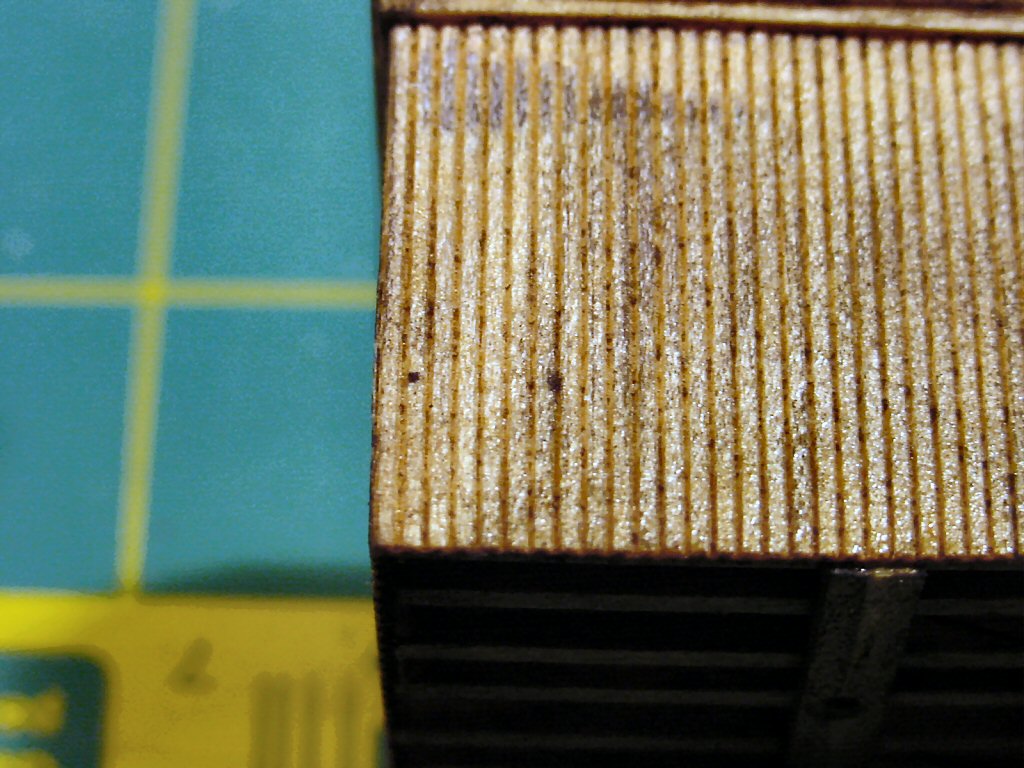
Using a block of wood to apply even pressure I glued on the scribed siding for the roof. It is important to make sure the first half is glued straight with respect to the roof centerline.
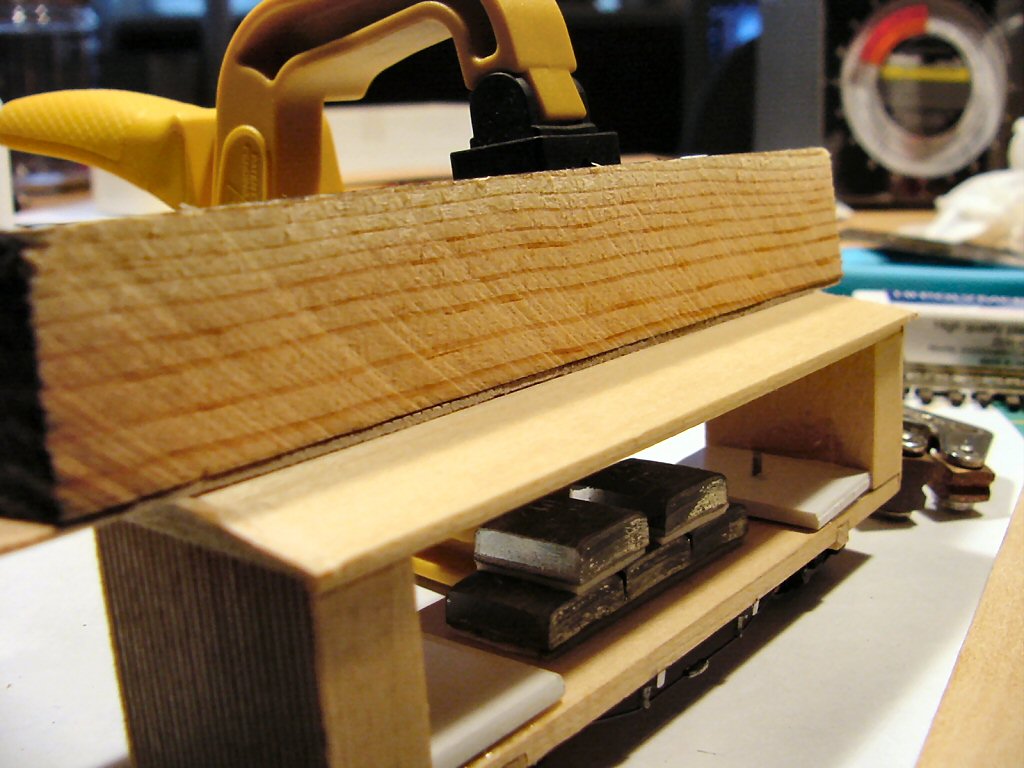
The second half just butts against the first. This is where it is a BAD THING if the first piece is not straight.
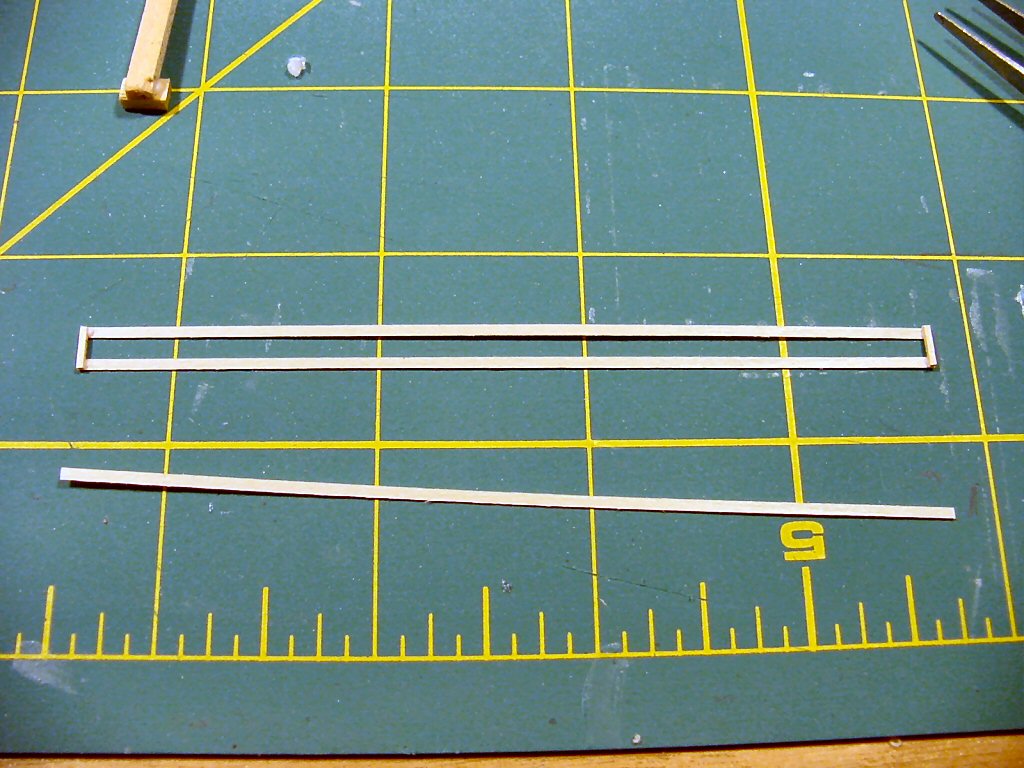
Now I laid out the pieces of scribed siding for the sides. The kit does not give you pieces long enough to go the full length of the car so I carefully spliced the pieces needed using scrap stripwood.
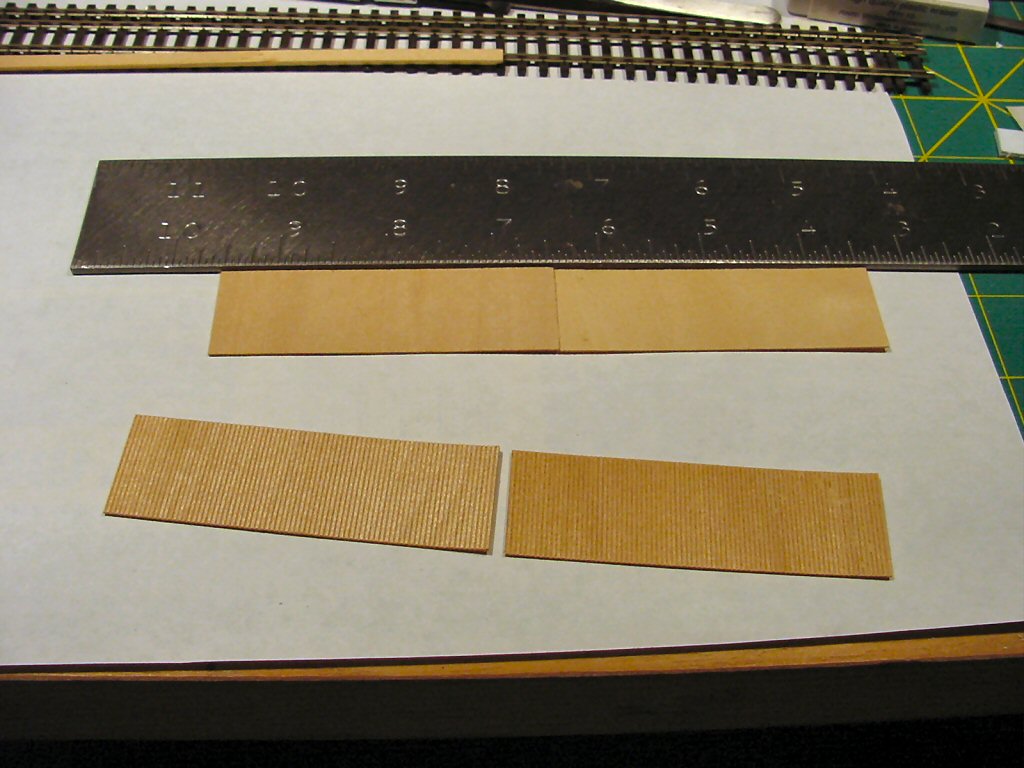
I keep a jar full of scrap stripwood I believe I bought as a “grab bag” – endlessly useful.
I was not too concerned about the look and/or the alignment of the splices from the outside since the big Grandt boxcar door casting was going to cover it later. Glue the sides on with white glue.
Once the sides were glued on I sprayed the entire model with clear sanding-sealer. This was very helpful in smoothing out the wood of the car so the plastic details don’t clash. I also drenched the sides with gap-filling ACC. This was to hide the spill-over from mounting car details as well as filling in the otherwise too-deep scribing in the car sides.
Step 8: Body Details
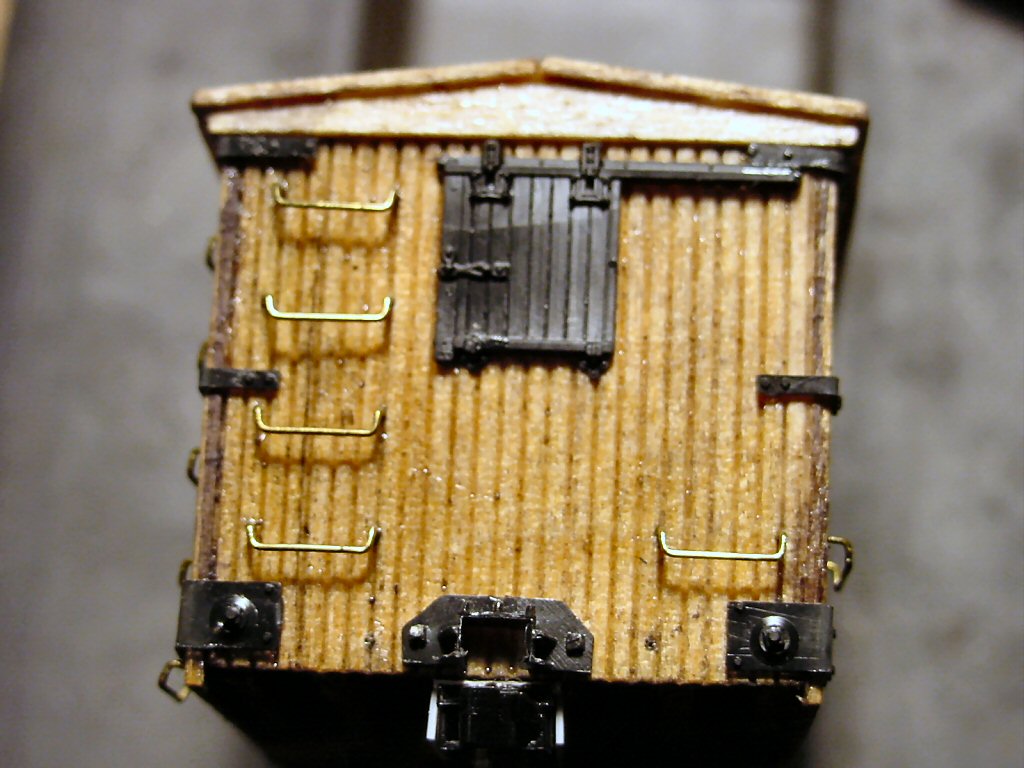
First I wanted to deal with all those wire handrails. I decided to go with the stock “drop” handrails from the kit instead of enhancing flat handrails with NBW castings. I photocopied the side and end drawings from the instructions and cut them so two sides lined up on the model and left extra on the other two sides to give me something to hold on to.
Using a large sewing needle held in a pin-vice I marked the handrail locations by poking through the plan into the car sides. A quick wash with ink-alcohol mix shows where the marks are.
I added the handrails first before any other side details were added since the handling had to be pretty rough while installing. After drilling the holes I used a small pair of needle nose pliers to push in the handrails and used gap-filling ACC to glue then in.
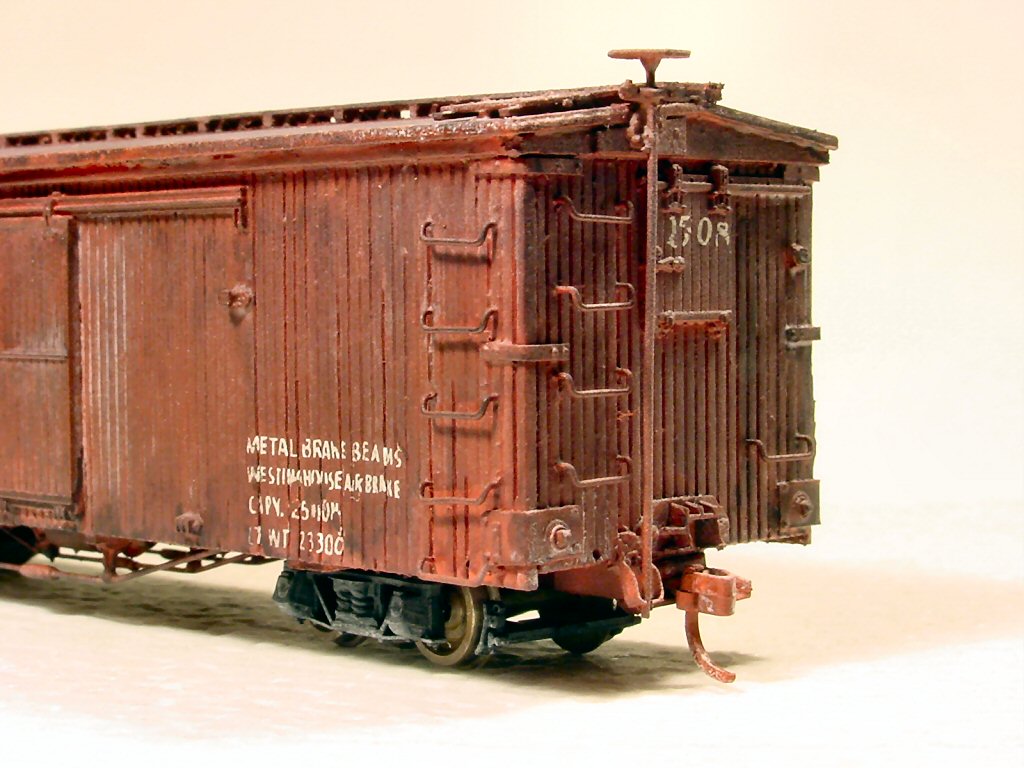
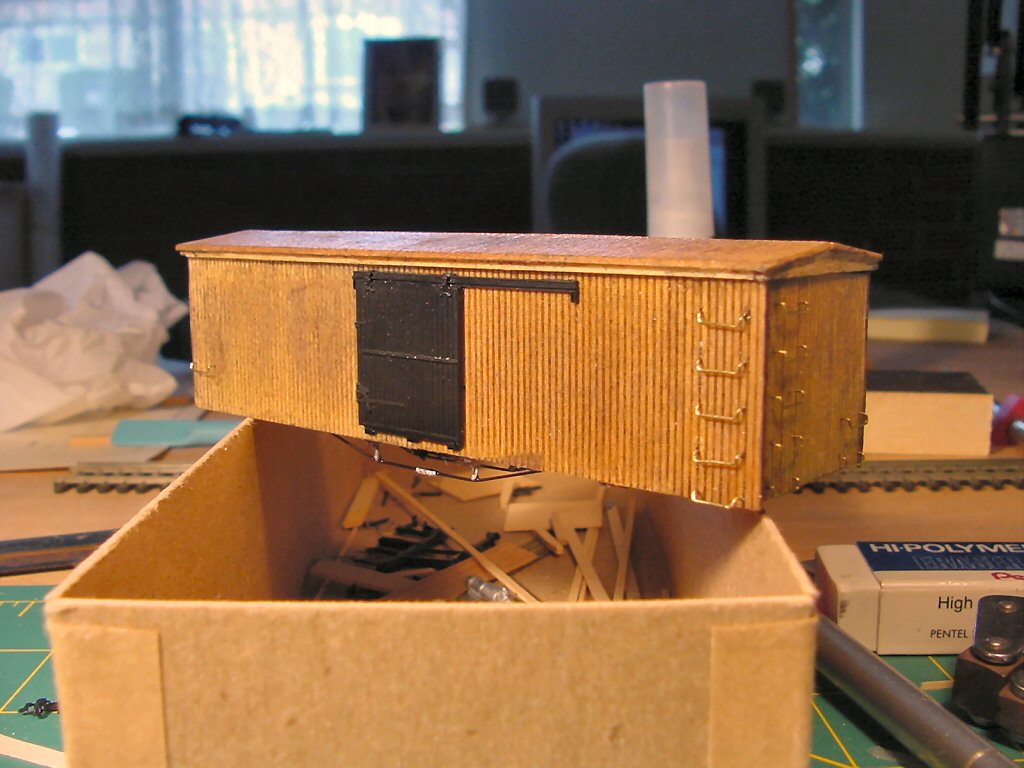
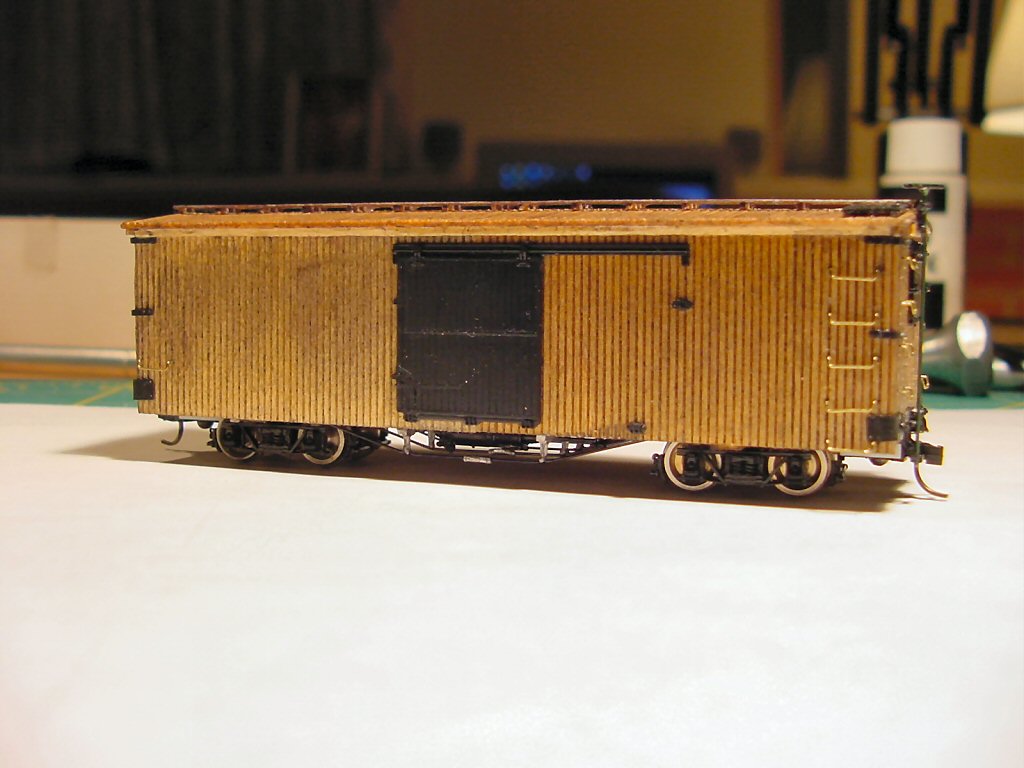
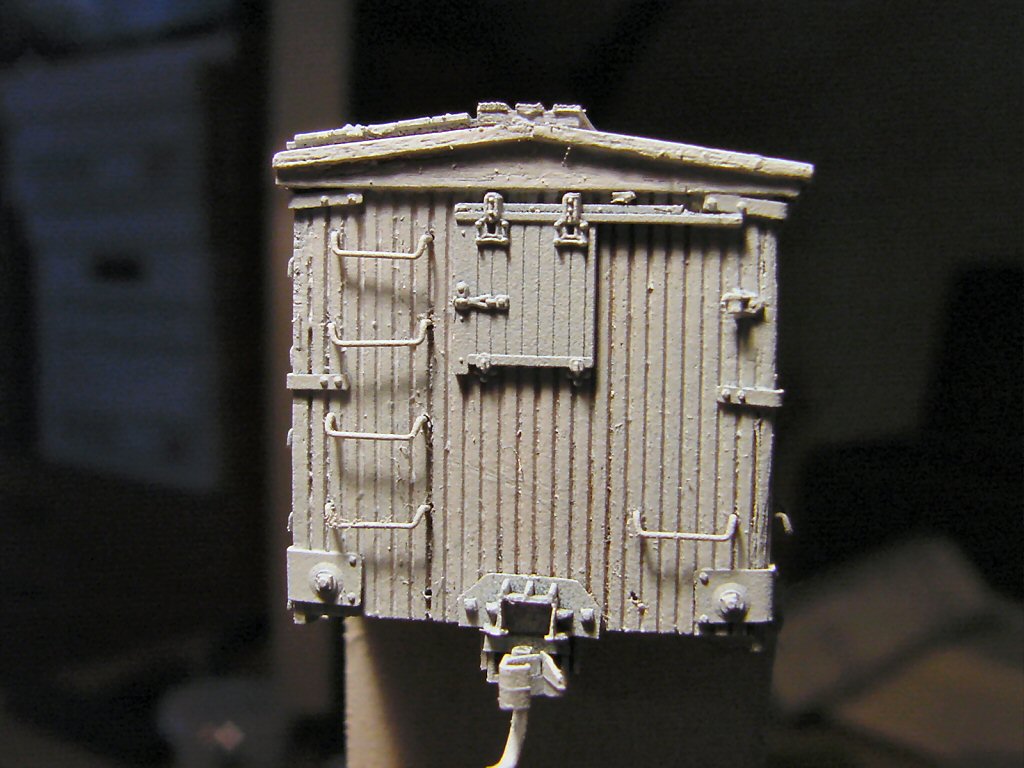
After installing handrails and the side doors it looked like this:
The Grandt Line coupler draft gear casting is mounted with two large pins. I made a quickie Coupler draft gear drilling template to aid in drilling the holes in the car body at the right place.
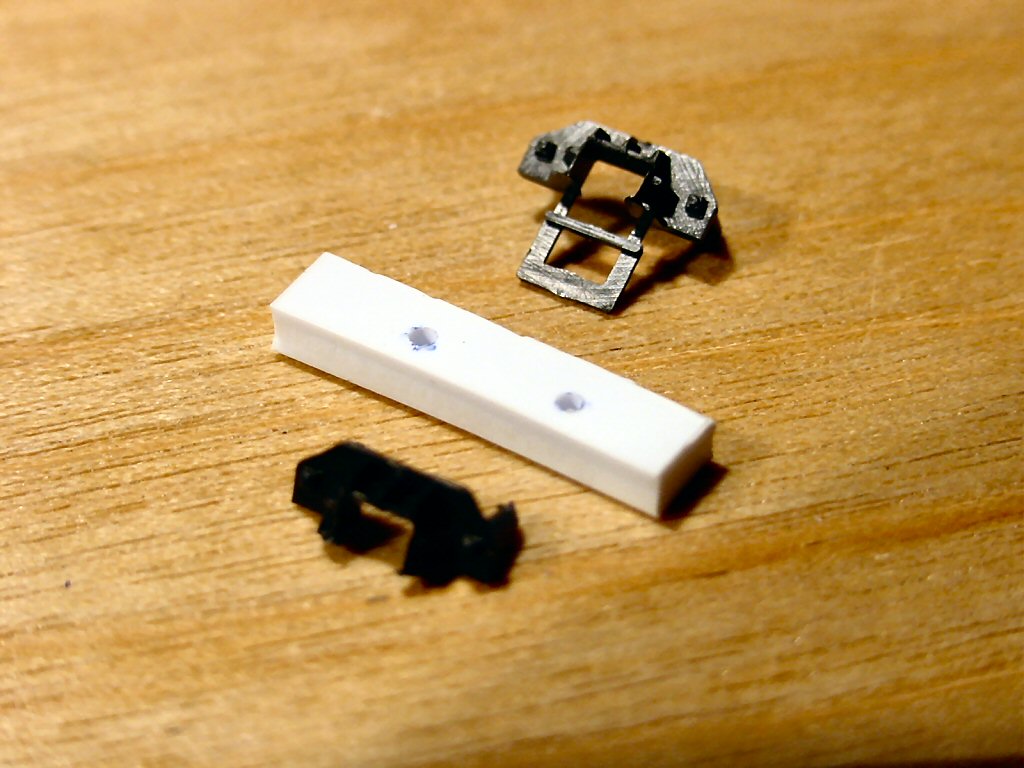
I use N-scale Kadee couplers mounted per N-scale standards. These mount lower than scale HOn3 couplers. I made a coupler draft gear mounting pad out of sheet styrene epoxied on the frame members and this hold the coupler at the right height above the rails.
Couplers mounted with trucks.

Adding more of the boxcar details from the Grandt Line hardware set. These were all glued with ACC.
Using scale lumber I laid out the roof walk. I made a small jig on a handle to guide placement of the cross members. I worked inward from both ends so it looked even.
Roof walk constructed and installed.
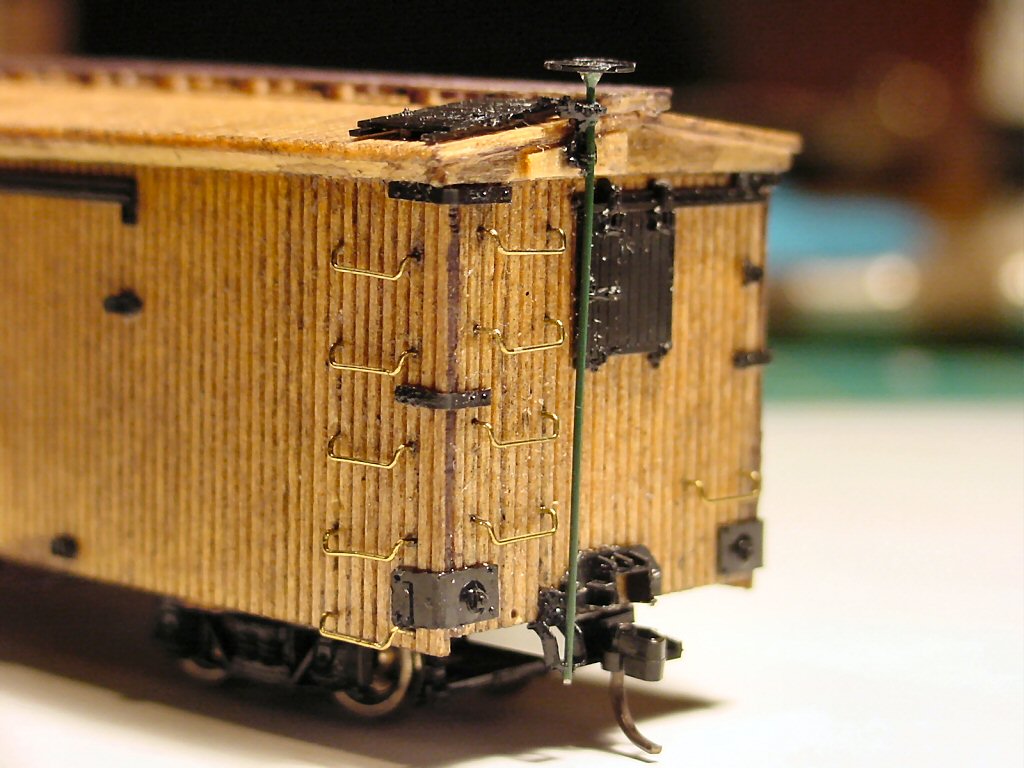
More plastic details added. Brake wheel on wire shaft (used the kit truss-rod material).
Step 9: Painting and finishing
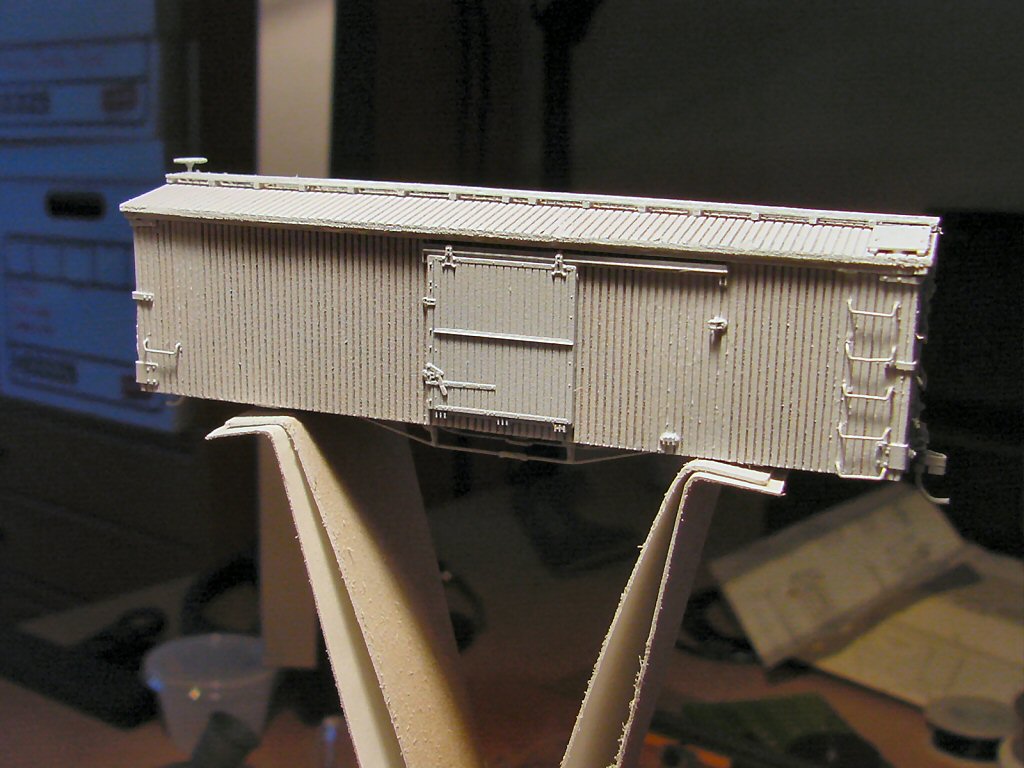
Primer coat
I removed the trucks and mounted the car on a cardboard “v” that I could hold by hand or clamp in my hobby-vise. I sprayed the model using a can of a standard grey autobody primer. Note: make sure you use a primer that doesn’t attack the plastic parts.
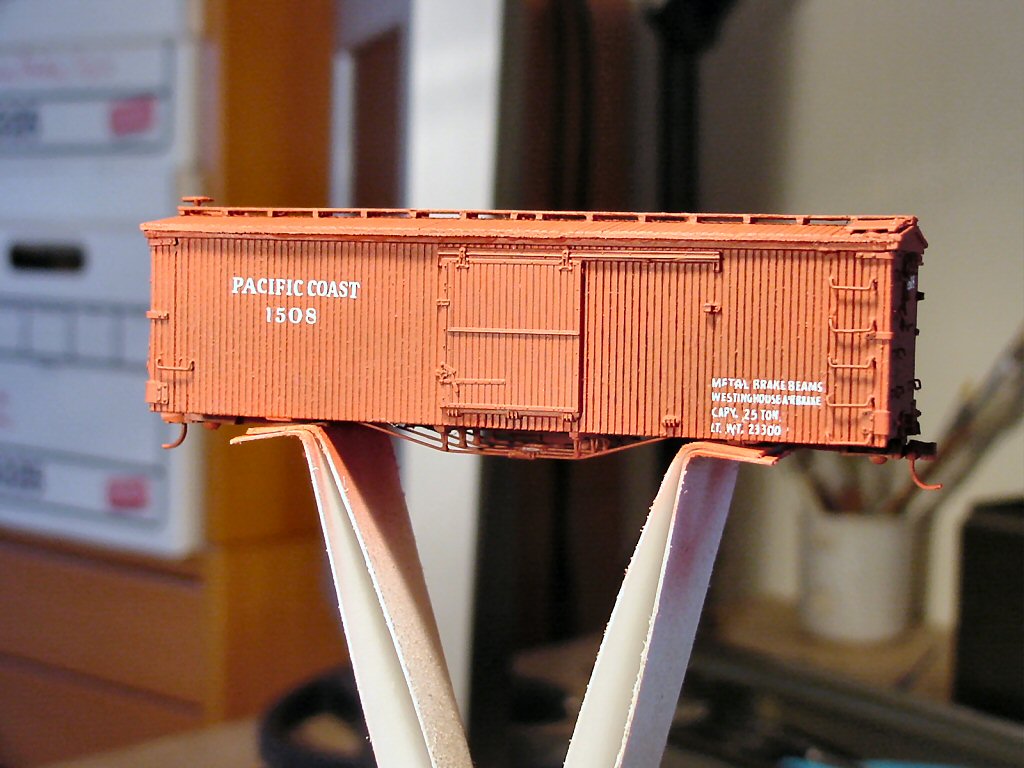
Painting and lettering
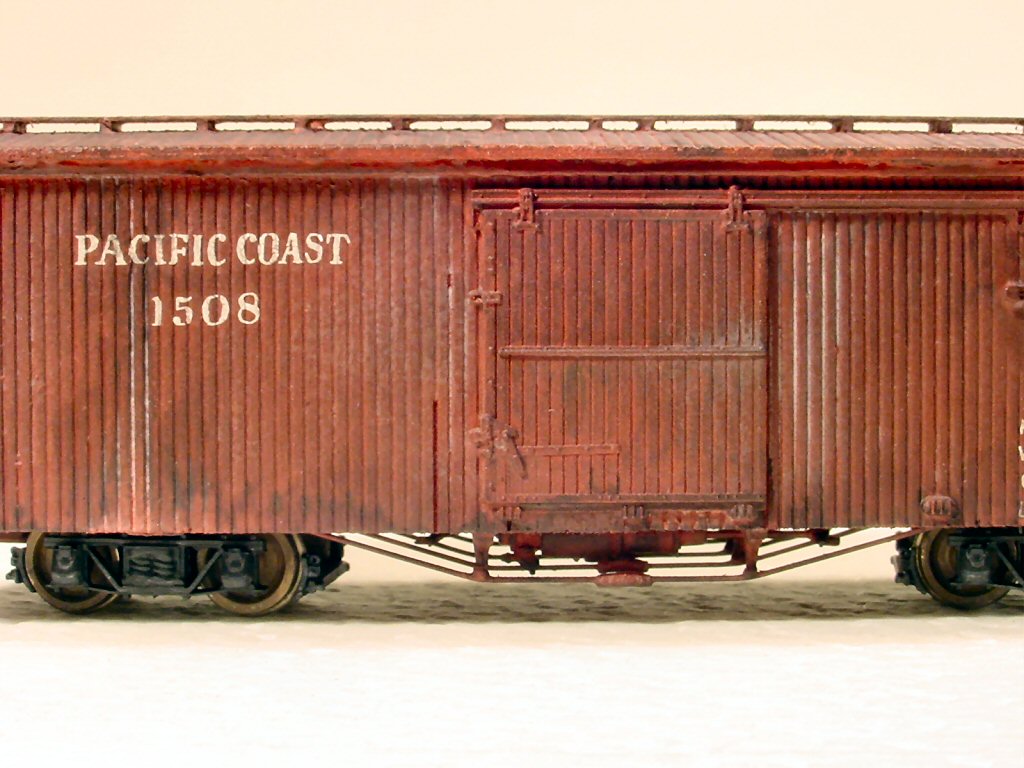
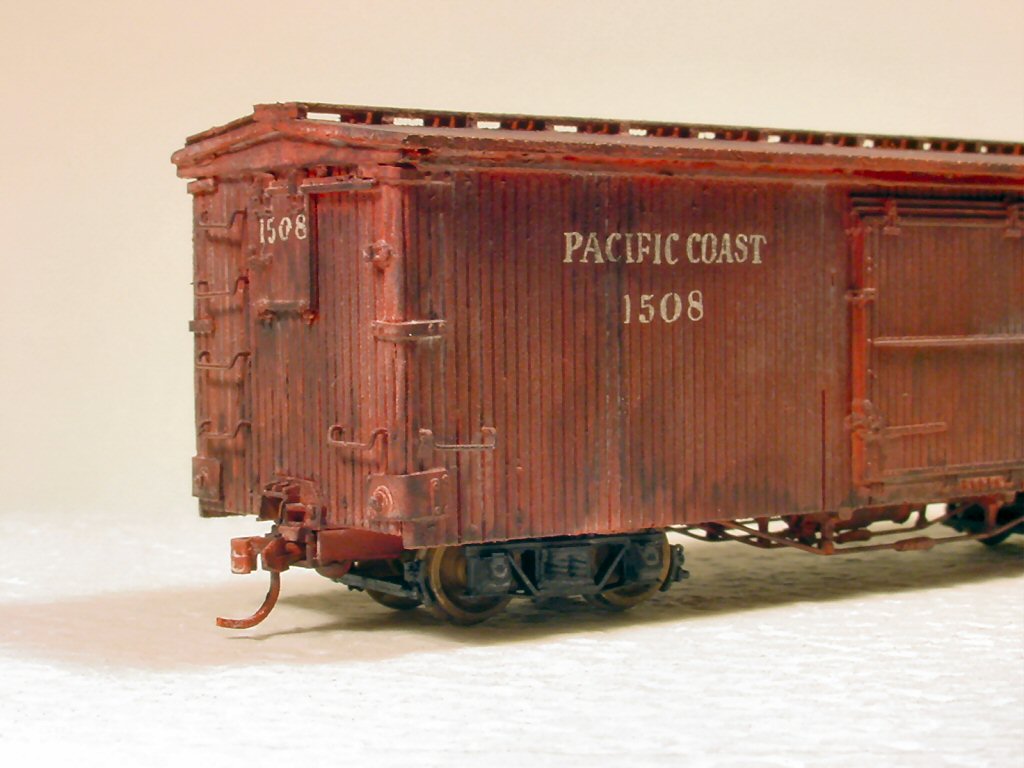
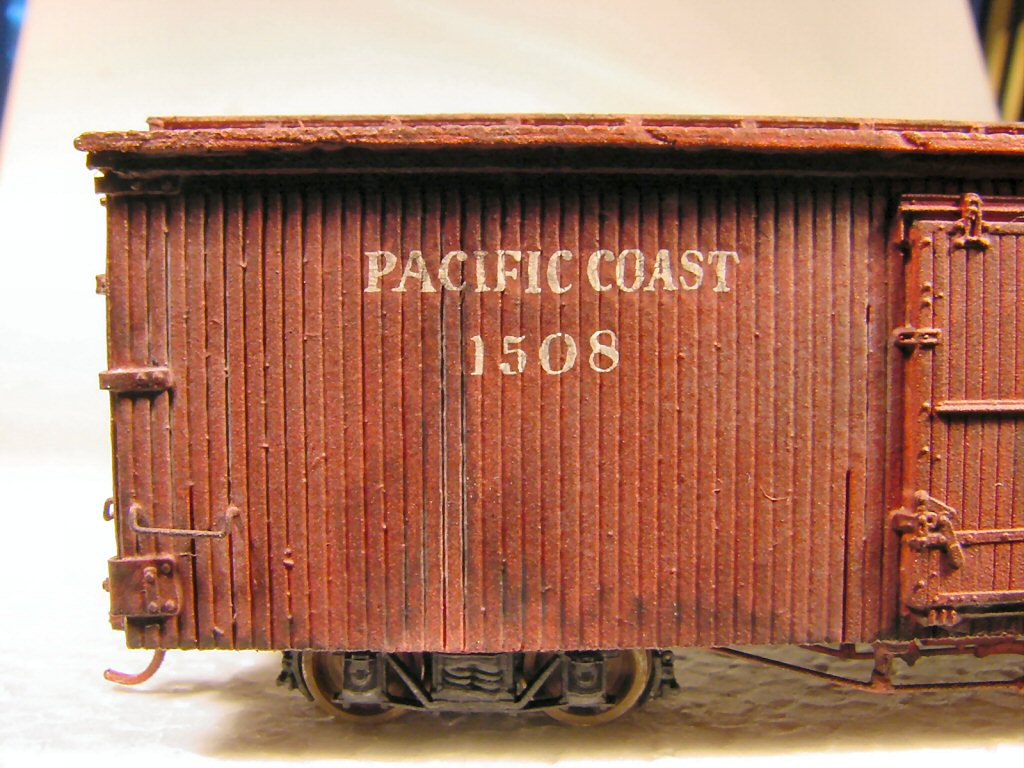
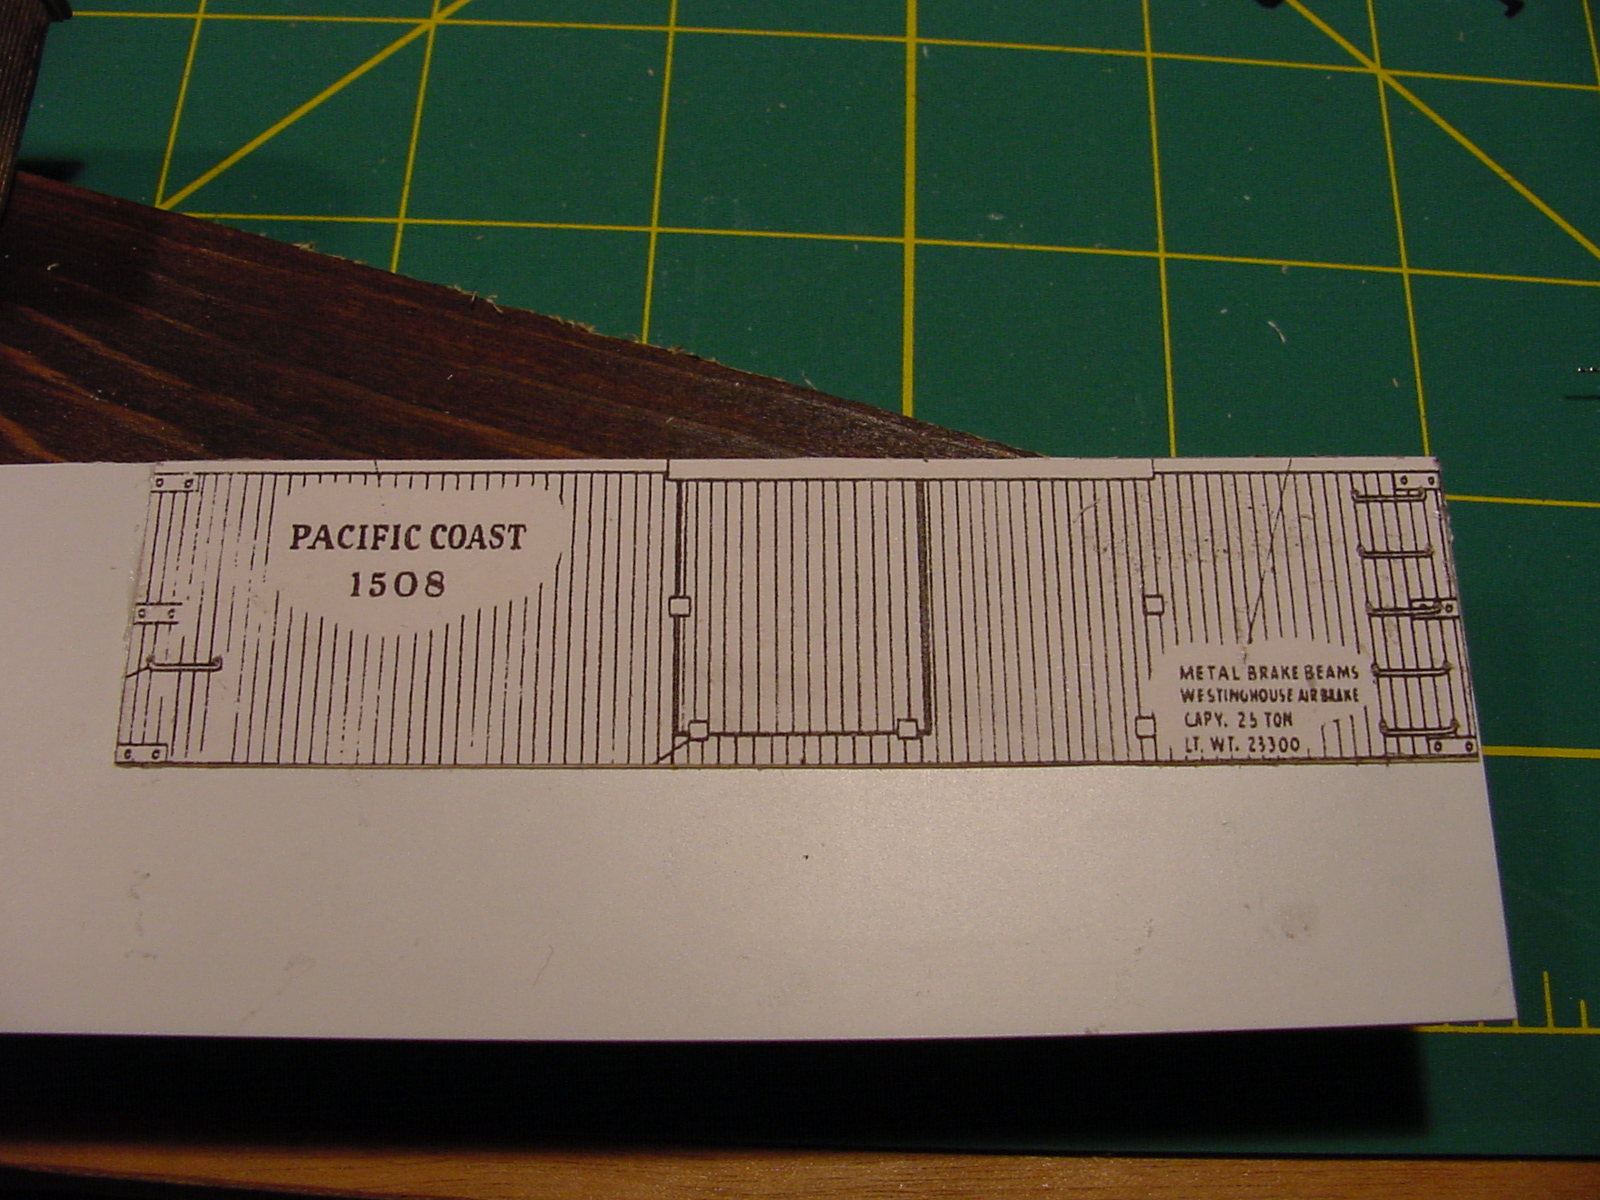
I airbrushed the body with basic Floquil Boxcar Red. To make the lettering stick better I gave the sides a quick final overspray of Testors Gloss-Cote.
Using a burnisher I applied the kit supplied dry transfer lettering. Covered with a overcoat of Testors Dull-Cote.
Weathering. I used ink-alcohol reacting with dullcote for most of the weathering effect. A final cote of PollyS “Dust” was air-brushed vertically onto the model to dust up and highlight edges.