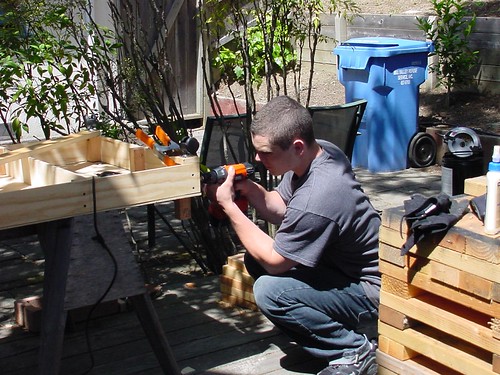
Having had so much fun with our first micro layout, Nick wanted to move on to something more ambitious. After pouring over my 30 year stack of Narrow Gauge & Shortline Gazettes, Nick wanted to do a small lumber layout and we chose On30.
Bachmann On30 Porter 0-4-0s can negotiate a 12″ minimum radius and Nick wants a large trestle.
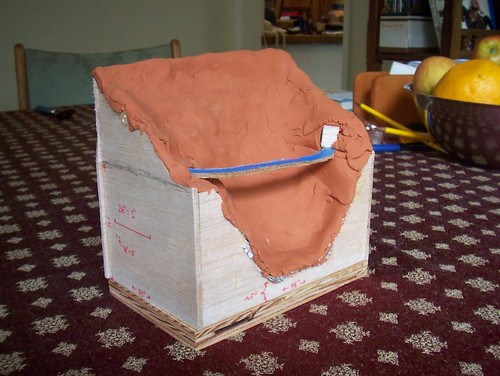
I had an idea but was having a hard time describing it to Nick so I made a quick planning model in 1/8″ = 1″ scale. The footprint is 30″ x 4 feet long and about 4 feet tall.
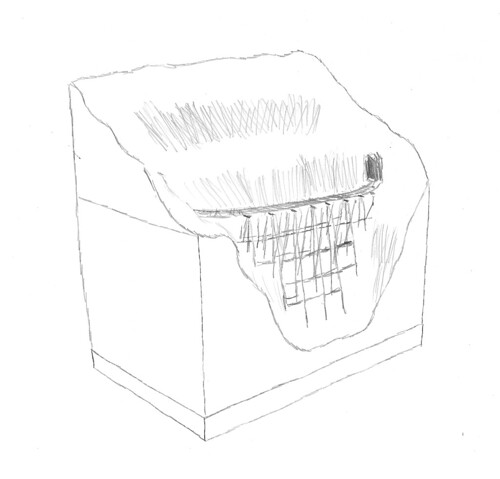
I made a pencil sketch to show how the bridge would look.
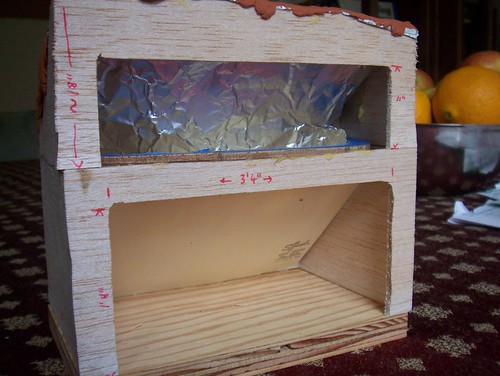
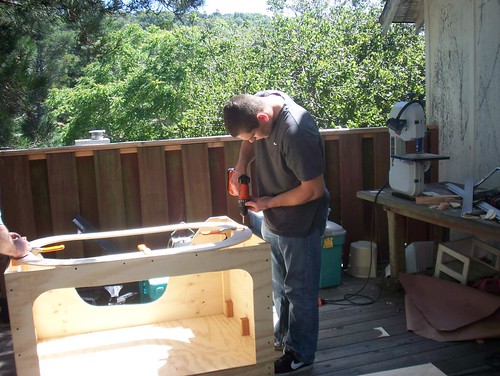
The lower back will have room for a separate small town/logging camp area. We may do this in HO scale.
We labeled lots of the construction dimensions on the planning model so it’s acting as kind of a 3D blueprint.
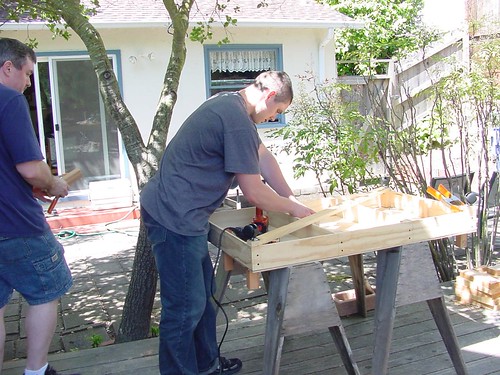
The frame is made of 3/8″ x 4″ plywood planks ripped on the table saw and connected with 2×2 blocks glued and screwed. We added casters so it is easy to roll around.
Next we built up the sides and made an oval of plywood as the roadway.
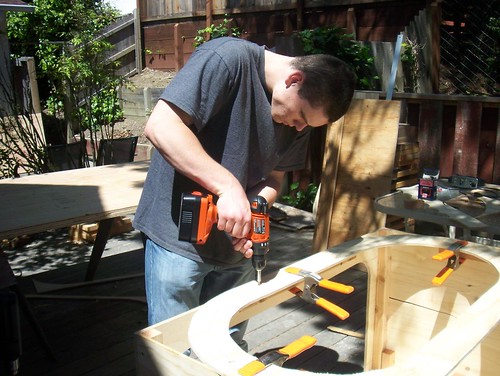
We’ll cut away the portion that will be spanned by the bridge.
David Lyman a.k.a. Dan D. Sparks posts a great description of how he makes and applies home-made decals to his Birney car project. Really nice work.
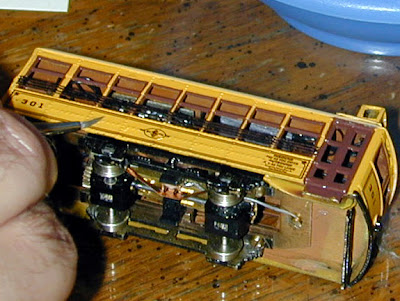
Photo by David Lyman, Dan D. Sparks
Posted by Daniel Swearingen under
Modeling Ideas ,
Other ModelsComments Off
There has been a wave of Warhammer 40K modeling and game playing sweeping my place of employment lately. A common scale is what is called “25 mm” and is taken as 1:72 scale.
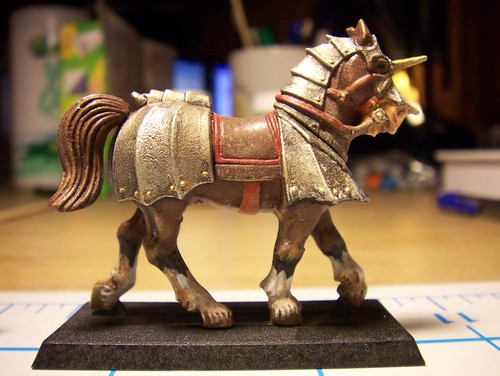
I think the methods routine in this modeling genre can be really effective for HO modeling. I found a horse that no one wanted and decided to do some painting.
I went for a softer, to my eye, more realistic look. Here’s how I did it:
First I assembled and primed the model.
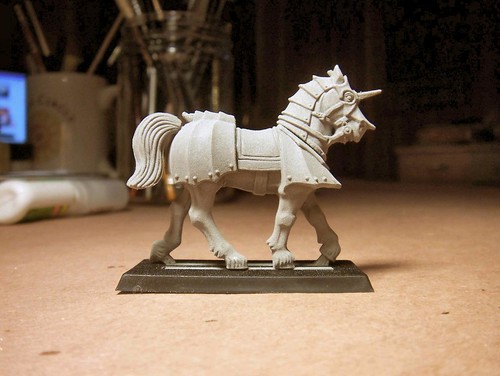
The detail in the castings is really impressive.

Next I roughed in the main colors.
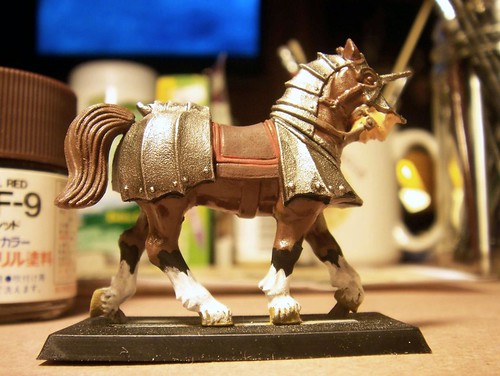
I detailed the edges and details like the harness. I used a dark wash of Burnt Umber followed by highlighting with white or light brown (depending on what I was edging).
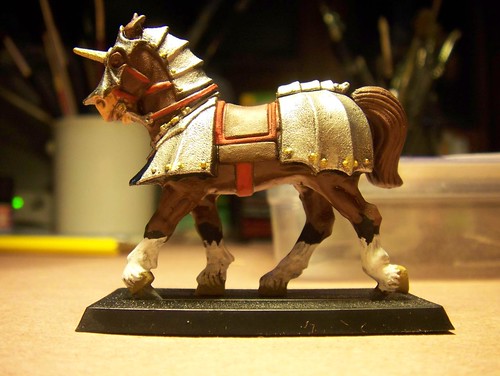
Lastly, I used Dullcote and Polly S “Dust” to flatten out the shine.
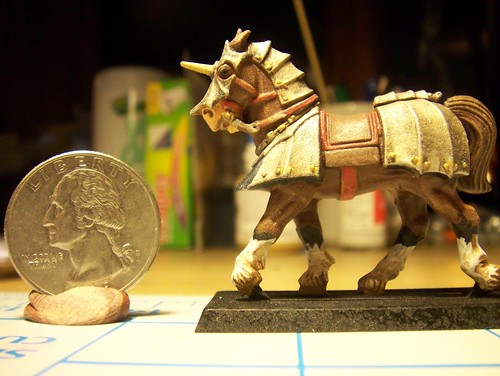
I did the eyes with a black ball-point pen.
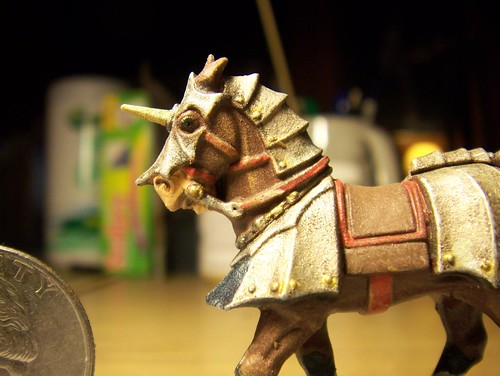
This was really fun and took me about two hours not counting drying time.
